UPDATE, August 12, 2018
From Mike. OK, onward to removing the chassis and crt. This will be sent over a few emails due to the number of pictures.
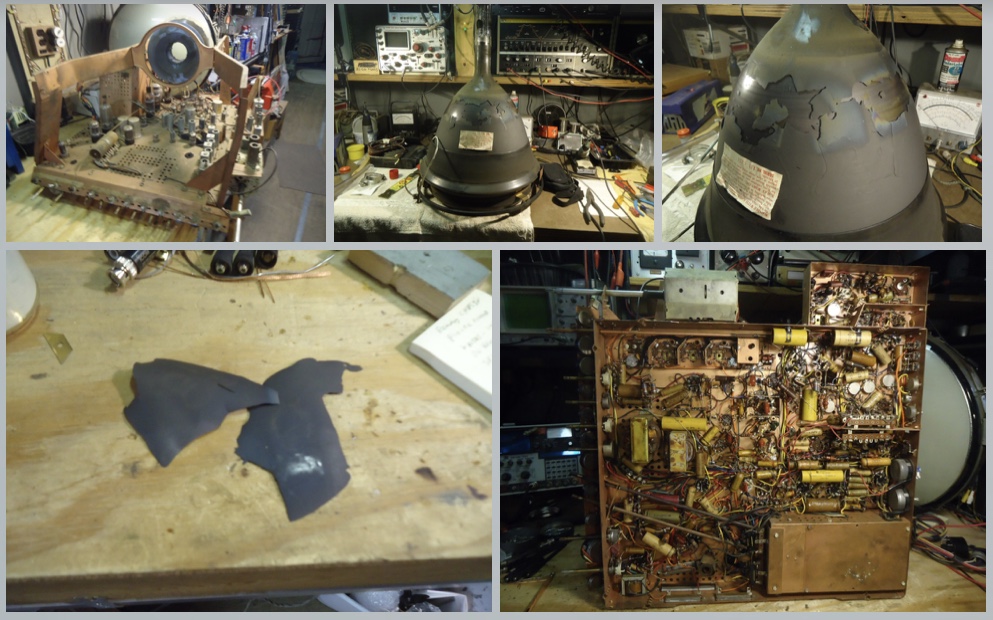
Pictures 1 and 2 Front panels and knobs being removed.
Picture 3 Broken knob (the white one). Not sure of its function just yet.
Picture 4 Chassis on the bench. Note: there were NO chassis bolts holding the main chassis to the cabinet. The power supply chassis is mounted in the lower part of the cabinet and it will be removed soon.
Picture 5 and 6 show magnetic shield mis-alignment bottom and then top. I believe when this piece is properly installed it should mate nicely with the other parts.
Picture 7 These pieces fell out from under the chassis as I removed it from the cabinet. One screw that I might likely find the place for later, the second looks like a tuning slug from one of the tuned transformers. (the next picture shows where this possibly came from). And then, what looks like a broken tuning slug core from some tuned transformer.
Picture 8 a tuned transformer with seemingly a missing tuning screw. The core piece may be inside the transformer.
Picture 9 Chassis top left.
Picture 10 Degassing coil plug.
Picture 11 and 12 Disconnecting the High Voltage connector.
Picture 13 Blocking the face end of the crt before removing screws. This insures minimum loading on the neck of the tube as the screws are removed.
Picture 14 Removing the necessary 3 screws on each side to unmount the crt from the chassis.
Picture 15 CRT removed.
Picture 16 CRT on bench. The tube will be boxed and placed in another building with my other CRTs until I am ready for it later in the restoration process.
Picture 17 Serious issues with the quality of the aquadag on the CRT.
Picture 18 These flakes of DAG were found on the chassis after the crt was removed. I guess its a good thing that I purchased a supply of aquadag liquid from Scott Avitt before he closed up Hawkeye. This issue, Im sure, will be a very easy part of the restoration process.
Picture 19 The chassis bottom.
Thus far, I have been doing some thinking on how this restoration will go. I will be doing this one a lot differently than ever before. Most of the repairs will be done without a crt at all and using only test equipment to breath life back in to the individual circuits. That way the CRT stays safe until I am ready for it. I may use a monochrome crt mounted to the chassis for some of the testing process. The signals from the individual circuits can then be patched in to the monochrome gun one at a time so the quality of the images can be seen as needed. This way, the Luminance and Chrominance signals can be evaluated without the use of the 15EGP22 being in the set.
Let the games begin.
Mike

Good Afternoon Mike,
I have all 19 photos. Thank you. Breathed a sigh of relief after reading your last comment about the dag.
Sound like an excellent plan. Great idea to remove the beast from the chassis to allow easier serviceing.
Marshall
As always, tap on any image to open the image carousel. Tap icon again for full resolution images.
GO HERE FOR FULL RESOLUTION IMAGES.
https://visions4netjournal.com/westinghouse/