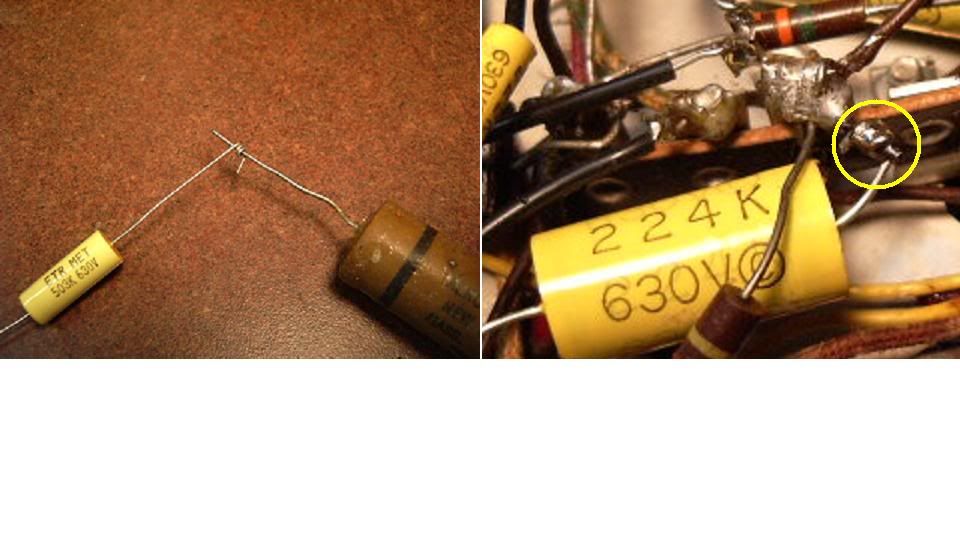
Back on the job, replaced the paper caps and this opened up a lot more breathing space. It was tough making some of the connections: terminals were buried and full of wires, so I resorted in a lot of cases to making "squibs," or whatever you want to call them, where you curl the wire from the new cap into a spiral to slip onto a stub from the old cap left on the terminal and solder it. If you're making a lot of these you can make a tool which is just a piece of wood or dowel about 1/2" in diameter and about 6 or 8" long, with a couple of brads stuck into the end of it. The wire is guided around the central headless brad by the other brad offset from the center. I'm too lazy to make a tool so I just loosely curled the wire from the new cap around the wire from the old one (so I know it will fit over the stub from the old one.) Finally I use pliers to stack the coils together and then snip off the end sticking out. On the right is circled an example of one of these connections. The big blob of a terminal carrying the stub of the old cap is original. I wasn't going to dig into that Gordian Knot...
I ohmed out all the coils just to be sure because some of them are wound with "hair" wire. All but one checked OK. The one open coil is shown below in before and after condition. This coil is wound on a machine and there is no way to rewind it perfectly. The way I checked it was to connect an ohmmeter to one coil terminal and then probe along the side of the coil windings with a fine sewing needle alligator-clipped to the other ohmmeter probe. I found continuity about a third of the way in from the outside. Nothing to do but unwind the coil to find the break.
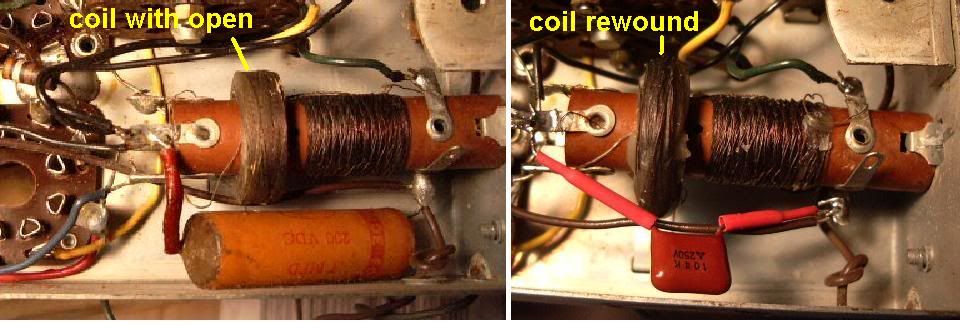
I made a sketch showing where all the wires connected and then pried out the mounting clip and removed the coil from the chassis. I put a box on the floor and carefully started unwinding the coil, allowing the wire to pile up loosely in the box. The fine wire was enamel-coated and also served with a thin (probably cotton) covering, so if there was a break anywhere it was going to be hard to see because the serving tended to hold any break together. Every few layers unwound I stopped and carefully scraped to bright copper in the wire and tested looking for continuity. Finally about a third of the way in I found the break, sure enough with the cotton holding it together (like a "green stick" break.) I scraped the wires, twisted them, and soldered them back together.
Then I started rewinding the coil. I tried to do it as neatly as I could by hand but hoped for the best. I had a light-colored wax candle going and every now and then I'd drip some wax onto the coil to hold it. Finally got to the end and reinstalled it and wired it up. It ain't pretty but ought to work, because this coil is in the plate circuit of the RF amp and serves to transfer the signal to the next stage. I'm guessing that maybe a plate current surge popped the wire, or just the hand of fate. It is not a tuned coil so the fact that the inductance and Q may have changed by rewinding it should not matter much. Cross fingers.
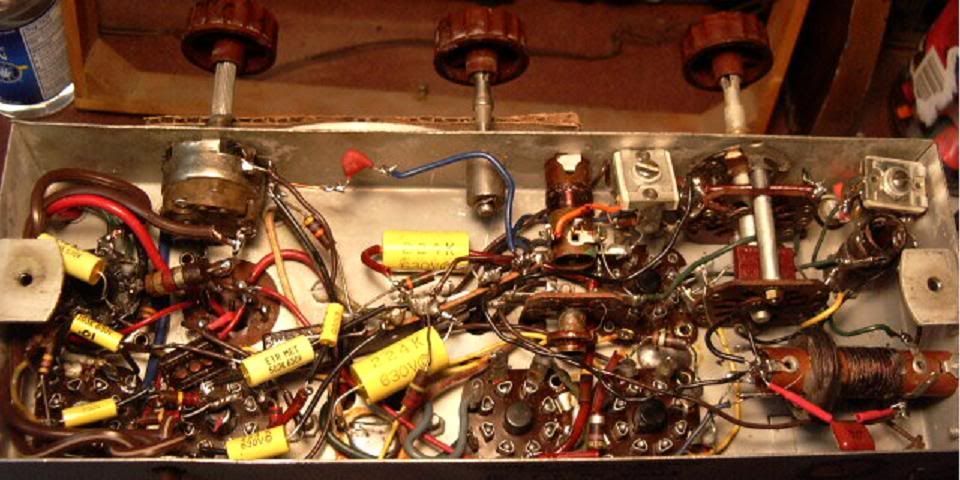
Here's the chassis with its new "yella" caps.