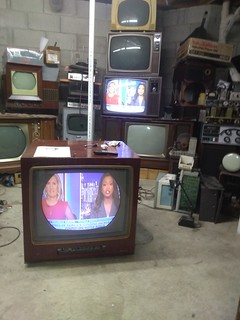
Well, I finally got tired of it sitting dismantled in the garage taking up 3X the space it should, and got round to installing a glass CRT.
Looking at EDs modification closer I decided to try a different approach since I did not want to cut a hole in the original 21AXP22 plastic shroud.
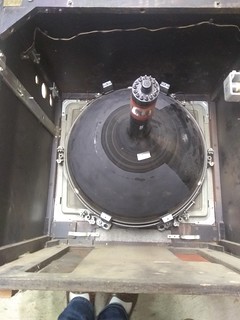
I've had a spare 21FJP22 bracket kicking around since buying a CRT from Miniman82 (nick) ~6 years ago... Initially I thought I'd rob the back plate drill some holes in it and get really long bolts to reach it, but that seemed like it would not work well with the existant bolt locations in the cabinet or the chassis mounting considerations. The strap with 4 brackets riveted to it seemed like a better choice...I noticed there were holes in the strap that suggested alternate rivet points for two of the brackets. Those points looked right so I drilled out the rivets of two of the brackets and moved them. They were close but not right so two of the brackets are not riveted to the first band. The first band effectively does nothing other than helping keep the two unriveted brackets snug against the plastic rim of the mask.
The 4 brackets themselves had to be modified a bit too...Specifically the top brackets had to have a pinch of and the bottom brackets had to have a good portion of the outer corners of the bolt flange ground off so they would not hit the top of the cabinet or interfere with the chassis. There was also a hook on the inside of the brackets designed to grab the face of the CRT that had to be bent in so that the brackets could get close enough to the rim for the bolt holes to line up with the bolts.
 IMG_20180801_154527235
 by
Tom Carlson, on Flickr
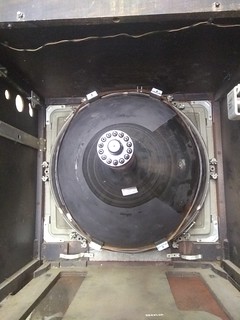
I then realized the first strap wraps around the plastic rim of the mask holding the 4 brackets against it but does not do anything to snug the brackets against the CRT...At that point there was a small gap between the rubber on the brackets and the bell of the CRT. This gap was big enough for the tube to be quite loose in its mounts yet not able to come out of those mounts...I fixed that by adding a second strap (which I had to shorten by cutting and bolting back together) around the rear groove of the brackets...This allowed me to tighten the brackets so the rubber on the brackets touches and holds the CRT securely, provides better side support of the CRT and serves to prevent the brackets beading outward and releasing the CRT. I took a discarded piece of round outer insulation sheath from a discarded section of power tool cord and placed it over the edge of the second strap where it touched the CRT side for cushion. Bringing me to my final solution which holds the CRT quite securely and accommodates the chassis (note bottom brackets not ground in that pic as I did not notice they needed it yet when I took that pic).
 IMG_20180801_162321910
 by
Tom Carlson, on Flickr
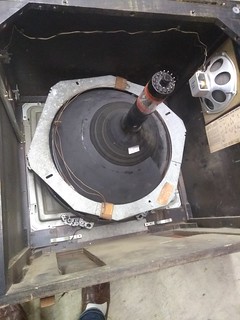
The yoke seems to grip the neck firm enough on its own that unless I need to drive the set somewhere (or pick it up and shake it violently) it should stay in place fine with no clamps or brackets.
It seems happier with a strong signal.
 IMG_20180801_215453170
 by
Tom Carlson, on Flickr
I briefly considered adding the rear plate of the 21FJP mounting assembly hoping to add automatic degauss to a CTC-5

, but soon realized it would only make it harder to get the chassis in....Which already required two adapters be made to lay two signal tubes on their sides.
 IMG_20180801_162515678
 by
Tom Carlson, on Flickr
My hat is off to the mechanical designers of RCA on this model...It blows my mind that they found a way to fit a 21AXP22 and all its purity hardware etc. into such a compact package in such a clever way...