I made a detailed post over on ARF about how I redid the knobs. So I thought I'd post that info here as well.
Here is what I did to the top knobs. I used the original knobs and cleaned them very good. This of course took off more of the letters/numbers. I tried using a black filler crayon to restore the letters/numbers. No dice. The indentations were very shallow. This must be the reason why the letters/numbers were so easily worn off. After that I lifted off the brass "bright" on each knob. It was glued but the glue broke free without much effort.
After cleaning them I tried polishing them with Gorhams Silver polish. Like the rest of the TV, the brass plating was pretty much worn off too! I then sprayed on some primer, sanded it smooth and used my Bright Gold Rust-Oleum spry paint to get them back up to an acceptable level. I suppose I could have looked into getting them re-plated, but I thought the cost would be too high.
Back to the plastic knobs. Once cleaned, I sprayed them with several coats of sandable primer. After they dried, I lightly sanded each knob "face" smooth. I then used some auto body galzing putty to fill what was left of the letter/number indentations. Then another 2 coats of primer sanded smooth. I then sprayed on several coats of Antique White Rust-Oleum spray paint. When dried overnight, I very lightly sanded the "face" of each knob till the paint was "level" and there was no sign of any "orange peel".
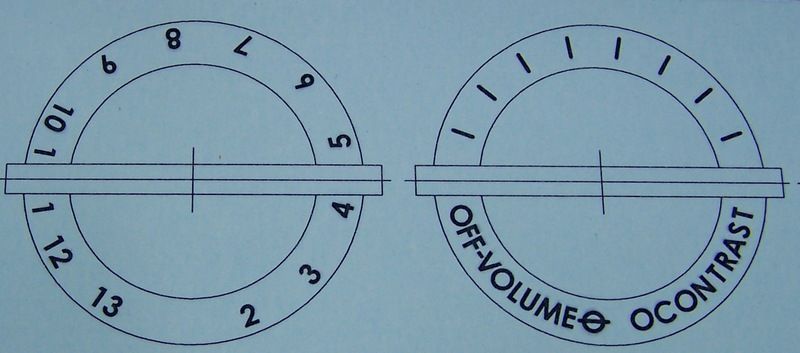
I then made up some decals using my CAD program. I was able to match the font perfectly. I then ran my clear laser decal paper through my Brother laser printer. This prints the image onto the decal paper. I then applied a light coat of decal "bonder" by Testers. When dry, I applied a medium coat, then 3 more medium/heavy coats to the decals. I let them dry overnight.
I then installed the "brights" with some glue and pressed them into position.
I then carefully cut out each decal and applied them to the knobs. Carefully blotting out the excess water and smoothing the decals very flat. Again I let them dry overnight.
I then fogged on several coats of the decal bonder over the entire knob. Then followed by several medium/light coats. Followed by several medium coats. When dry I installed the knobs.