
|
|
|
#46
 03-17-2018, 03:07 AM
|
||||
|
||||
|
Show and Tell
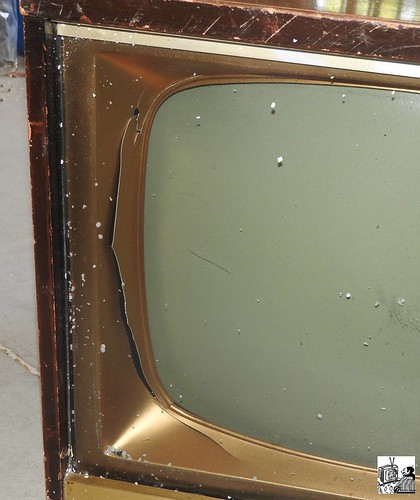
Now that the electronic restoration is complete, I'm going to do a "show and tell" to share how I dealt with a couple of cabinet problems. The first issue is repair of the broken plastic mask. This is what I saw when I first unpacked the set.
 The right side of the masked was cracked in a similar fashion. I didn't think about it again until I was reassembling the set. This is what worked for me. The plastic is quite thin. The cracked segments could be apposed, but they were slightly warped and wouldn't stay in place passively. I used just enough tape on the back side to hold everything in place. Then I roughened the surface along the cracks with coarse sandpaper and covered the cracks with a liberal coat of epoxy cement. 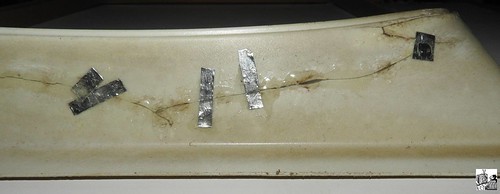 When the epoxy was fully cured, I applied enough epoxy to the front surface to fill any gaps, then sanded it smooth. 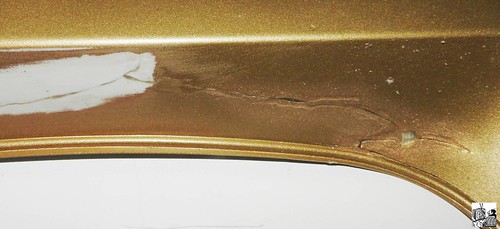 When that epoxy was fully cured, I applied spot putty (an auto supply item) to fill any defects or scratches sand sanded it smooth. 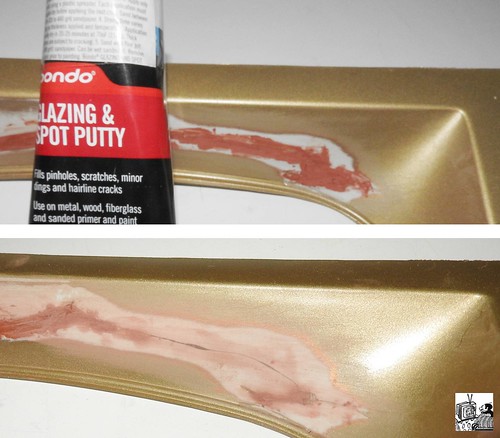 Finally, with a coat of spray paint, there's no visible evidence that it was ever damaged. 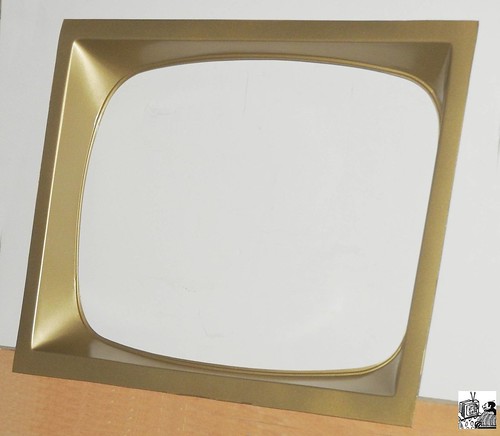 In my next episode I'll show how I replaced the eight-inch-long horizontal hold control knob.
__________________
Winky Dink Damn the patina, Full speed ahead! 
|
|
#47
03-17-2018, 10:44 AM
|
||||
|
||||
|
Gorgeous!
|
|
#50
03-18-2018, 02:53 PM
|
||||
|
||||
|
Craft Paint
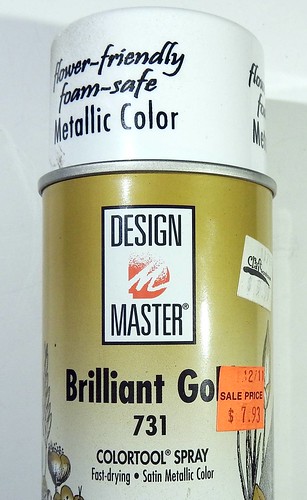
I have a least a half-dozen different cans of metallic gold spray paint. I used this because it's very fast-drying, durability was not an issue, and the can was near empty. By sheer chance it turned out to be a perfect match--but it's behind tinted glass, so that didn't matter, either. It was at Craft Warehouse a few years ago.
__________________
Winky Dink Damn the patina, Full speed ahead!
|
| Audiokarma |
|
#51
03-18-2018, 03:14 PM
|
||||
|
||||
|
In Praise of Wooden Knobs
This post is about a mundane repair. I'm showing it here only because I found the outcome to be esthetically pleasing.
Horizontal Hold coil was controlled with a plastic rod attached with a metal tube. The coil-end attachment was loose and wobbly. When I was removing the HV cage I bumped it and it snapped off, flew into the air, it and I never found it. So I decided to replace it. with a long nylon alignment tool that would work perfectly. But... 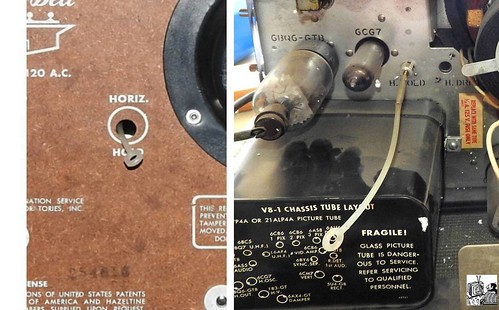 ...this cartoon inspired me to use wood (The Idaho Forests Products Commission points out that wood is an environmentally friendly, renewable resource). 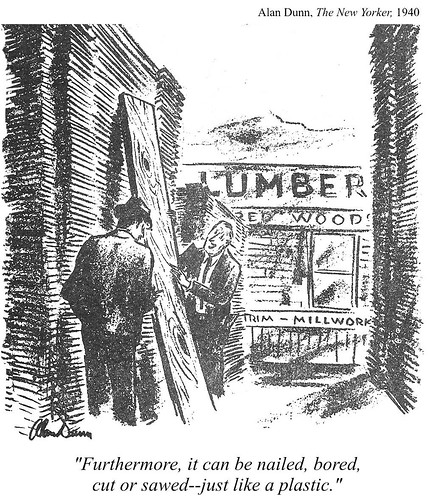 I had to cut the metal attachment. Readers from my generation will recognize the classic Tinker Toy construction. 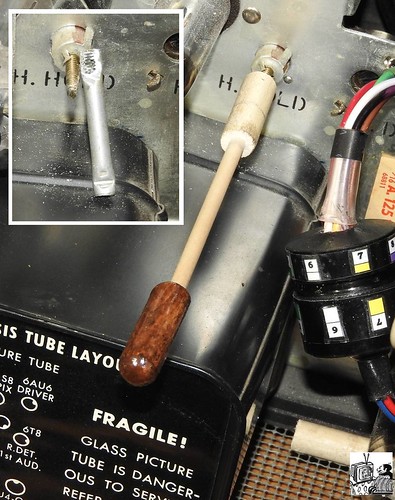 Finally, the hole did not align with the coil. The rod was flexible enough to reach the original hole, but it wouldn't turn freely, so I made a new hole.  Ta-dah! ***I previously asked about the purpose of a short beaded chain attached to the HV cage. As it turns out, the end chain was broken but was originally to chassis. I think the purpose was to prevent a repair technician from forgetting to put the cage back.***
__________________
Winky Dink Damn the patina, Full speed ahead!
|
 |
| Thread Tools | |
| Display Modes | |
|
|


 Linear Mode

