
|
|
|
#1
 11-16-2011, 07:02 AM
|
||||
|
||||
|
Resistor Behavior Question
I've witnessed some behavior on a resistor in a set that I'm working on and would like to know if it's normal. I have a TV chassis that I have replaced all of the electrolytic capacitors. I will be replacing the paper caps as well, but I wanted to get a baseline for how much the set is functioning before I move on. Bringing up the voltage slowly on the set to around 2/3 line voltage I noticed that one of my resistors started to "boil." That is to say the area around one of the leads began to bubble up a bit and out-gas a very small amount of smoke/steam. I only had voltage to the set for a few more seconds once the resistor started to do this so I'm not sure if it was a temporary thing or if it would have eventually burned up. I just wanted to know if this is ever normal for an old resistor to behave like this when it's being powered up for the first time in possibly decades, or if behavior such as this is always indicative of a greater problem in the set.

|
|
#2
11-16-2011, 09:02 AM
|
||||
|
||||
|
well im not a tech for these sets but if its an old resistor and the first time firing up after awhile then i would think that there is a short somewhere maybe the old paper caps. if the old resistor just had dust on it maybe it would burn away and thats it but your saying boil, or bubble, and venting smoke to me spells a short. i would double back and check all the connections on the lytics as it is easy to place a wire in the wrong place by accident being very careful not to,it happens. check and see what the value of the resistor is to be and compare the old one maybe it went high out of tolarence. hope this helps.
|
|
#3
11-16-2011, 12:47 PM
|
|||
|
|||
|
Measure the resistor. If it's in tolerance, don't replace it. It may be overstressed, as some components may be, while bringing up the voltage slowly. The bubbling should eventually stop; then measure it again.
Resistors are so cheap that you might as well replace it anyway.
|
|
#5
11-16-2011, 07:58 PM
|
||||
|
||||
|
I found that there was a problem in that part of the set. The resistor was wired just before a control that was way out of spec. I could adjust the control down to be within spec and when I did so there was no further abnormal symptoms from the resistor.
|
| Audiokarma |
|
#6
11-17-2011, 04:05 AM
|
||||
|
||||
|
Save yourself touble and frustration by replacing all of the paper caps before powering up the set!. When i replace the paper caps, For the fun of it i test them on the way out only to find that less than one in twenty tests within the value labled on the part. Further more these old paper caps change value as they warm up and for the worse, Going up in capacitance and at best they screw up tuned circuits to worst case causing other components to burn up. Working sets with old paper caps tend to need adjusting (fiddling) juring usage, Conversly i find that my sets that have been recaped with modern replacements are rock solid stable and do not need readjusting even after days of sitting. By first replacing all the failure prone caps i have gotten fast results by reducing the need to trouble shoot multiple faults.

|
|
#7
11-17-2011, 07:52 AM
|
||||
|
||||
|
Quote:
|
|
#8
11-17-2011, 10:32 AM
|
||||
|
||||
|
Hook a voltmeter across the suspect resistor (with power off). Estimate the
voltage you expect across that resistor (from the schematic). When you turn the power on, read the meter, and kill the power supply instantly if you see something too high. I'm quite sure a bubbling resistor is being overloaded.
|
|
#9
11-17-2011, 01:11 PM
|
||||
|
||||
|
The method i have adopted did seem strange at first as it is normal to
run the device (baring any ovious short circuits) However understanding that these old caps are like having multiple short circuits in various degrees, I will replace them one at a time using the schematic while making notes i also see what circuit they are in and visualize the problems created. 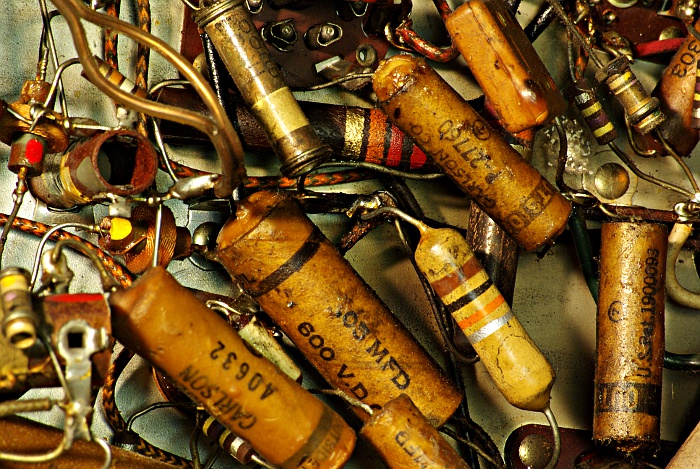 This snake pit must go! 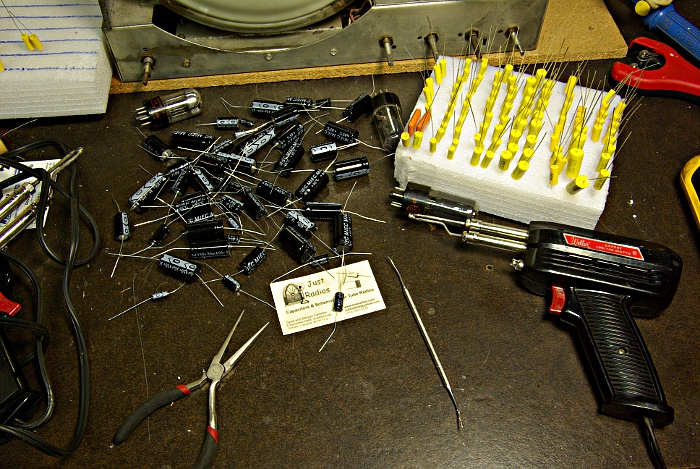 These new parts will go in before the power goes on. 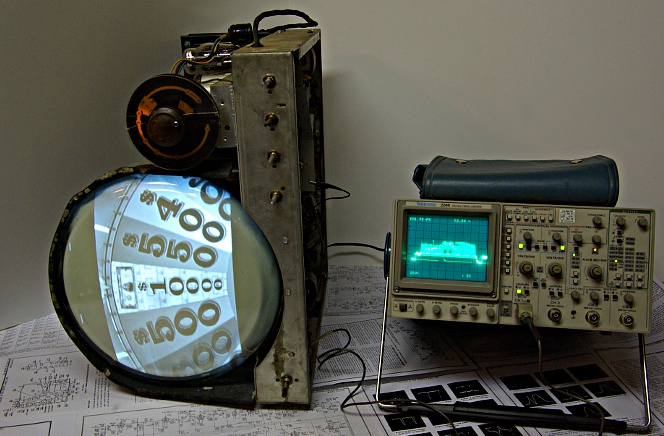 Trouble shooting and adjustments were easy. 
|
 |
|
|


 Linear Mode

