
|
|
|
#16
 03-13-2016, 02:34 PM
|
||||
|
||||
|
Quote:
__________________
Tom C. Zenith: The quality stays in EVEN after the name falls off! What I want. --> http://www.videokarma.org/showpost.p...62&postcount=4 
|
|
#17
03-13-2016, 03:22 PM
|
||||
|
||||
|
Quote:
Quote:
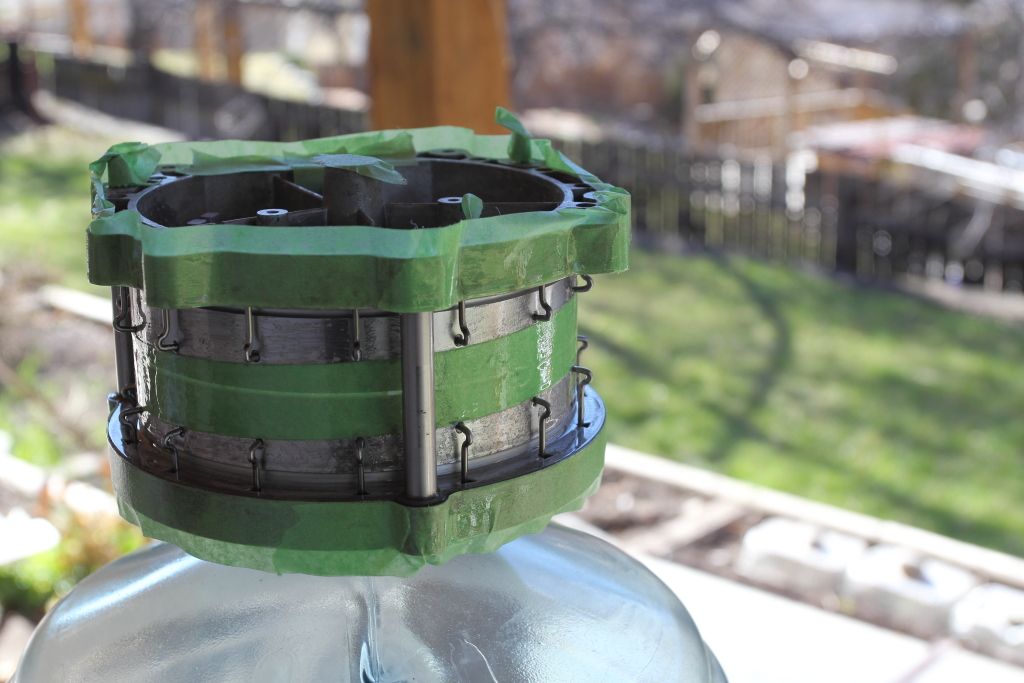
I had to remove the rest of the plastic frame to get at all the bolts which meant the capstan rollers had to be pulled. They had some brownish material on them that got all over my hands but cleaned off easily. Did someone put a tape through and all the oxide shedded off before he could stop it?  the rubber is still in excellent condition so after a clean they're probably good as new. the rubber is still in excellent condition so after a clean they're probably good as new.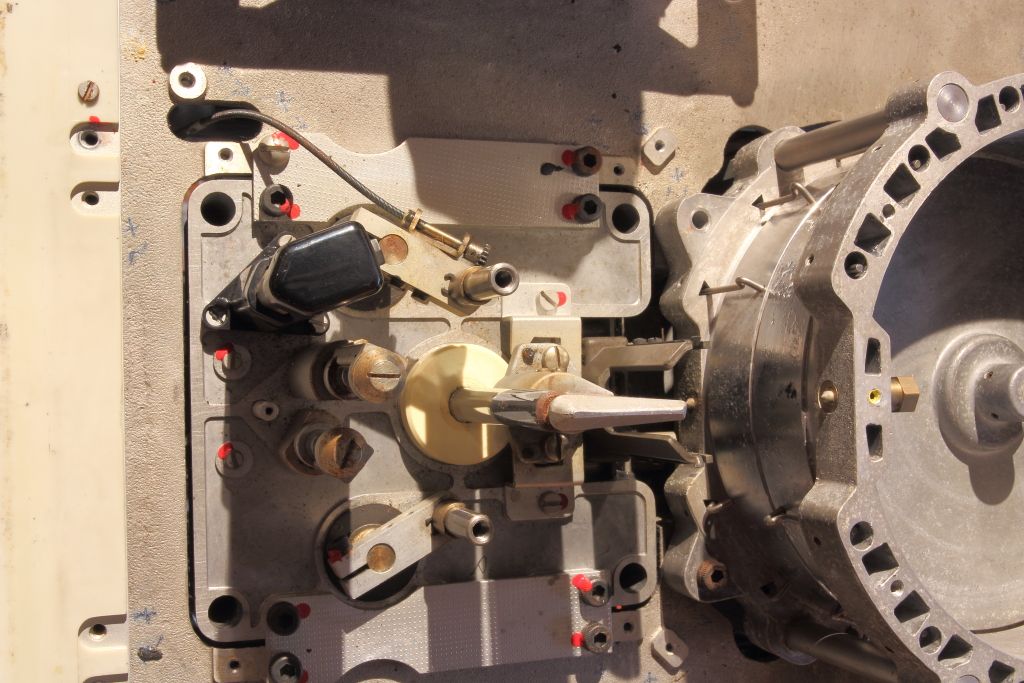 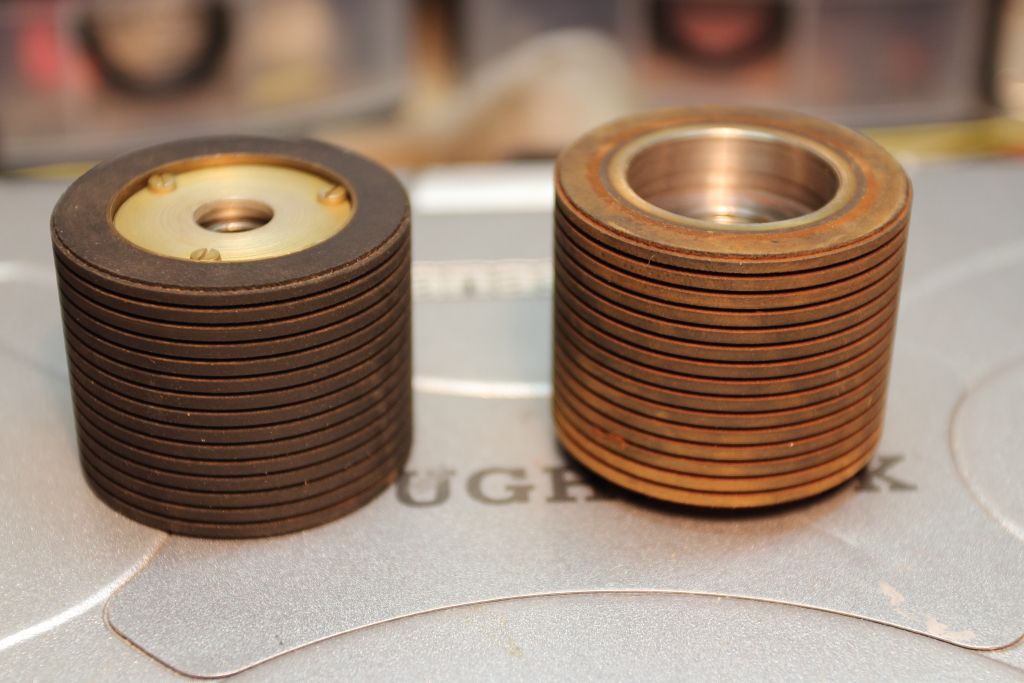 Anyways yes, the entire assembly is a module. It's held in by four hex bolts. Two of them were present and since I have two identical size bolts which I found rattling around inside the machine earlier I can now account for all the loose components. With the four bolts out you unplug the head and desolder lines for a lamp, lamp sensor, motors and a coil and the whole thing pulls out so you can work on it from a bench. In the process though I found a random clipped lead. Heck do I know where that went. 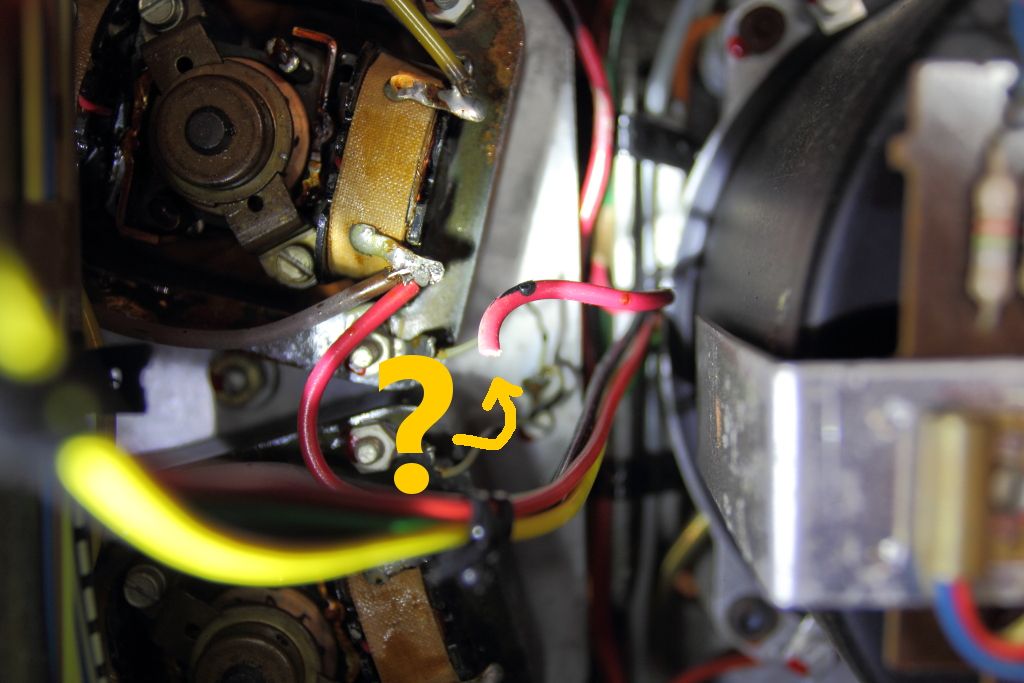 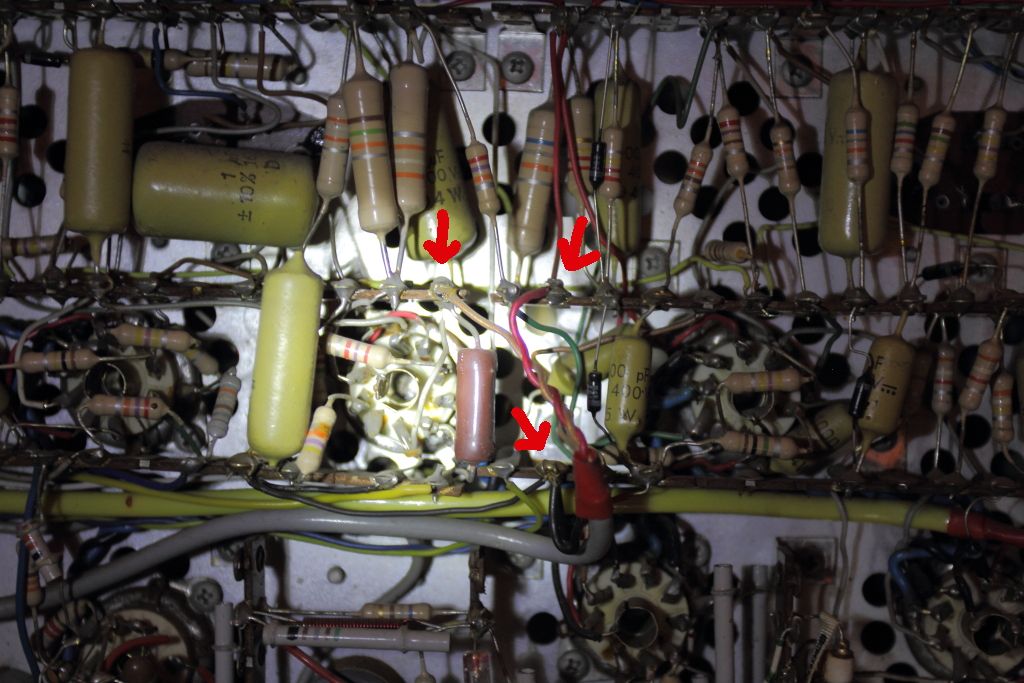 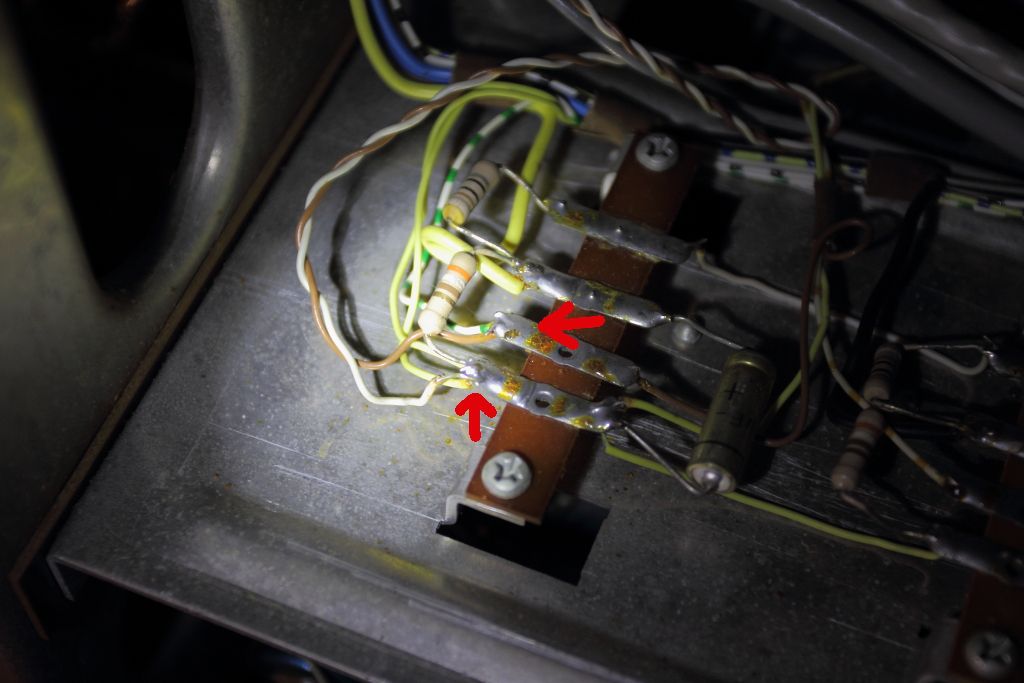 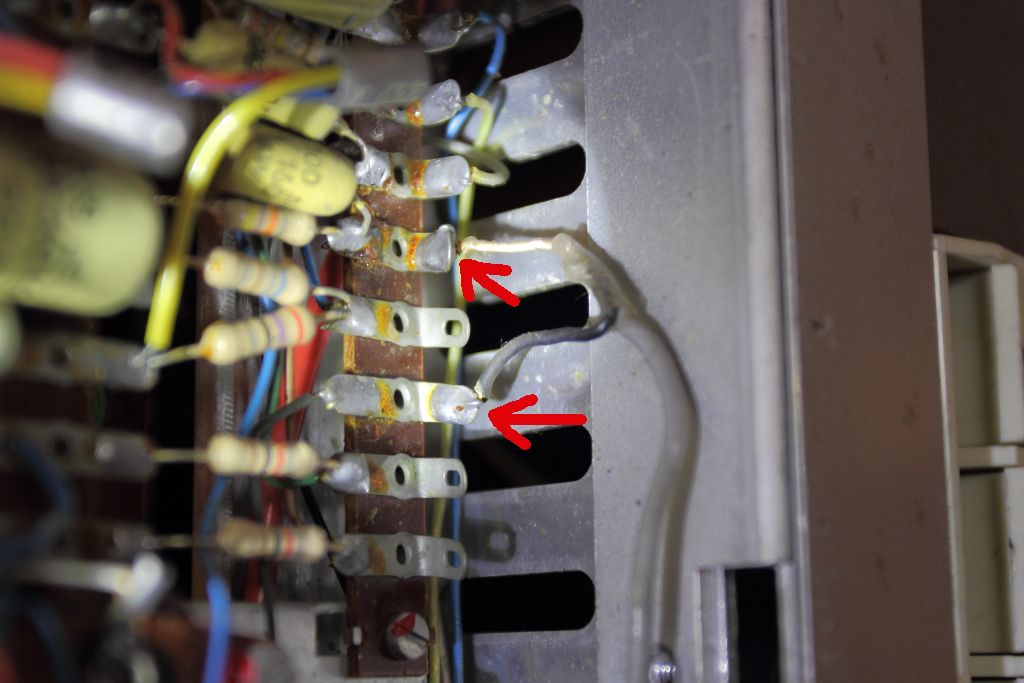 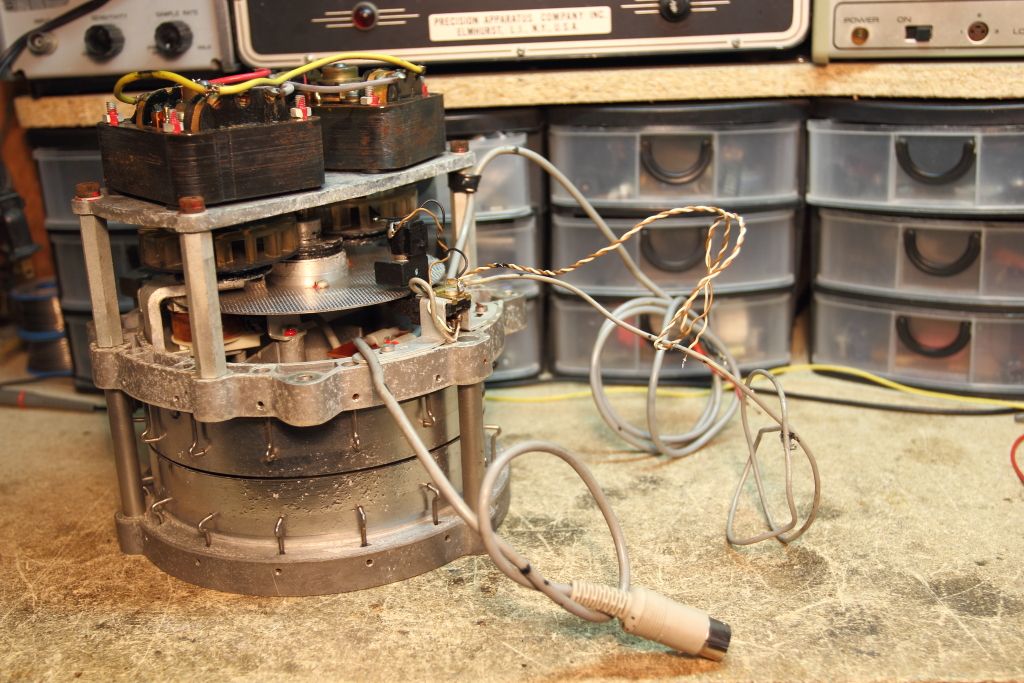 Now to give the drum a much closer inspection.
|
|
#18
03-13-2016, 04:28 PM
|
|||
|
|||
|
Quote:

|
|
#19
03-13-2016, 04:40 PM
|
||||
|
||||
|
If this is a pre-late 60's unit (likely) it probably used one of the older orange-brown ferric oxide tape formulas that looks orange and leaves orange in the mech....If you work on older RTR (reel to reel) audio decks and or have a working one and play a lot of older tapes you'll discover the stuff likes to accumulate on transport surfaces from use...
As for that wire: What terminals could it naturally reach? If any terminals were in reach you will probably find a wire stub (with or without insulation) on one. If not then look for another cut piece of that wire that could make it there. Worst case scenario you'll need a service manual to trace the wire. It is interesting that one drum lead unplugs and the others are soldered.
__________________
Tom C. Zenith: The quality stays in EVEN after the name falls off! What I want. --> http://www.videokarma.org/showpost.p...62&postcount=4
|
|
#20
03-13-2016, 04:44 PM
|
||||
|
||||
|
Quote:
__________________
Tom C. Zenith: The quality stays in EVEN after the name falls off! What I want. --> http://www.videokarma.org/showpost.p...62&postcount=4
|
| Audiokarma |
|
#21
03-13-2016, 05:55 PM
|
||||
|
||||
|
I wish I could keep this level of progress for the rest of the restoration but expect things to slow down after this.
You can get reels of 2" tape for not too much if you shop around. I should have a reel of 456 at my door tomorrow in fact that cost $50 shipped albeit it will need a bake. The red wiring of that guage seems to be related to the drum motors. As I was desoldering the cabling and not clipping them I can only assume this is some relic of some form of conversion or something. Indeed I'll need the manual to know for certain. Anyways, I was able to strip the drum down almost completely after I pulled out the calipers and micrometer. Having learned a lot from the DVK-2400 restoration I measured and marked down everything before it was removed. The result is below. 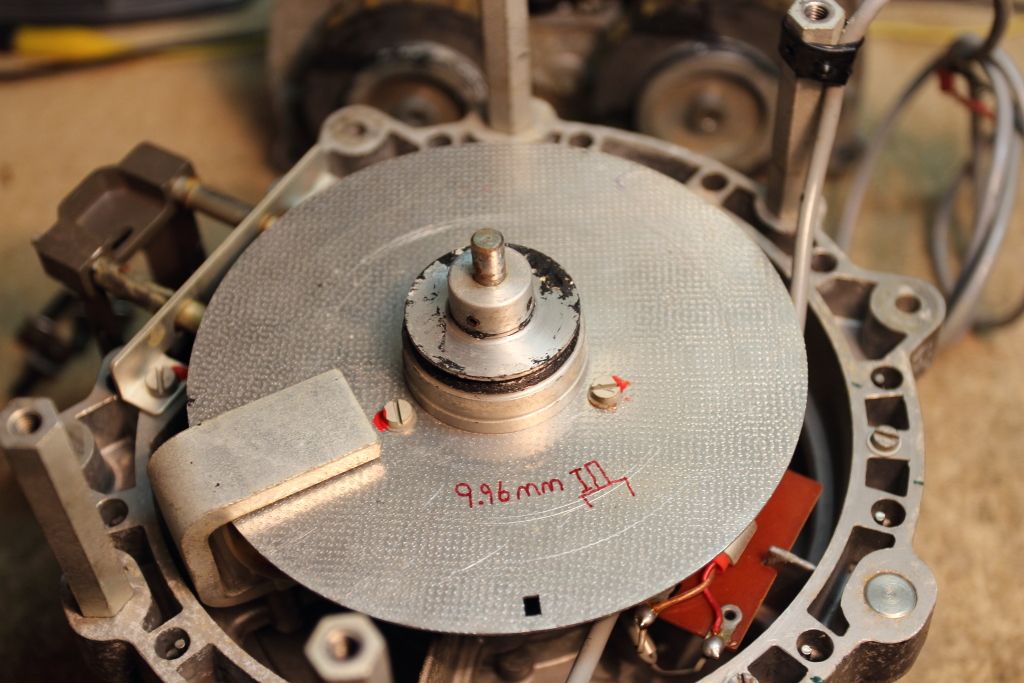   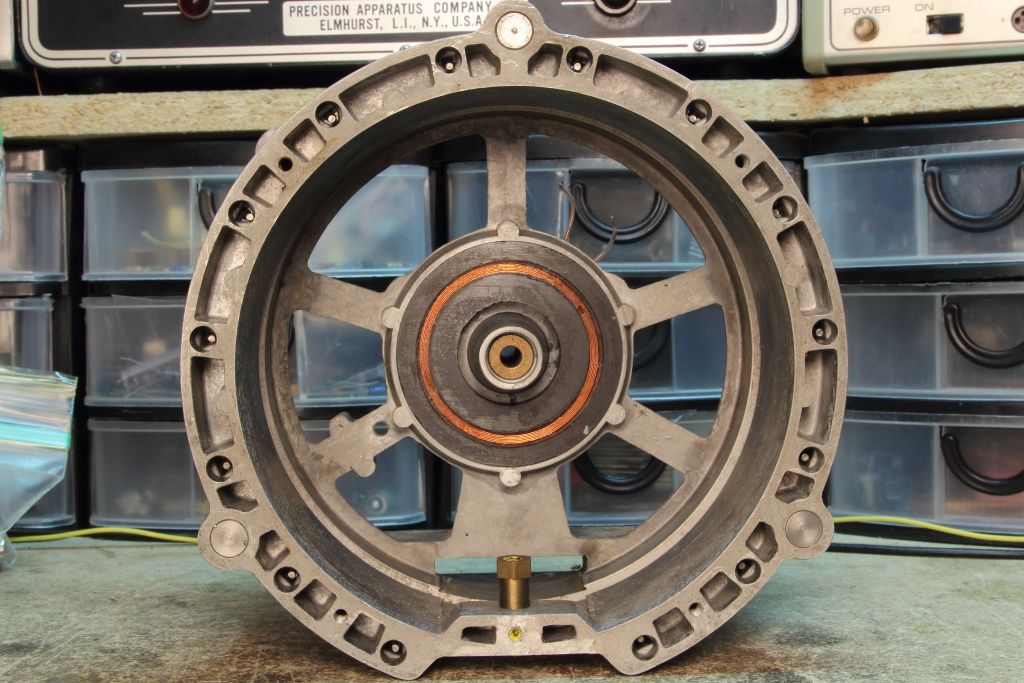 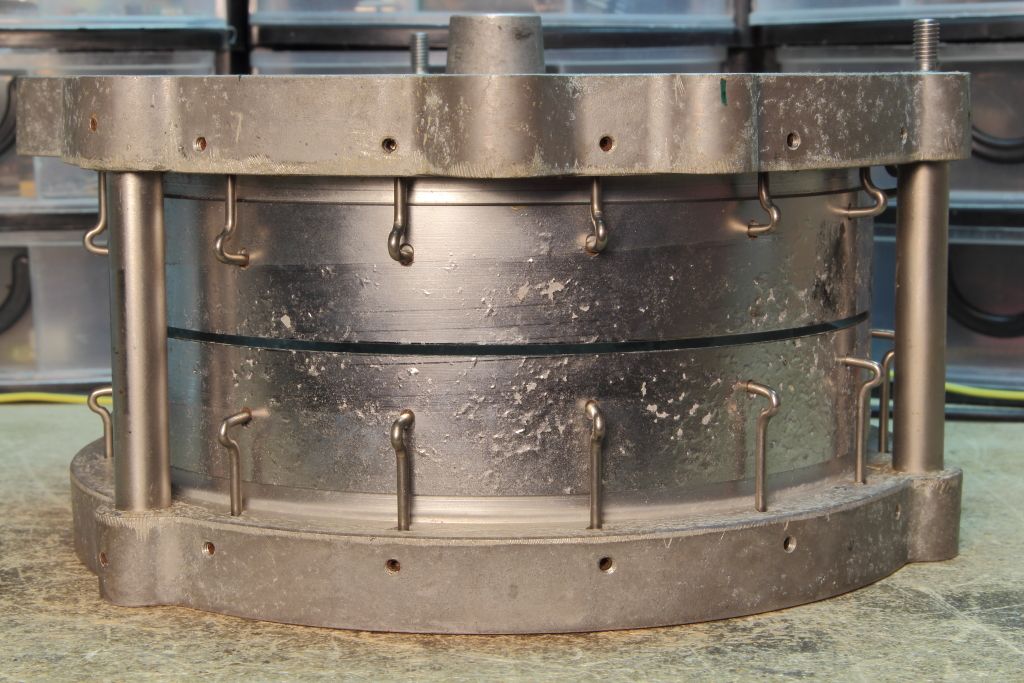 The two halves of the drum are press fit and pinned so you won't be able to split it in half or otherwise spin it to clean it up that way. The other problem is that each of the tape guides have small up/down adjustments. Without a proper jig there's no way in all hell I'm going to touch any of them so here we are now. HMMMMMMM.... One idea is that because emery paper is available with a 1" width I can thread it like a piece of tape and clean up the path like that and do the same to polish it. Outside of the path however and around the guides I'm not entirely sure how to do it without possibly marring the surface pretty bad but it needs to be cleaned up or else the corrosion might creep right back into the tape path. We cannot use solvent batch because of both the potted head coil and all my reference marks.
|
|
#22
03-13-2016, 06:30 PM
|
||||
|
||||
|
Perhaps you could hit the areas outside of the tape path with rust converter and lacquer to stop corrosion and prevent bits of metal from flaking and falling into the tape path...
__________________
Tom C. Zenith: The quality stays in EVEN after the name falls off! What I want. --> http://www.videokarma.org/showpost.p...62&postcount=4
|
|
#23
03-14-2016, 04:49 PM
|
||||
|
||||
|
Removing all the flaking and corrosion has revealed that the drum is in WAY worse shape than it looked.
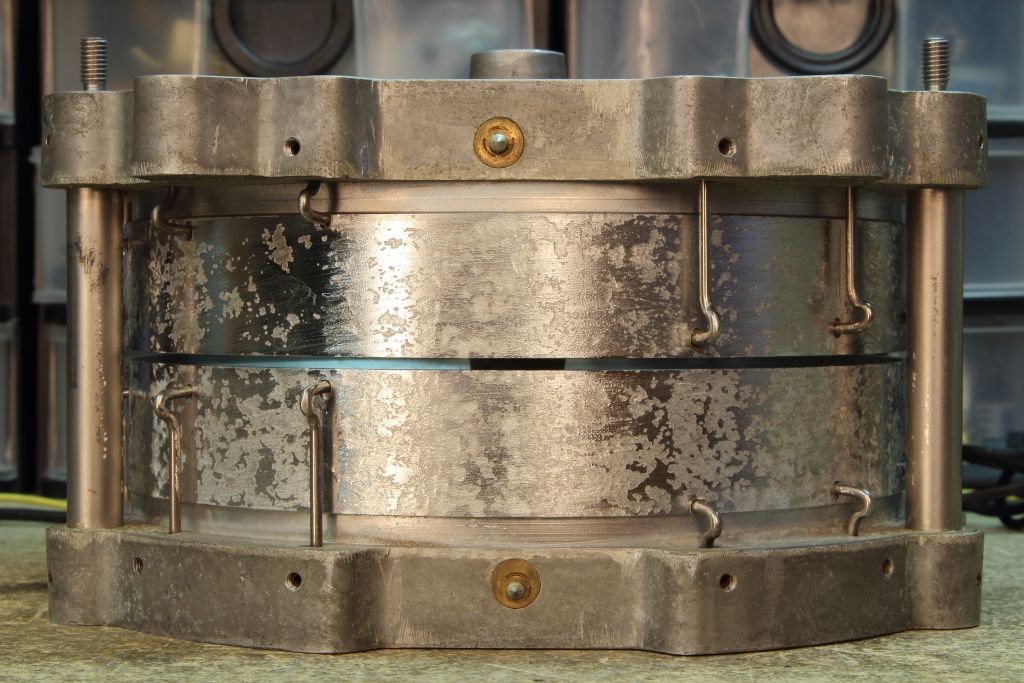 Believe me, part of me DID die as I was doing this. It's bad, mind you it's not like we are any worse off. The only thing that ca save it now is a good resurfacing of the tape path. Emery paper and the polishing tools I need are on order. While a lot of that nastyness is the thickness of the old plating I'll be keeping an eye on how much material we remove in case we run into a head clearance problem later. There is an adjustment for that but I'm not gonna touch that right now.
|
|
#25
03-14-2016, 11:35 PM
|
||||
|
||||
|
As mentioned before the upper and lower are connected by three rods which seem to be press fit (possibly even an interference fit) and pinned to make sure they don't shift. It's almost impossible to separate the two, otherwise I'd resurface both sides with a lathe and replate them. The best I can do is seal it, clean up the path and hope where I live is arid enough that the corrosion won't start up again. but it will never be anywhere near as perfect as it was.
|
| Audiokarma |
|
#26
03-16-2016, 06:54 PM
|
||||
|
||||
|
Ebay has revealed I can get ten foot rolls of emery tape in 240, 320 and 400 grit for $25 a roll. The tool shop in town can order it in up to 600 grit in a $22 50' roll but I'm waiting for a response back on if they can order them by the box or if they have to come in a case of ten rolls (hell no).
Any last words before I tape up the parts of the drum I don't want touched and clear coat the thing?
|
|
#27
03-17-2016, 09:17 PM
|
||||
|
||||
|
So after a final cleaning the drum was taped up and a light clear coat layer was put on. We shouldn't have to worry about corrosion again.
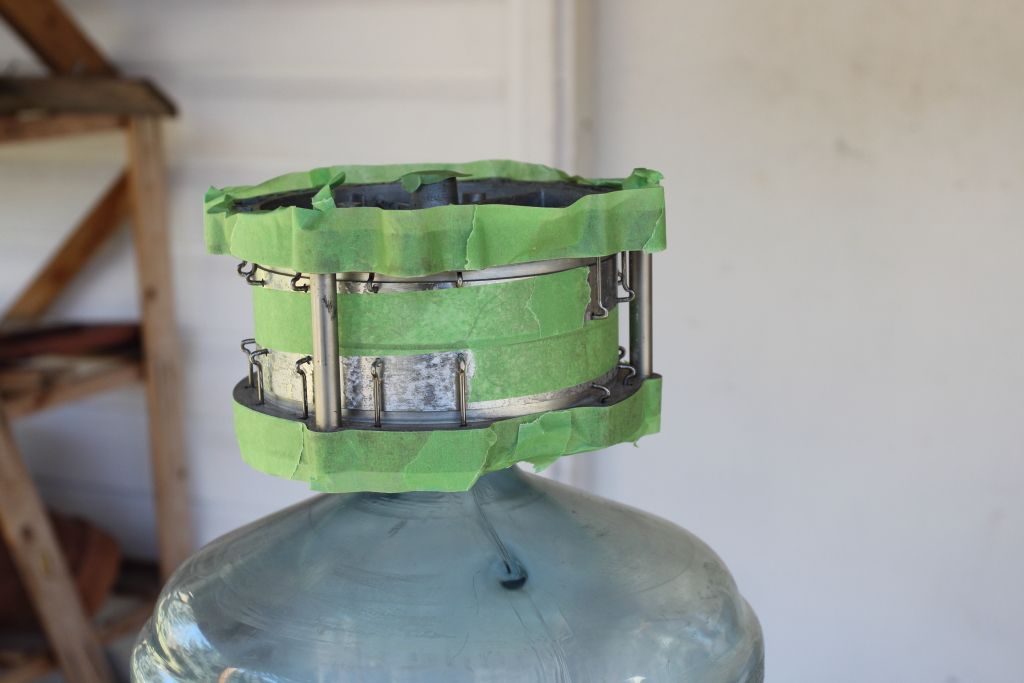  I then took a sharp blade and scored the edge of the tape I had put around the drum. There wasn't a need to coat that as well because it still needs to be sanded but now we wait for the emery tape to come in. 
|
|
#28
05-11-2016, 05:18 PM
|
||||
|
||||
|
Took two goddamn months to get in three boxes of emery tape.....
So today I started with the resurfacing with the 240 grit. By the looks of it once the old electroplating is removed the surface is clean enough I can proceed forwards. 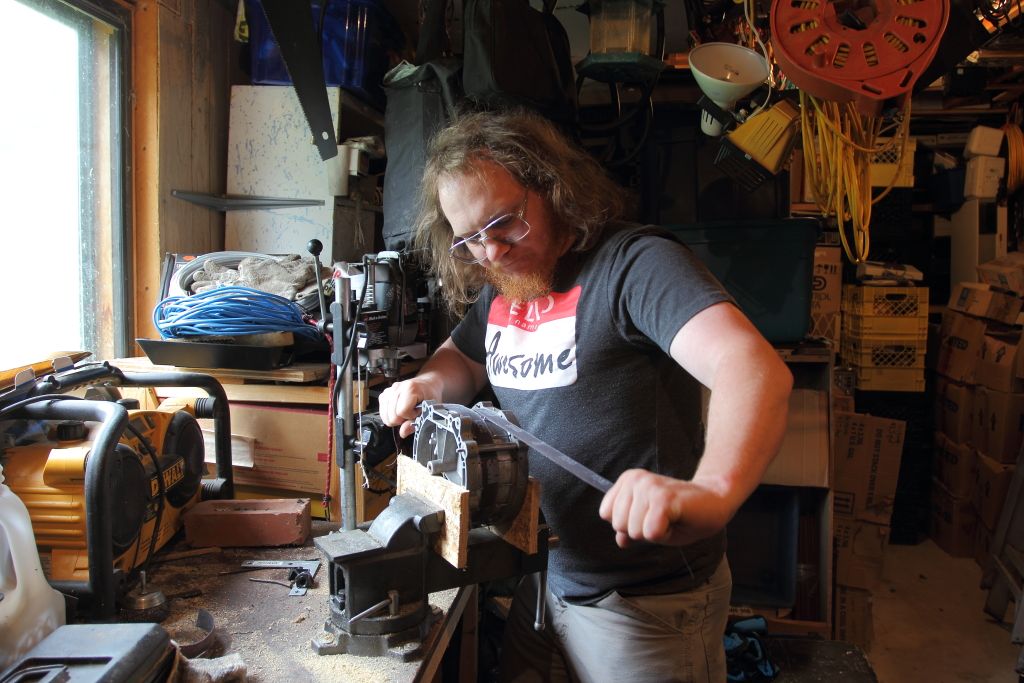 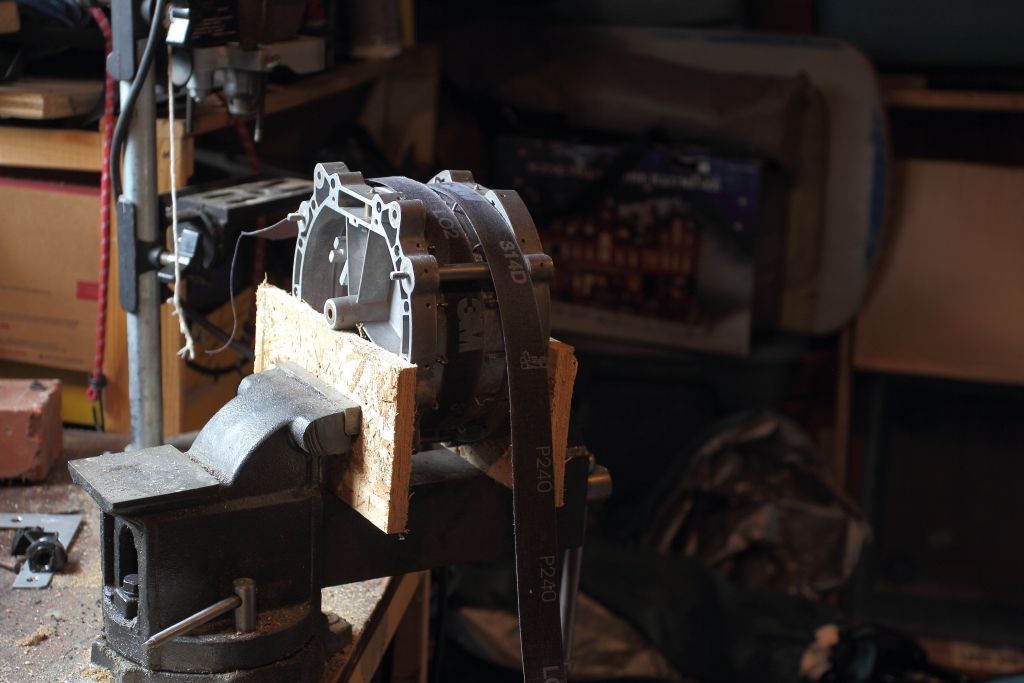 I noticed that the sanding was really scouring out some of the alignment pins but since I last reported in I got a nice digital caliper so I measured the positioning of the eight which were being hit the most and removed them. The process is currently extremely labout intensive and while it's doing a great job on one side the other isn't really sanding down. I'll see if I can form a bow and try again, or the plating is uneven. 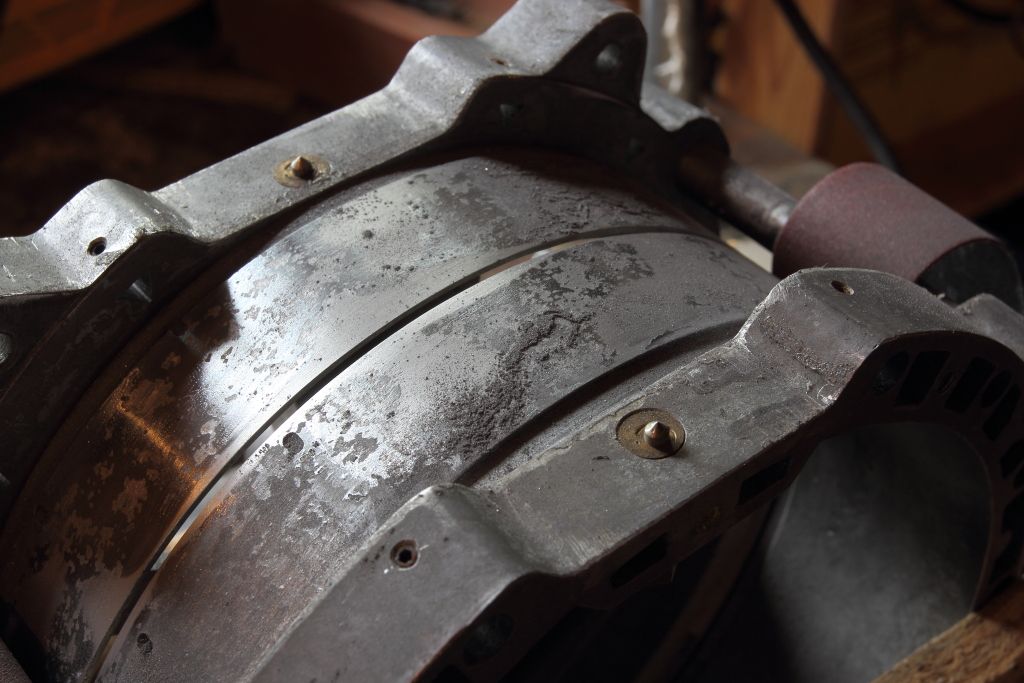
|
|
#29
05-11-2016, 06:25 PM
|
||||
|
||||
|
I screwed up.
While by all means the tension around the surface of the drum should be even as the tape is pulled back and fourth it was not. This has left portions where too much aluminum has been sanded off and there is nowan uneven surface. Dammit. I also discovered that there were more guides that were slowly being sanded away so the hell with it, I measured the position of the remaining 20 guides and removed them for safekeeping. NOW would be an awesome time to separate the two halves and just lathe the damn thing but again, the two halves are press fit together.
|
|
#30
05-28-2016, 03:20 AM
|
||||
|
||||
|
There is a guy in Holland who collects old Ducth electronics and I think you shoul write to him.
http://www.marcelstvmuseum.com/photoalbum0.html http://www.marcelstvmuseum.com/folde...s%20EL3400.pdf
|
| Audiokarma |
 |
|
|


 It's going to depend on how the upper and lower halves of the drum dismantle and what precision points I find along the way. What I'm really hoping is I end up with two pieces and nothing hanging off it so I can polish it like I did with a copper cigar canister I made in highschool. (Remember when copper was cheap? I do because this baby could pay me through university if sold for scrap!)


 Linear Mode

