
|
|
|
#31
 11-26-2009, 06:03 PM
|
||||
|
||||
|
I never thought about using water slide for caps. I bet that would work with a scan of a paper cap tube that was unwound also.
I normaly don't care to go to that much effort for originality, but I have an Arvin what I'm found of. John 
|
|
#33
11-26-2009, 09:45 PM
|
||||
|
||||
|
Quote:
 Hope you had a good dinner. Hope you had a good dinner.I got my paper from this place. It works fine with an inkjet printer. Use it like you would glossy photo paper. I've used it before to make decals for TV controls like this. They recommend using clear acrylic for the decal backing but I used lacquer. Works just fine. Last edited by bandersen; 11-26-2009 at 10:59 PM.
|
|
#34
11-26-2009, 09:47 PM
|
||||
|
||||
|
Quote:
|
|
#35
11-27-2009, 09:53 PM
|
||||
|
||||
|
The turkey must have jogged a few brain cells, because I finally found the problem in the first set.
When I recapped it, I inadvertently broke a crucial ground connection  Those two tube pins should be shorted together! Those two tube pins should be shorted together! Here's one of the radios all done with the rebuilt cap in place. I added a safety cap across the AC line and added a fuse.  I found a faucet washer that works well as a cushion between the cord and chassis.   I took Reece's suggestion and spritzed the back with some water and placed it between two metal plates with a little weight for a few days. It came out real nice  Just a little stain when there was already a break in the board. I'm going to try making a copy with some masonite. Just a little stain when there was already a break in the board. I'm going to try making a copy with some masonite.   I cleaned all the contacts and oiled up the tuning capacitor. They're both playing really well now  I hope Jody's white case makes it in one piece   
Last edited by bandersen; 12-01-2009 at 09:57 PM.
|
| Audiokarma |
|
#36
12-04-2009, 04:46 PM
|
||||
|
||||
|
peverett (Jody) sent me this case to replace that broken brown one. It's in great condition aside from the flaking paint.
Any suggestions for stripping it off? I'll be repainting it white. 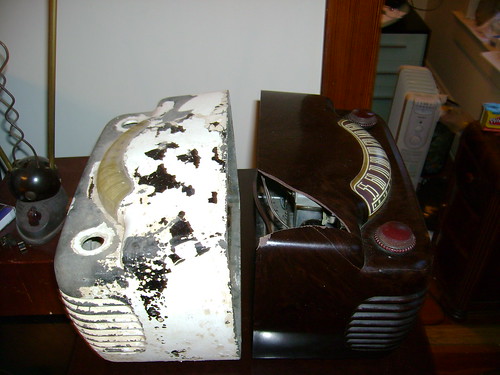 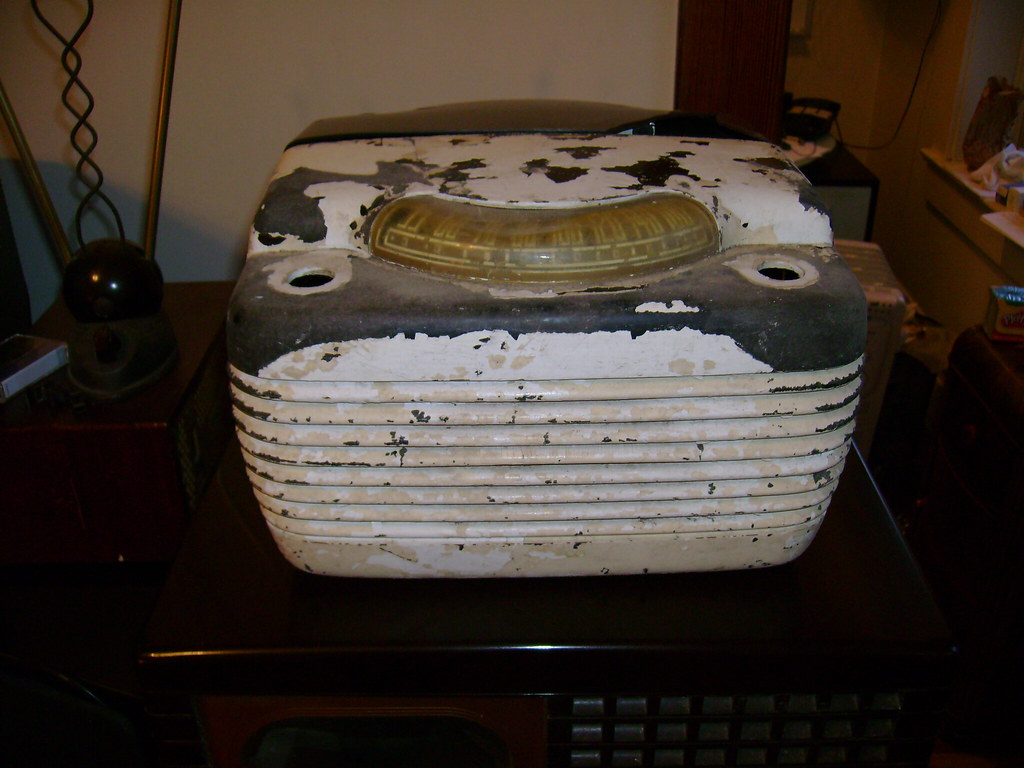
Last edited by bandersen; 12-05-2009 at 12:03 AM.
|
|
#37
12-06-2009, 12:32 AM
|
||||
|
||||
|
I have used various kinds of paint stripper on Bakelite, from gel types to old-fashioned zip strip. Some people also use oven cleaner. None of that stuff will faze Bakelite a bit, so use whatever you like.
Resist the temptation to scrape. Repeat: no scraping. If you're lucky, the original Bakelite will have been protected by paint all these years, and may still have that gorgeous shiny-new surface. If the old paint doesn't turn to mush and wipe off, be patient, apply more stripper, and come back later. I have stripped a couple of sets that looked so nice after stripping, I couldn't bring myself to paint them again. Here's one.  Phil Nelson
|
|
#38
12-06-2009, 01:33 AM
|
||||
|
||||
|
Thanks Phil, I give my favorite strippers a go. It does look pretty good where the paint already has flaked off which is going to leave me with your dilemma. Do I paint it ?
I've seen some wild color combinations online. I thought the only productions colors were bare bakelite and painted white ? Last edited by bandersen; 11-13-2014 at 02:44 PM.
|
|
#39
12-06-2009, 02:25 AM
|
||||
|
||||
|
Pay no attention to the loons who paint old radios glitter green, popsicle purple, etc. They are going straight to Hell without passing Go.
Phil
|
|
#40
12-06-2009, 10:00 PM
|
||||
|
||||
|
Quote:
Seriously though, I've been searching for example photos of several radios I picked up recently and have seen some really horrible restorations. Horribly overpriced too. Like this Philco 38-10 with it's photo-finish completely gone  On sale for only $350 On sale for only $350 ") Anyway, the stripping has begun 
Last edited by bandersen; 12-06-2009 at 10:15 PM.
|
| Audiokarma |
|
#41
12-06-2009, 11:55 PM
|
||||
|
||||
|
I don't get the whole painting a radio wild colors thing. There was one guy on the radio forums who claimed he made good money doing this, but if it really is that easy to spraypaint a junker radio and turn a massive profit, then I think we would see more out there.
|
|
#42
03-12-2010, 12:02 AM
|
||||
|
||||
|
The weather has finally gotten warmer and I've been able to do some painting tests.
It turned out that the bakelite under that old paint was pretty rough so painting is really the only option. That's fine with me - I'd like a white one anyway. 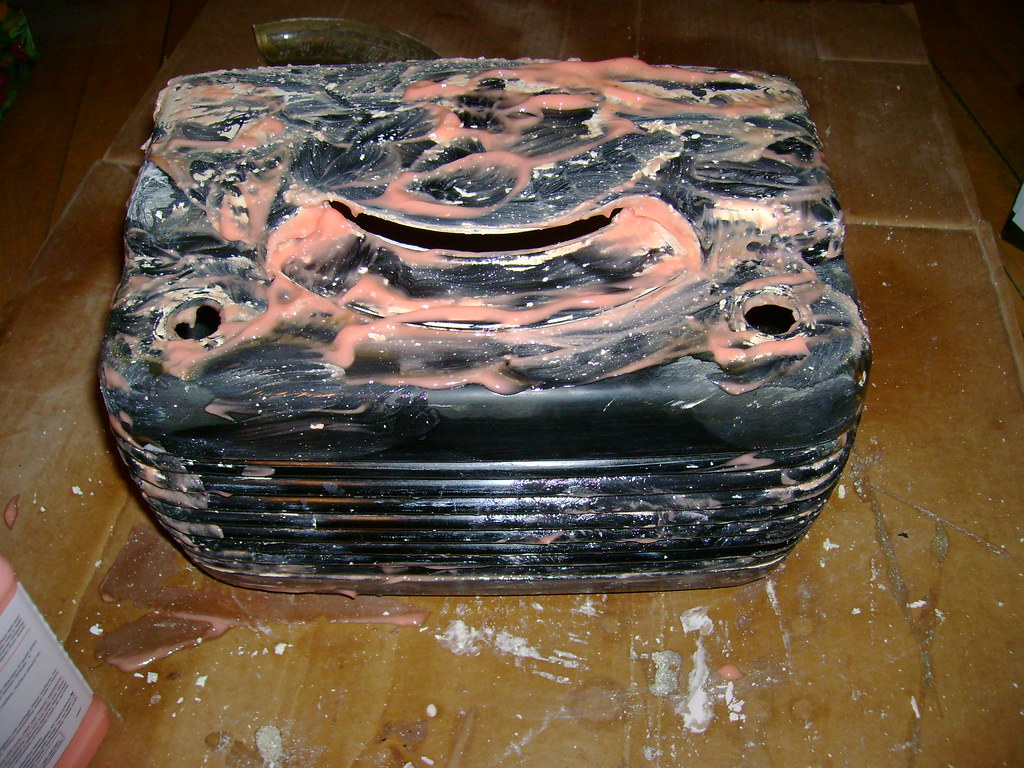  I used the old, cracked cabinet to test out some different products. I had a few disasters like using Watco clear gloss lacquer over Rustoleum specialty lacquer. The white lacquer immediately puckered and split  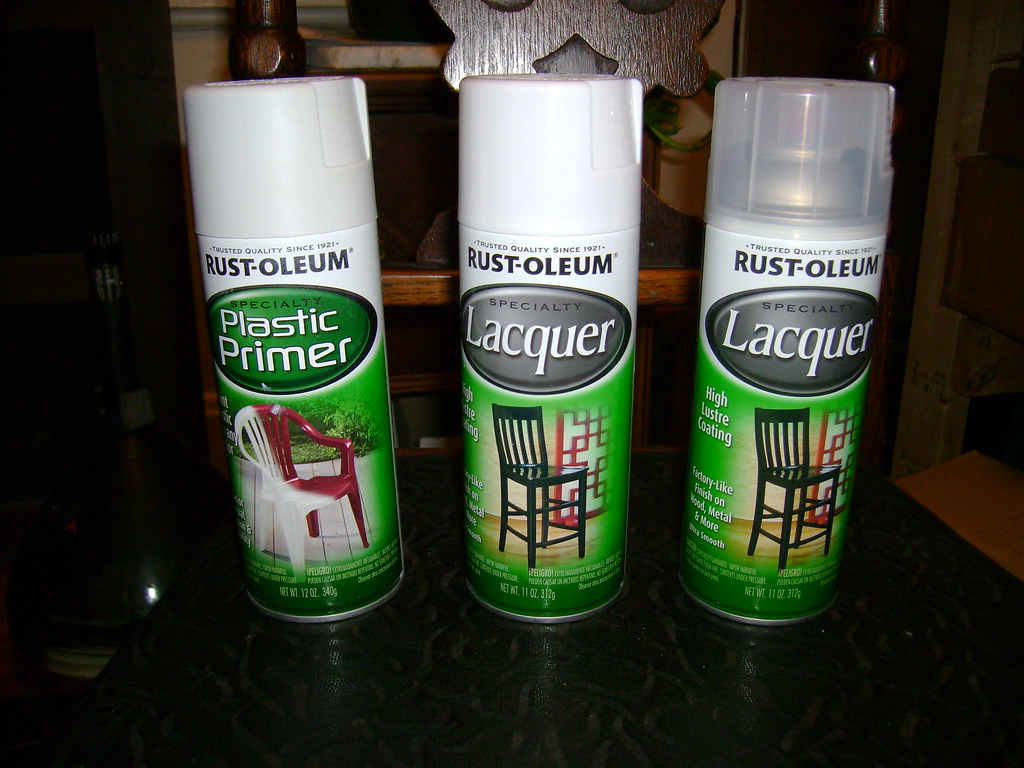 I used two light coats of plastic primer, four light coats of white lacquer, applied the decal and three light coats of clear lacquer. (That's not where the decal really goes - this is just a test) There's some orange peel, but I think some wet sanding between coats will take care of that. 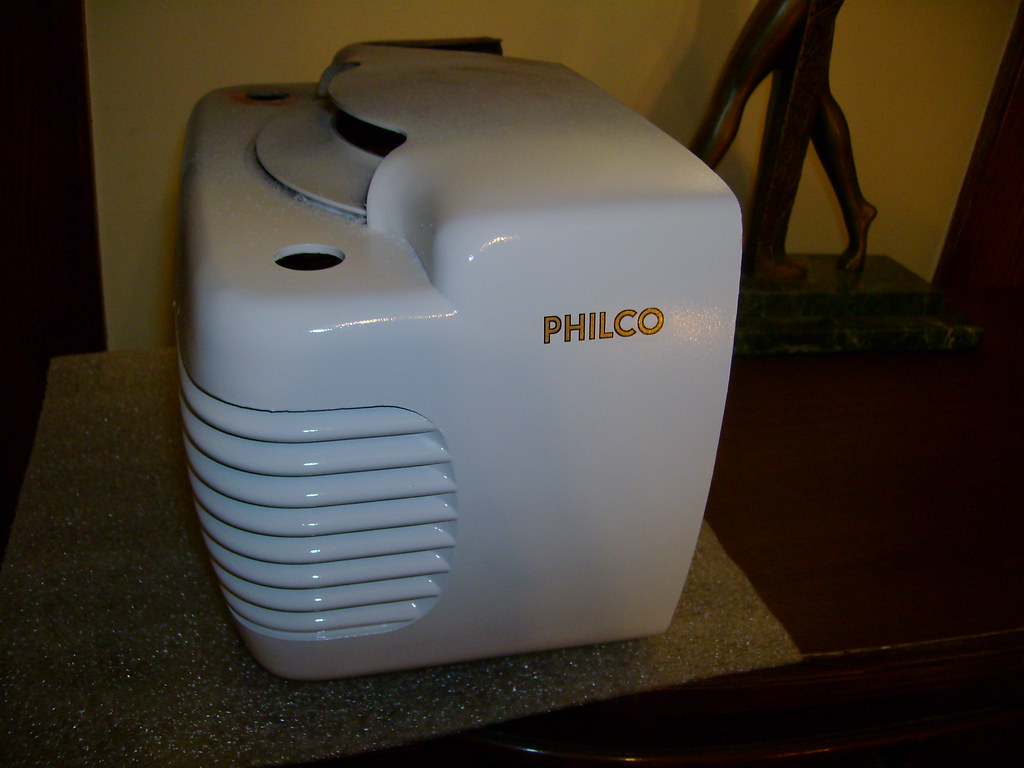 Now it's finally time to try it out on the undamaged cabinet - Last edited by bandersen; 03-12-2010 at 01:35 AM.
|
|
#43
03-12-2010, 09:35 AM
|
|||
|
|||
|
Looks like things are getting underway. Glad to see the old case is to be used and will look nice when finished. I found that I had one with a cracked case(not broken completely as was yours) and used the other brown case on it.
I also just picked up two more of the Philco Hippos(brown) at a local estate sale. I am almost completely through restoring one of them. I like these radios as they have an RF amplifier and pick up San Antonio well. I live near Austin, and AM radio in Austin is all talk, sports or music I do not like. They also sound pretty good.
|
|
#44
03-12-2010, 09:29 PM
|
||||
|
||||
|
Cool. I've been using my brown one daily for a few months now and it's still sounding great
|
|
#45
07-27-2010, 07:39 PM
|
||||
|
||||
|
OK, it's time to finish off another long overdue project
 Here's the cabinet after applying the primer. 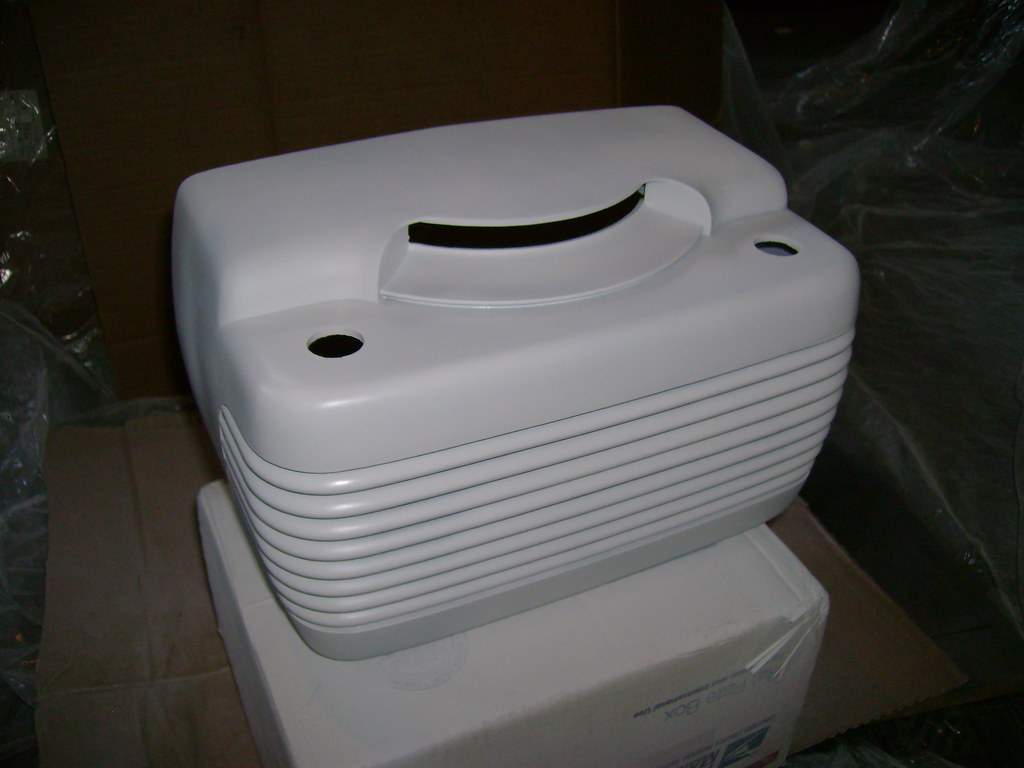 Once that dries, I'll sand out any defects and start on the white lacquer.
|
| Audiokarma |
 |
|
|


 Linear Mode

