
|
|
|
#16
 09-10-2009, 09:27 AM
|
||||
|
||||
|
Well, I did it again... I misplaced the schematic of my TS-4J and I want to finish the vertical circuit before I put it back in it's case (been freaking customers out with it naked in the shop). If anyone can scan the vertical I would really appreciate the help.
Oh, it is OK to ridicule me for losing the schematic... again! 
|
|
#17
09-10-2009, 12:06 PM
|
||||
|
||||
|
TS-4J early or late ?
|
|
#18
09-10-2009, 01:36 PM
|
||||
|
||||
|
October 2, 1948. If there is more info please let me know and I will post it.
Thanks!
|
|
#19
09-10-2009, 01:49 PM
|
||||
|
||||
|
An easy way to tell is from the Contrast control. The early version just has one end grounded. The late version has a few capacitors and resistors attached to all 3 legs of that control.
|
|
#20
09-10-2009, 02:19 PM
|
||||
|
||||
|
Contrast control only has two wires.
Thanks!
|
| Audiokarma |
|
#21
09-10-2009, 03:54 PM
|
||||
|
||||
|
Here you go.
TS-4J Early page part 1 TS-4J Early page part 2 Those came from a Wallace Telaide which has ledger size pages so I had to split it into two scans. Hope you can read it. Bob
|
|
#22
09-10-2009, 04:19 PM
|
||||
|
||||
|
Many thanks!!
|
|
#23
09-10-2009, 08:38 PM
|
||||
|
||||
|
Quote:
I have a bakelite and a wood 9" with the type of knob shown in picture 1. Perhaps these sets are not correct?  I have seen the tan swirled knobs on the leatherette-covered "portable" (VT-73) version... picture 2 I have also seen the tan knobs on a blonde set. (looked good IMHO) I have a Black bakelite 7" with the gold knobs... picture 3 jr Last edited by jr_tech; 06-09-2017 at 06:57 PM.
|
|
#24
09-10-2009, 10:39 PM
|
||||
|
||||
|
Quote:
John
|
|
#25
09-10-2009, 11:34 PM
|
||||
|
||||
|
Thanks for the info. I've never seen those stylized "M" knobs before- very cool.
Those gold knobs look awesome on the bakelite set. I'm restoring one of those as well and only have the Volume knob so far. I've got a VT-73 too with a complete set of knobs. I think the tan knobs look great on the blonde and I'm leaning towards those even though my set came with a couple of the darker brown knobs.
|
| Audiokarma |
|
#26
09-10-2009, 11:41 PM
|
||||
|
||||
|
Finishing supplies
My hand-rubbed lacquer supplies arrived today
 I ordered these just before I read John's post about micro-mesh. That product seems promising (and less messy) so I think I'll give it a try on the next project. 
|
|
#27
10-02-2009, 08:37 PM
|
||||
|
||||
|
My stupid printer ran out of color ink and I spent a few weeks finding a reasonable priced "refilled" cartridge. Here are the dark brown decals applied to the control area. This system works quite well.
Now I'm working on burying the decals in a few layers of lacquer. Then, I can finally start working on the hand rubbed finish! 
|
|
#29
06-29-2010, 07:19 PM
|
||||
|
||||
|
Here's a long overdue conclusion to this project!
The set was suffering from visible retrace lines so I tried out this modification I had to tinker with the resistor value to maintain vertical stability. 47K worked out well.  That eliminated the retrace lines, but now I have random bright streaks in the picture. This was due to positive spikes in the retrace suppression signal.  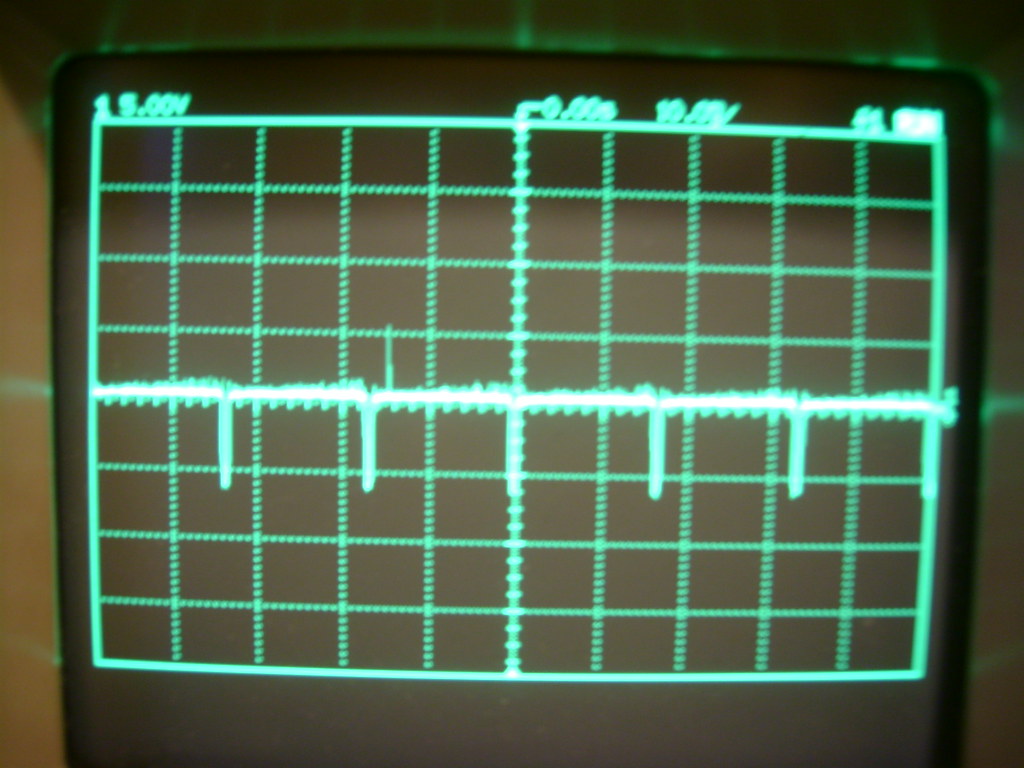 I added a clamping 1N4007 diode across the 47K resistor and the signal is a lot cleaner now. 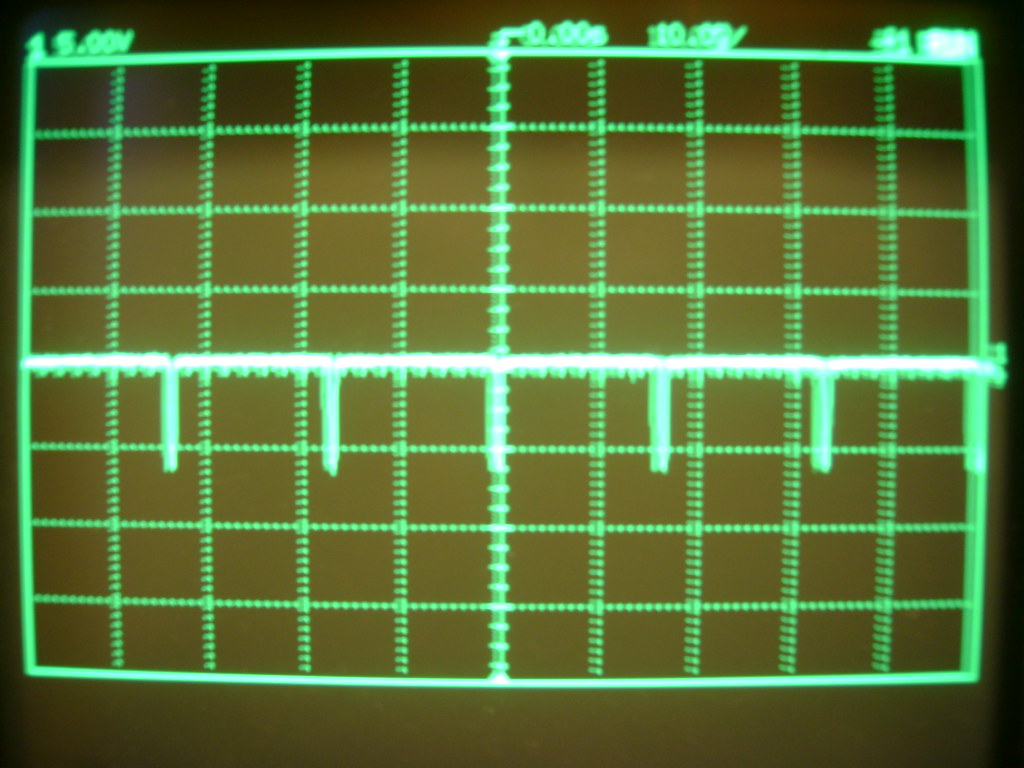 So is the picture 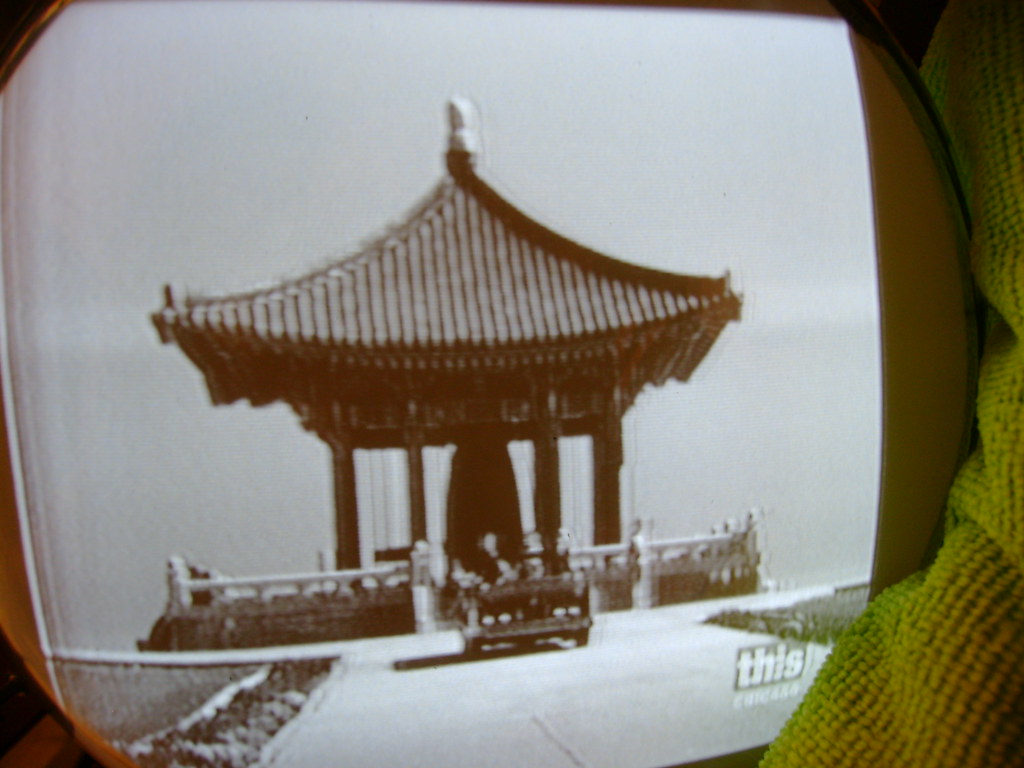 Here's the circuit I used. 
|
|
#30
07-06-2010, 06:58 PM
|
||||
|
||||
|
I'm finally calling this project done
 I made some reproduction high voltage warning decals for this and another set using white backed water slide decals. 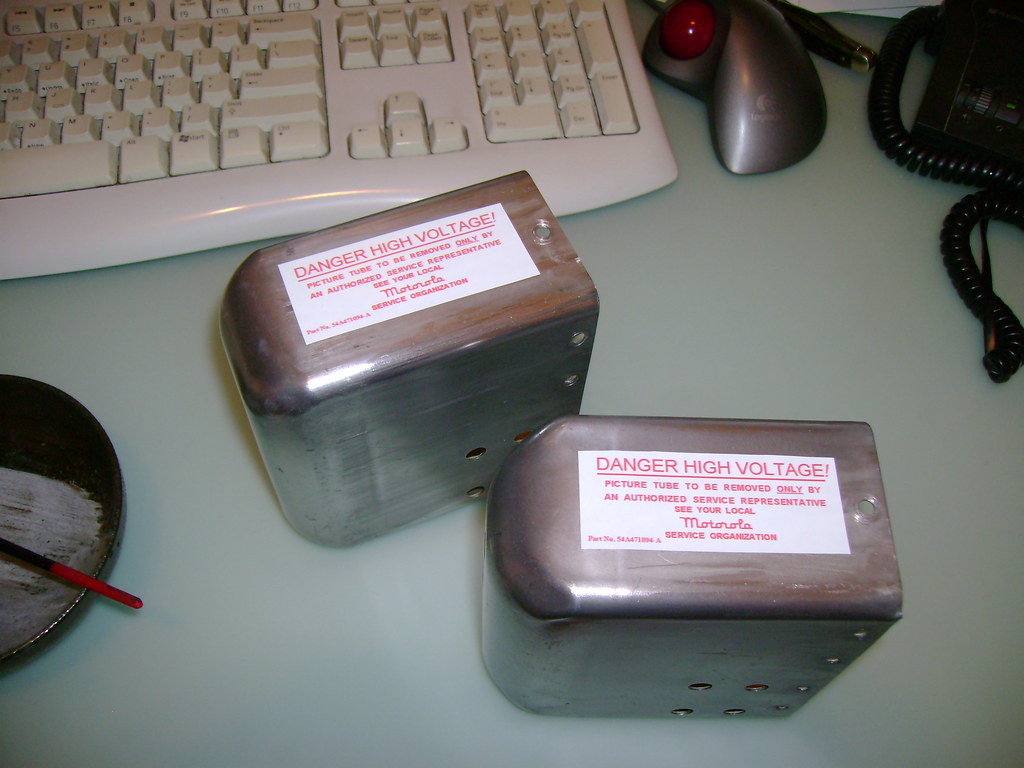 Time to put it all together. 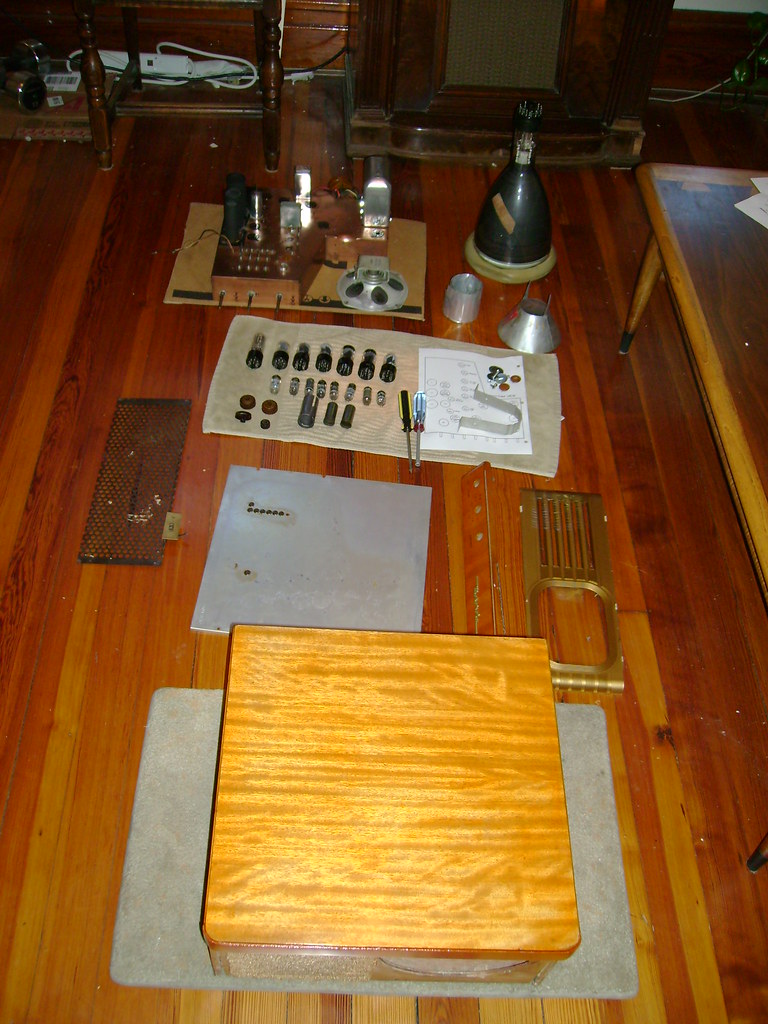 Here's the original back. I'd love to get a couple more of these for my other sets  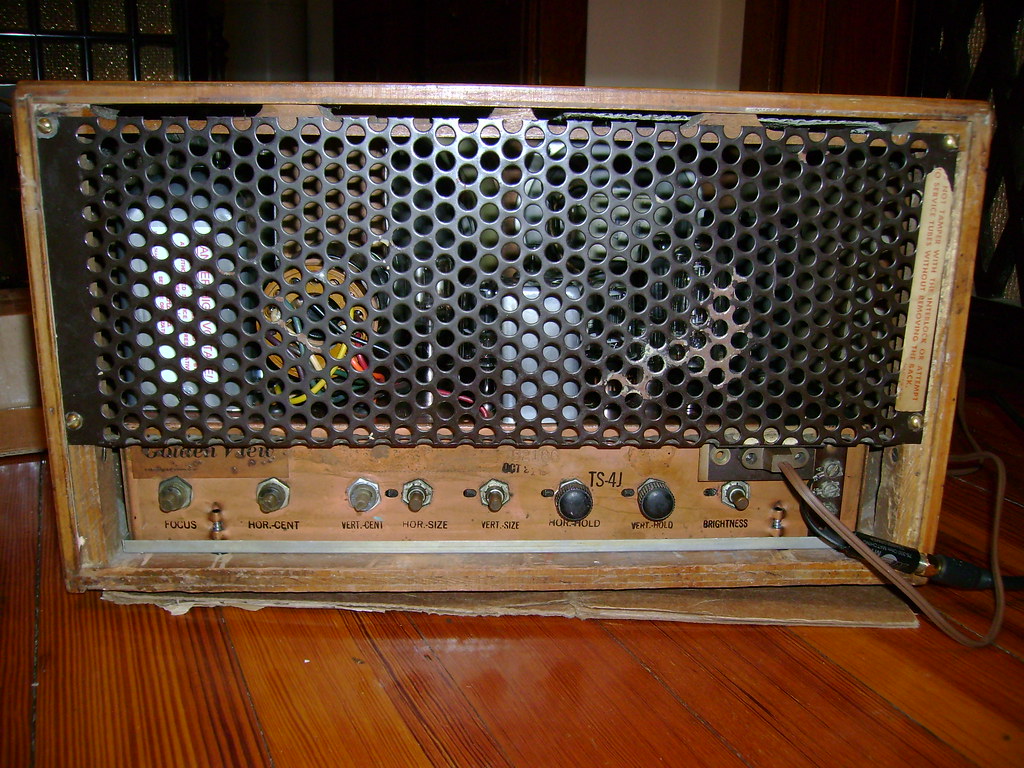 Here's the front. My restored / veneered photo finish is too orangy, but I can live with it. Someday I may give it another try. I've heard bamboo veneer is a good match. 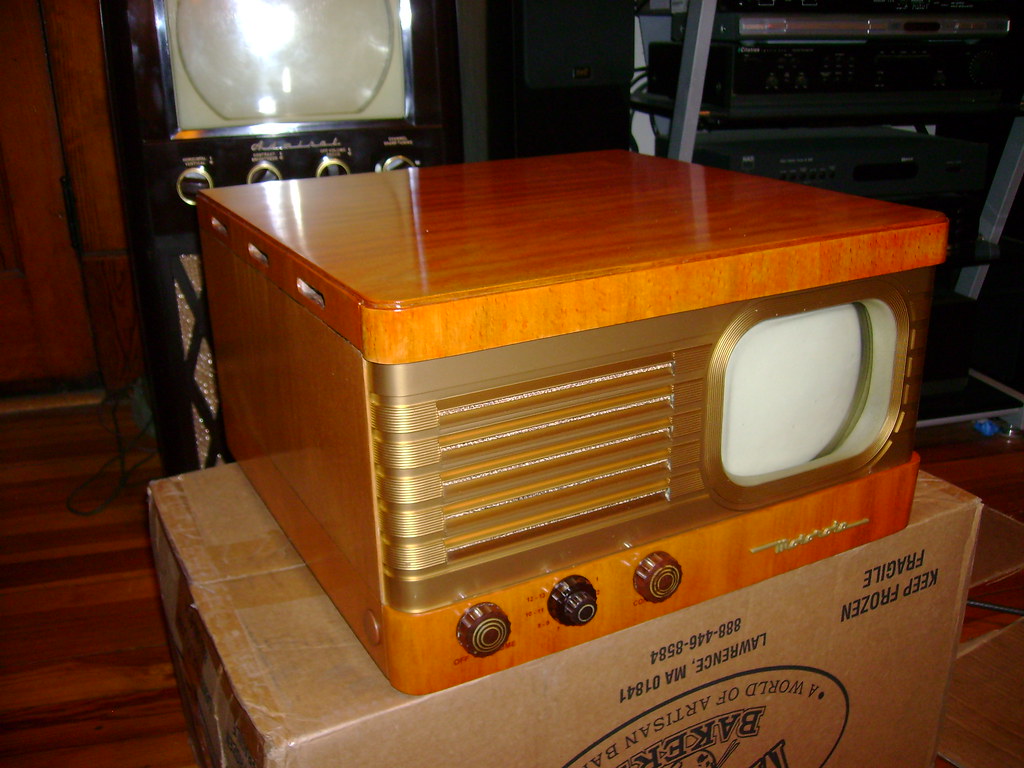 I had a heck of a time getting the reproduction mask to line up properly. The upper-right is still off a bit. 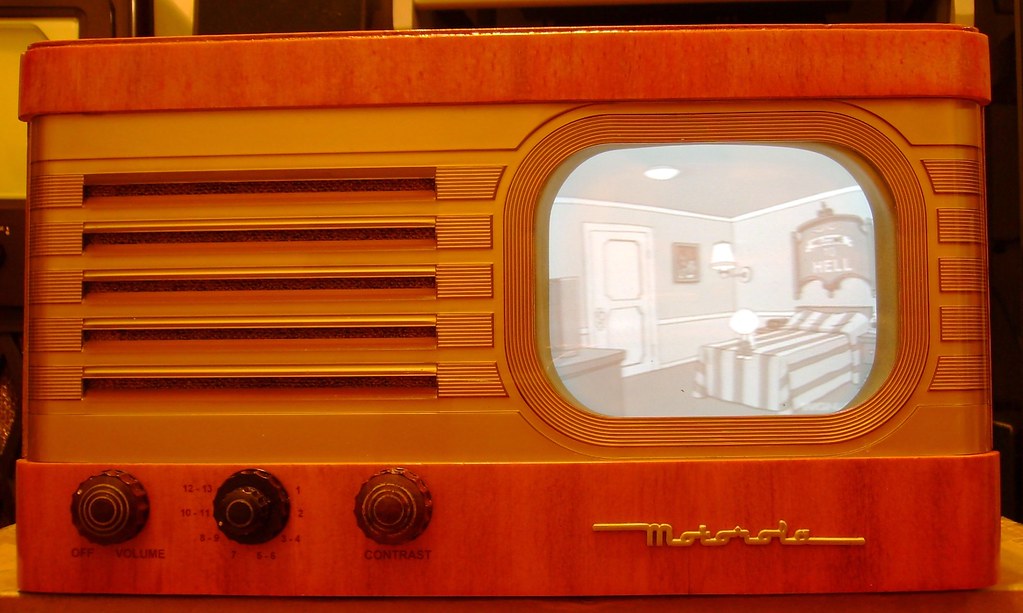 There are a couple flecks on the screen and a burn hole near the bottom. Not too bad considering the base had been ripped off this CRT! 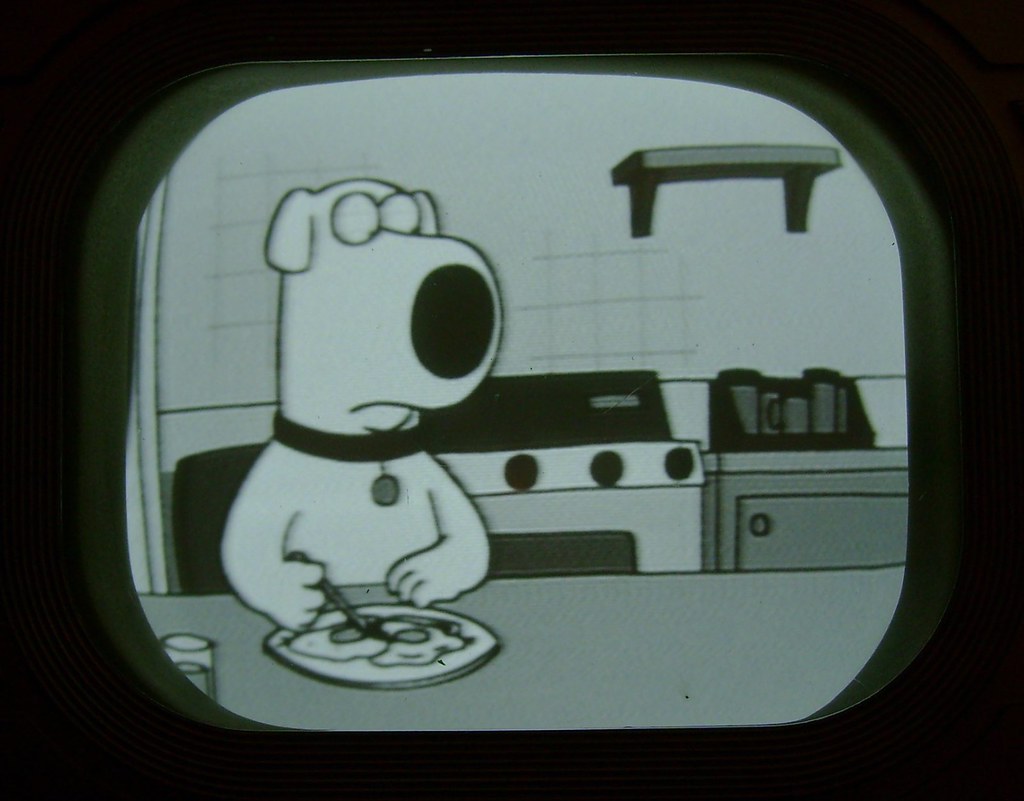
Last edited by bandersen; 07-07-2010 at 02:07 AM.
|
| Audiokarma |
 |
|
|


 Linear Mode

