
|
|
|
#91
 12-07-2013, 01:39 PM
|
||||
|
||||
|
Last few pics of original condition.
Does anyone know if a decal set is available for this set? Would be nice to restore the front panel control decals. I also don't have the original main knobs for the front. I imagine those will be hard to find. Any tips on a possible source would be greatly appreciated. I believe I saw an NOS tuning knob on eBay a couple of years ago. Didn't know I would ever need one then... 
|
|
#92
12-07-2013, 02:00 PM
|
||||
|
||||
|
Quote:
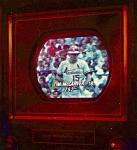
If that's correct, it's similar to the copy protection blocks that appear on the CT-100 screen but not modern TVs. Designers blanked out retrace lines on the CT-100; how could they have imagined a need to blank brute copy-protection! Pete
|
|
#93
12-07-2013, 02:14 PM
|
||||
|
||||
|
Quote:
http://www.solidesign.bizland.com/decals.html I looked through my box of CT-100 stuff and I guess I donated my last spare set. If you contact Scott, he can print you a new sheet from the old art file. He prints as many sets as will fit on one sheet, so then you will have some spares to share with future CT-100 owners. Phil Nelson Phil's Old Radios http://antiqueradio.org/index.html
|
|
#94
12-07-2013, 02:21 PM
|
||||
|
||||
|
I believe it's less this above, and more the fact that anything taken off the camera and then sent through any kind of image processing, digital, or analog, can take the image and expand it's dynamics to the limits of the image window for transmission..... For example, while the camera may have photographed a dark scene, meant to be black, it may not show up as black unless it's tweeked a little by a video processor.... Photoshop also allows this for stills, it's called adjusting Levels.... Almost like adjusting the contrast so some of the grays are lost....
In a video, if the blacks are extended below black, they can effect sync, if white is extended beyond white, you get some noise in the sound... Most likely anything sent over a live camera feed keeps everything out of the too black, or too white areas, Most likely the norm back in the day.... Today the black, and especially white in DVD menus are not photographed, but generated, and un naturally sent whiter than white, causing noise, blooming in that older set...
__________________
Yes you can call me "Squirrel boy"
|
|
#95
12-07-2013, 04:50 PM
|
||||
|
||||
|
Quote:

__________________
Evolution... 
|
| Audiokarma |
|
#96
12-07-2013, 04:59 PM
|
||||
|
||||
|
Hi miniman82,
I was just about to send off an email to Solidesign, but if you're willing to send me a set, I'll do my best to put them to good use. Great to see how folks here share resources and tips. Quick question here for anyone who has worked on these or faced a similar situation on a different set -- Is there a preferred way to get the safety glass off the plastic CRT mask? Looks like the original rubber or expanded foam seal liquefied at some point and ran downward a little, and then very helpfully turned to stone with quite good adhesive properties (see picture). I'm hoping not to damage the paint on the front of the mask, which might happen if I simply try to pry it apart. Maybe a little (but not too much) heat? Tom
|
|
#97
12-07-2013, 06:34 PM
|
||||
|
||||
|
Quote:
I did use the heat method on a CTC4 safety glass once, but the solvent method above works well if you are patient and there is less risk of breaking the glass. RE: the decals issue. It is my understanding that if you are doing a complete refinish and you place the decals on wet varnish, and then apply several more coats to the cabinet, that the decals will be less visable. I have yet to try this method so I cant vouch for it. But Nick is correct, if you apply the decals on the surface, the carrier of the decal will be VERY visable.
__________________
Vacuum tubes are used in Wisconsin to help heat your house. New Web Site under developement ME http://AntiqueTvGuy.com
|
|
#98
12-08-2013, 10:40 AM
|
||||
|
||||
|
There are various setting solutions that model builders use to brush over the decal after it's been first set. The solution softens the film, allowing the decal film to pull down tight against any surface irregularities when it dries, which eliminates voids under the film that show up as white spots when the film dries. Hiding the film edges becomes a process of applying many coats of clear finish over the area - enough so that the edges can be feather sanded in. There are various
thicknesses of decal films available too. However the thinner ones will be much more fragile to apply. I use to use this stuff back when I was into model railroading when I was younger. It was really amazing how many irregularities you cold conform a decal over. I think during manufacturing that they used the silk screening process. There's no way they could have taken the time to apply individual decals, unless it was for a prototype. Last edited by Kevin Kuehn; 12-08-2013 at 10:44 AM.
|
|
#99
12-08-2013, 10:42 AM
|
||||
|
||||
|
On both my CTC-4 and CT-100, I heated the frame/glass with a pair of hair dryers. Slowly apply pressure to pry them away from each other, they should come apart with little effort. Bob's right, it's a PITA to get the crap off the frame. I used a razor on the glass and some goo gone, that worked fine. But I ended up damaging a little of the paint on the mask scraping it off; I guess I always meant to repaint the damaged areas, but apparently it hasn't bothered me enough to take the thing back apart to fix it. Most of it is out of sight anyway, but some of them do drip down a ways and are more bothersome.
__________________
Evolution...
|
|
#100
12-08-2013, 03:08 PM
|
||||
|
||||
|
Thanks for all the advice on getting the black crud off. I looked over all of the above, and ended up using the following procedure which worked well:
1. Heat the edge of the glass with a heat gun, gently prying the glass up with a screwdriver and inserting little spacers as I proceeded along. It didn't take much heat -- perhaps about 100-120 degrees F was enough to get things apart. Whole operation took less than 5 minutes to get the glass off. 2. Used a razor blade to get most of the crud off the glass. No problem. A little residue left behind was easily removed with paint thinner and a rag. 3. I didn't have any mineral spirits on hand, but tried paint thinner on the crud on the mask side. I found it is a very marginal solvent for the crud, and using paint thinner alone would have taken a very long time and a lot of rubbing (mineral spirits might have done better). What worked very well was to wet the surface with paint thinner, and then use a razor blade to carefully scrape the crud off, rewetting things as material was removed. This is probably much safer than trying it dry. The paint thinner softens the crud slightly, and more importantly, lubricates the surfaces and the razor blade, so you have a nicely lubricated sliding interface for scraping the crud off. This step took maybe 15 minutes, finished up with rubbing with a cloth wet with paint thinner. All clean, and no scratches. ------------------ On the decal subject: On previous radios and TVs I have restored, I apply the decals between coats of clear finish. The result looks perfect, with not a hint of visibility for the decal film. I have not found it necessary to apply the decal with the clear finish wet. I simply let it dry, and apply the decal using the usual water float method with a tweezer. After the decal dries in place, the next coat of clear finish can be applied. A few coats over the decal with light sanding in between gets rid of any trace of a hump from the thickness of the decal film. Back to cabinet stripping... Last edited by Tom Albrecht; 12-08-2013 at 03:12 PM.
|
| Audiokarma |
|
#102
12-11-2013, 03:03 AM
|
||||
|
||||
|
Thank you for the decal note, Phil. I will need a set when I eventually have my CT-100 (re-)refinished. It has no decals now.
__________________
Chris Quote from another forum: "(Antique TV collecting) always seemed to me to be a fringe hobby that only weirdos did."
|
|
#103
12-21-2013, 10:51 PM
|
||||
|
||||
|
Been very busy with the cabinet refinishing for past couple weeks. Lots of dents to steam out and/or fill, plywood and veneer repair on the feet, etc.
Anyway, I've got the entire cabinet grain filled and stained, and wanted to confirm that the very bottom of the sides should be substantially darker than the rest of the sides -- everything from the horizontal veneer cut downward (basically the last 3-4 inches at the bottom). How about the bottom skirt on the front? Should that also be a shade darker than the rest of the front? That was not easy to tell on mine, since the original finish was in quite poor shape at the bottom. I'll darken the bottom areas further once I know whether that is correct.
|
|
#104
12-21-2013, 11:25 PM
|
||||
|
||||
|
I'll be happy to defer to the experts, but my cabinet is a uniform color from top to bottom. Of course, now it has been refinished, but I just looked at cabinet photos in its as-found condition and there's no indication that there was darker toning anywhere near the bottom (or anywhere, period).
As you've probably noticed from examining interior areas protected from sun fade, the original color was rather reddish. Phil Nelson Phil's Old Radios http://antiqueradio.org/index.html
|
 |
|
|


 Linear Mode

