
|
|
|
#1
 06-01-2022, 10:33 AM
|
||||
|
||||
|
Sprague TO-4 Leather Handle Replacement
Didn't know where to post this, but hopefully it'll be of interest to someone sometime.
I picked up a Sprague TO-4 (Capacitor-Resistor Analyzer) about 7 years ago. I did the electronic restoration and it worked perfectly for capacitor checking--actually reliable down to 2 pF. BUT because the original leather handle was broken I set it aside and let it gather dust for 7 years. 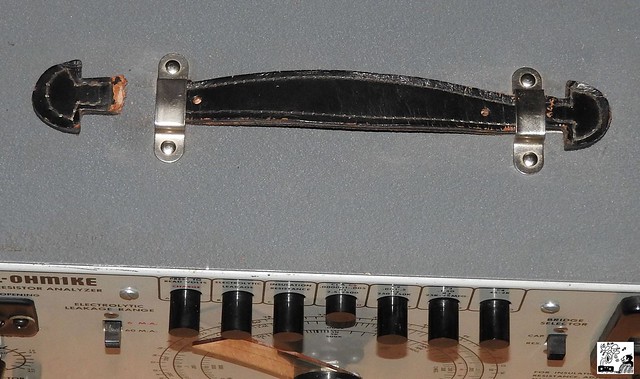 Then, I came across a 30-year-old leather belt which I couldn't wear. (It must have shrunk 3 or 4 inches since I bought it.)  I flattened the deeply embossed side with sandpaper: https://flic.kr/p/2n8XSRU Scanned the original handle to make a template and cut two identical forms from the belt: https://flic.kr/p/2n91A4b Pressed the layers together with hide glue overnight: https://flic.kr/p/2n91zYg Made holes for stitching with an electric drill, painted the leather with black fabric dye, and sprayed the top surface with satin black paint. (No photos) I found this leatherworking stuff in my sewing box: https://flic.kr/p/2n8XSzb Researched leather stitching online and settled on the simplest one--the "saddle stitch." (No photo) This is the really good part. The metal retainers for the handle are riveted, and they have to be attached AFTER the leather handle is complete. So I had to remove the riveted retainers and reattach them with the new handle in place. In the past I would have used nuts and bolts to simulate rivets, but I had long-ago purchased (but never used) a riveting kit for replaing riveted tube sockets:  Hence, an authentic-looking reproduction:  More details in Flickr album: https://flic.kr/s/aHBqjzG2bK
__________________
Winky Dink Damn the patina, Full speed ahead! 
|
|
|


 Threaded Mode