
|
|
|
#1
 03-20-2017, 01:28 PM
|
|||
|
|||
|
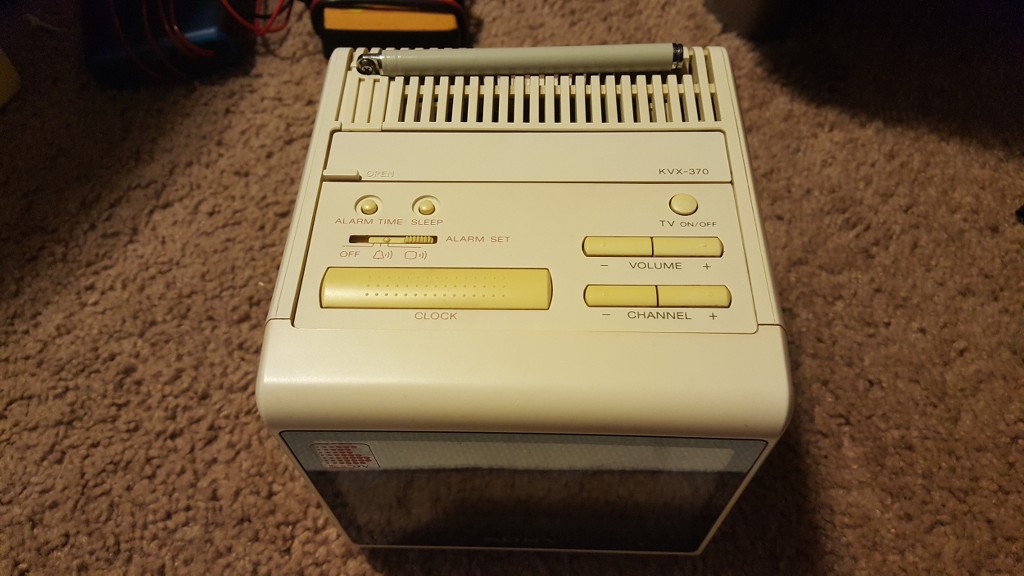
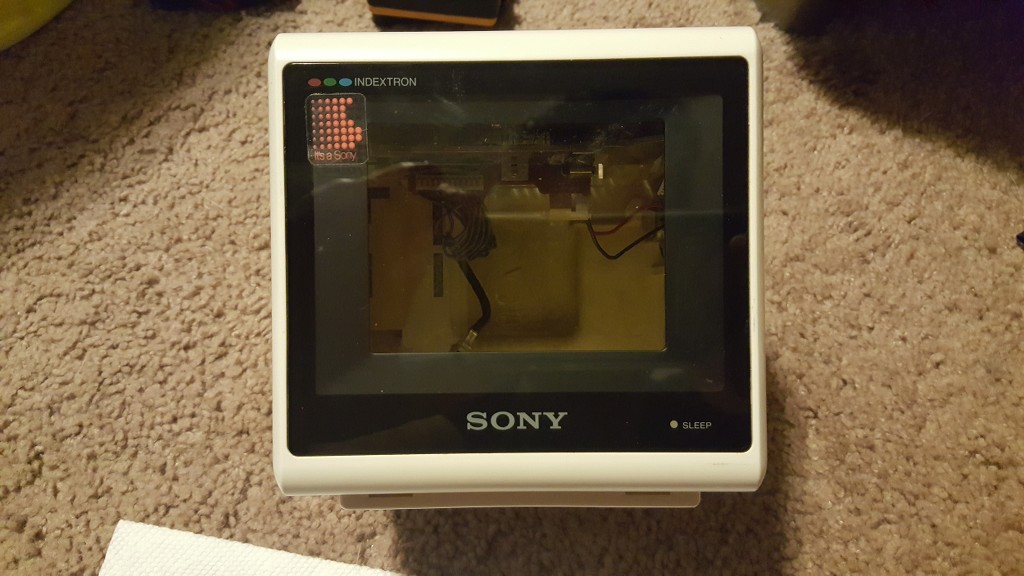
Sony Indextron...What do I have here guys? (REPAIR IN PROGRESS)
So i happened upon a white sony indextron at the thrift store the other day and found some interesting things online about it but as a whole there isnt a ton. It isnt currently working but i may hae found the culprit in a blown fuse on the power board. Upon visual inspection the caps look fine though the esr is reading a bit high on most. I do plan to recap but i want to see what the fuse does first as I do like the idea of keeping it as original as possible.
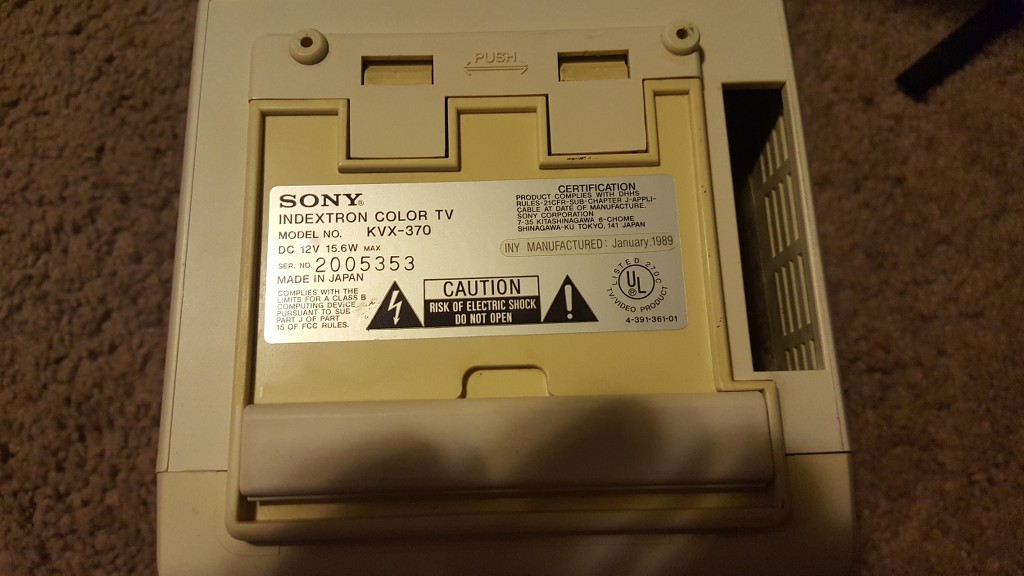
Anyways are these things still sought after? What do you think its value might be at this point? I would post pictures but at the moment it is in pieces. Like I said it is a white version with a manufacture date of Jan. 1989. The buttons have slightly yellowed with age which is pretty typical of electronics from this era. Last edited by Shibby; 07-31-2017 at 11:33 AM. Reason: Started Repairs 
|
|
#2
03-20-2017, 03:14 PM
|
|||
|
|||
|
I've had several of these over the years, and although they are pretty cool and have some unique technology behind them, they are vary finicky, and die easily. I'm actually glad to no longer own any of them.
These are not easy to recap. And the problematic caps in these spew corrosive gunk on the circuit boards causing further damage. You may be better off having Andy recap it, he has the experience with these. http://mail.videokarma.org/showthread.php?t=122975 You can get the service data from Jerome Halphen here: http://www.videokarma.org/showpost.p...9&postcount=11 The white one seems to be much scarcer than the black one. The value is hard to determine, because very few appear in any year on ebay. But they are down from the early 2000's, where a good one could bring in $300-750 depending on condition, complete with the box, etc. .
|
|
#3
03-20-2017, 03:51 PM
|
|||
|
|||
|
Quote:
 . . As far as the caps in my unit it has passed the sight test with flying colors. Not a single cap is bulging and i have not been able to find any signs of a leak. I know this really doesnt mean anything and i still plan to recap but I just thought that was interesting given the fact that its pretty much the first thing you read about when you look these things up. I have tested about four of the caps already with an esr meter and they were all reading slightly above spec telling me that if they arnt bad already they are certainly on their way out. The biggest most obvious issue that i did notice was the blown galss fuse. It make me wonder if this fuse blew earlier in its life which might explain the relative "ok'ness" of the caps. Its all speculation at this point until I am able to get a replacement fuse in. It has been surprisingly hard to find a fuse of that exact type. I have yet to find someone that sells a through hole glass fuse with the same specs as the original. I might just buy a holder style glass fuse and solder the pins from the old one to the new one. after all it does look like the old one was done this way.
|
|
#5
03-20-2017, 07:12 PM
|
||||
|
||||
|
Shibby:
First, welcome to Videokarma. As to reliability, just what Andy said, especially his last paragraph. I own two Indextron's, both recapped by Andy. This was done 7 years ago. They both function well today. The point I want to stress, congratulations, you have come into possession of a very rare television in terms of uniqueness and television history. If you don't already know, these sets are highly desired by collectors, the reason being, the Indextron was the first stand alone Index color consumer television. The Indextron paints a color picture with only one electron beam! See this link for more information. https://visions4netjournal.com/indextron/ Edit: I have the complete service manual. It's yours for the asking.
__________________

Last edited by etype2; 03-20-2017 at 07:21 PM.
|
| Audiokarma |
|
#6
03-20-2017, 07:24 PM
|
|||
|
|||
|
Quote:
Also now that you say that about the power adapter the blown fuse may be my own fault. It did come with the original power adapter but when i plugged it in at the thrift store to test the tv i got nothing. when i grabbed the adapter i accidentally dropped it on the floor so i thought it might be possible that i accidentally broke it. I grabbed another adapter of the same spec and tried again but nothing. That may be where it popped because before i distinctly remember hearing a noise come through the speaker when i initially plugged it in but after trying the other adapter i got nothing. Ill post pictures here in a bit.
|
|
#7
03-20-2017, 07:35 PM
|
|||
|
|||
|
Quote:
Also it may sound crazy but its sort of an honor to me that i get to work on such a niche little part of history. I am certainly not into old televisions like the rest of you but I can certainly appreciate it. My grandfather in his day was the local tv repair guy and when I was very young i use to watch him fix them in his work room. That along with old jukeboxes. I really wish the family still had that house along with all the old tools to be able to share with you guys. He died a few years ago and left me with all of his old audio equipment including 70's record players, several reel to reel players and countless records and reels. did i mention he fixed jukeboxes? this means when he would get a new one in he would empty the records to add to his collection then sell the fixed machine off to the new guy. needless to say my little townhome is busting at the seems with boxes. or at least it use to be. I was able to sell of a good bit of the undesirable stuff.
|
|
#9
03-20-2017, 08:22 PM
|
||||
|
||||
|
At the bottom is the parts list I sent to Mouser. It was supposed to
be all the caps with a few extra type because I was not sure of size fit. I missed a few, including one hidden under the shield (bit only one) and two on the main board, I believe 0.47 uF. This was all the 105 degree C caps. Almost all were actually bad. Even recapped it didn't work since my attempts at cleaning the goo didn't get under the surface mount resistors. Apparently you really do need an ultrasonic. I had to pay Andy. He said that the problem was surface mount resistors that were still stuck on but had bad solder contacts. It does work OK except that some controls have slightly inadequate range. Doug McDonald The caps listed below are indeed correct types. Select Product Detail Customer Part # Order Qty. Price (USD) Ext. (USD) Status Date Invoice # Mouser #: 647-UPW1E471MPD Mfr. #: UPW1E471MPD Desc.: Aluminum Electrolytic Capacitors - Leaded Aluminum Electrolytic Capacitors - Leaded 25volts 470uF 10x16 20% 5LS 3 $0.30 $0.90 3 Shipped Jun 30, 2016 41306822 Mouser #: 647-UPW1A471MPD Mfr. #: UPW1A471MPD Desc.: Aluminum Electrolytic Capacitors - Leaded Aluminum Electrolytic Capacitors - Leaded 10volts 470uF 8x11.5 20% 3.5LS 2 $0.26 $0.52 2 Shipped Jun 30, 2016 41306822 Mouser #: 647-UHV0J331MED Mfr. #: UHV0J331MED Desc.: Aluminum Electrolytic Capacitors - Leaded Aluminum Electrolytic Capacitors - Leaded 6.3volts 330uF 105c 6.3x11 2.5LS 2 $0.39 $0.78 2 Shipped Jun 30, 2016 41306822 Mouser #: 647-UPW0J221MED Mfr. #: UPW0J221MED Desc.: Aluminum Electrolytic Capacitors - Leaded Aluminum Electrolytic Capacitors - Leaded 6.3volts 220uF 6.3x11 20% 2.5LS 3 $0.23 $0.69 3 Shipped Jun 30, 2016 41306822 Mouser #: 667-EEA-GA1C470B Mfr. #: EEA-GA1C470B Desc.: Aluminum Electrolytic Capacitors - Leaded Aluminum Electrolytic Capacitors - Leaded 16volts 47uF 6.3X7mm L/S=5.0mm Ammo Crmp 2 $0.43 $0.86 2 Shipped Jun 30, 2016 41306822 Mouser #: 647-USR1H220MDD Mfr. #: USR1H220MDD Desc.: Aluminum Electrolytic Capacitors - Leaded Aluminum Electrolytic Capacitors - Leaded 50volts 22uF 6.3x7 20% 2.5LS 4 $0.26 $1.04 4 Shipped Jun 30, 2016 41306822 Mouser #: 647-USV1C100MFD Mfr. #: USV1C100MFD Desc.: Aluminum Electrolytic Capacitors - Leaded Aluminum Electrolytic Capacitors - Leaded 16volts 10uF 7 $0.41 $2.87 7 Shipped Jun 30, 2016 41306822 Mouser #: 647-USV1V100MFD1TE Mfr. #: USV1V100MFD1TE Desc.: Aluminum Electrolytic Capacitors - Leaded Aluminum Electrolytic Capacitors - Leaded 10UF 35V 105c 2 $0.43 $0.86 2 Shipped Jun 30, 2016 41306822 Mouser #: 647-UPW2C4R7MPD Mfr. #: UPW2C4R7MPD Desc.: Aluminum Electrolytic Capacitors - Leaded Aluminum Electrolytic Capacitors - Leaded 160volts 4.7uF 8x11.5 20% 3.5LS 2 $0.34 $0.68 2 Shipped Jun 30, 2016 41306822 Mouser #: 667-ECE-A1EKA4R7 Mfr. #: ECE-A1EKA4R7 Desc.: Aluminum Electrolytic Capacitors - Leaded Aluminum Electrolytic Capacitors - Leaded 4.7UF 25V MINI ALUM ELECT (KA) 3 $0.20 $0.60 3 Shipped Jun 30, 2016 41306822 Mouser #: 647-UPW1HR47MDD Mfr. #: UPW1HR47MDD Desc.: Aluminum Electrolytic Capacitors - Leaded Aluminum Electrolytic Capacitors - Leaded 50volts 0.47uF 5x11 20% 2LS 3 $0.16 $0.48 3 Shipped Jun 30, 2016 41306822 Mouser #: 647-USV1HR47MFD Mfr. #: USV1HR47MFD Desc.: Aluminum Electrolytic Capacitors - Leaded Aluminum Electrolytic Capacitors - Leaded 50volts 0.47uF 4x7 20% 1.5LS 2 $0.41 $0.82 2 Shipped Jun 30, 2016 41306822 Mouser #: 647-UTT1H010MDD Mfr. #: UTT1H010MDD Desc.: Aluminum Electrolytic Capacitors - Leaded Aluminum Electrolytic Capacitors - Leaded 50volts 1uF Mini Low Impedance 3 $0.41 $1.23 3 Shipped Jun 30, 2016 41306822 Select All
|
|
#10
03-20-2017, 08:54 PM
|
|||
|
|||
|
Thanks so much dtvmcdonald....You guys are seriously awesome. I did plan to run the boards through an ultrasonic bath though i have never done that before. will need to look up a good bath solution and technique for this.
|
| Audiokarma |
|
#11
03-20-2017, 09:35 PM
|
|||
|
|||
|
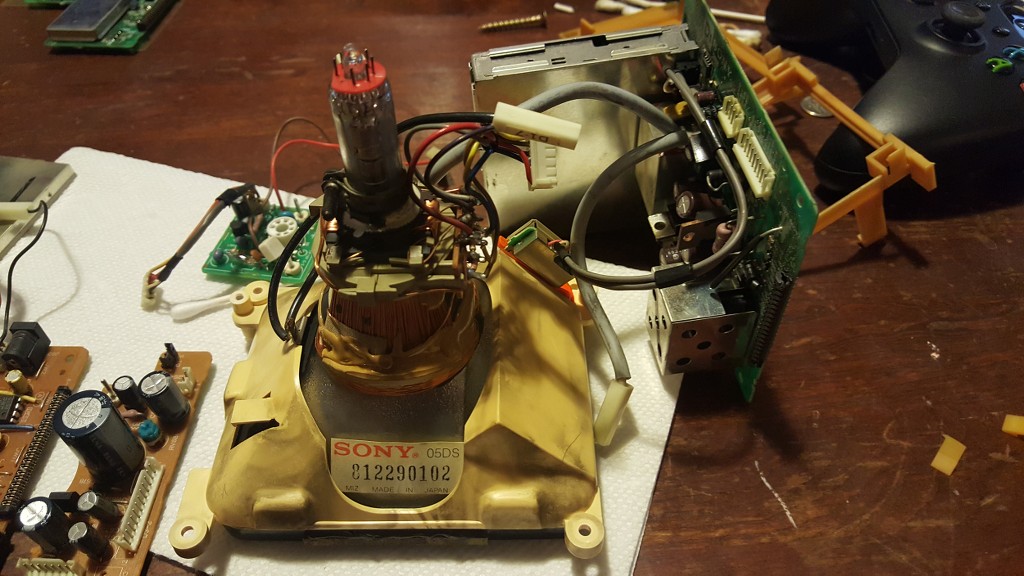
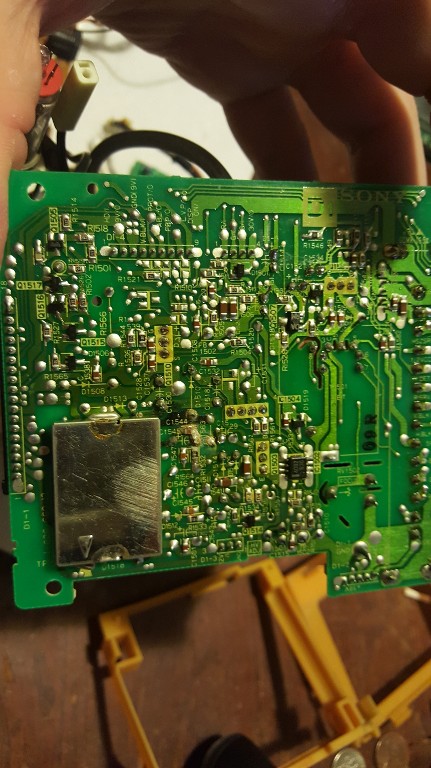
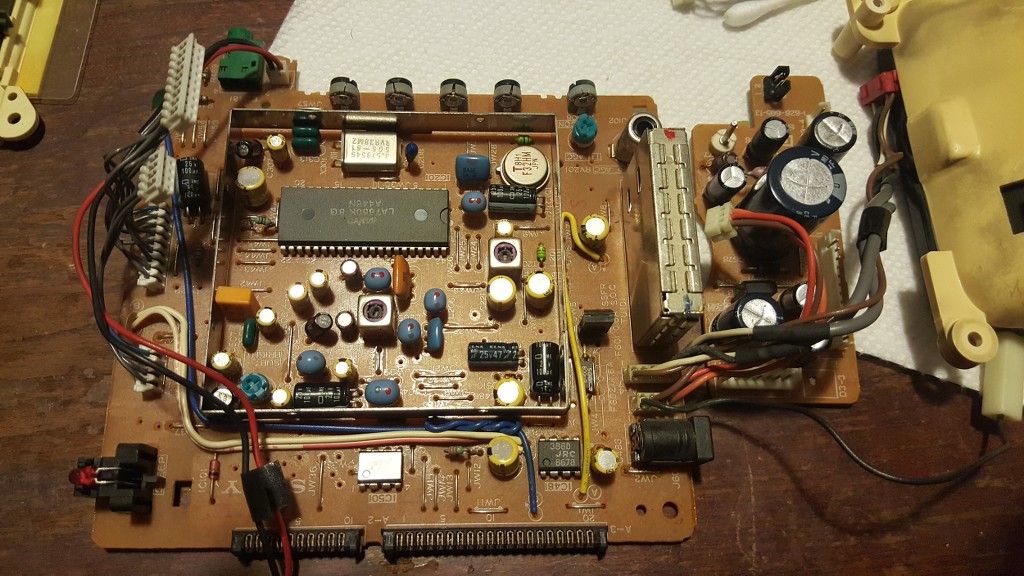
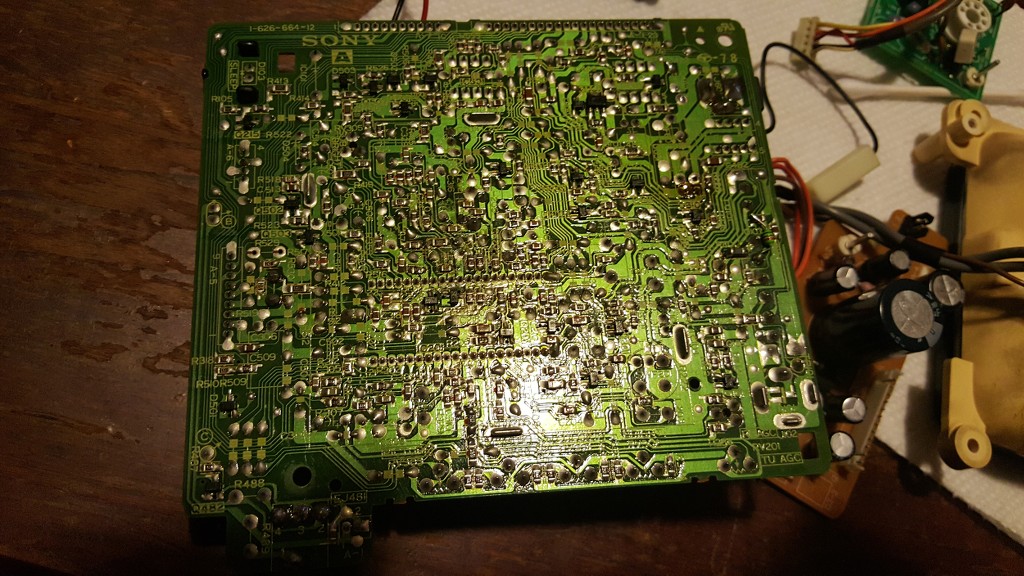
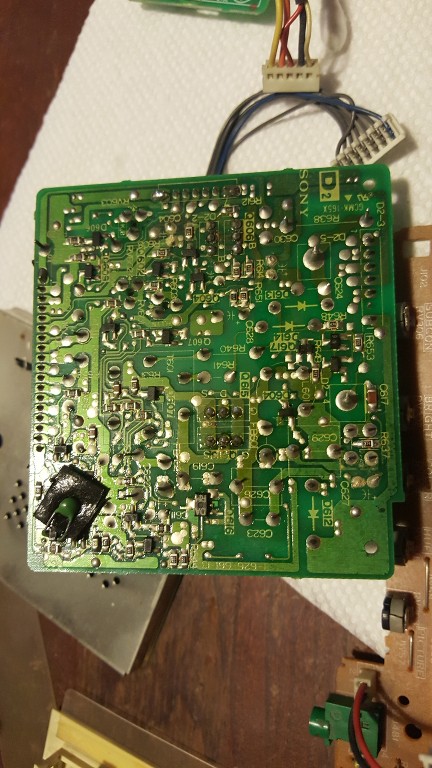
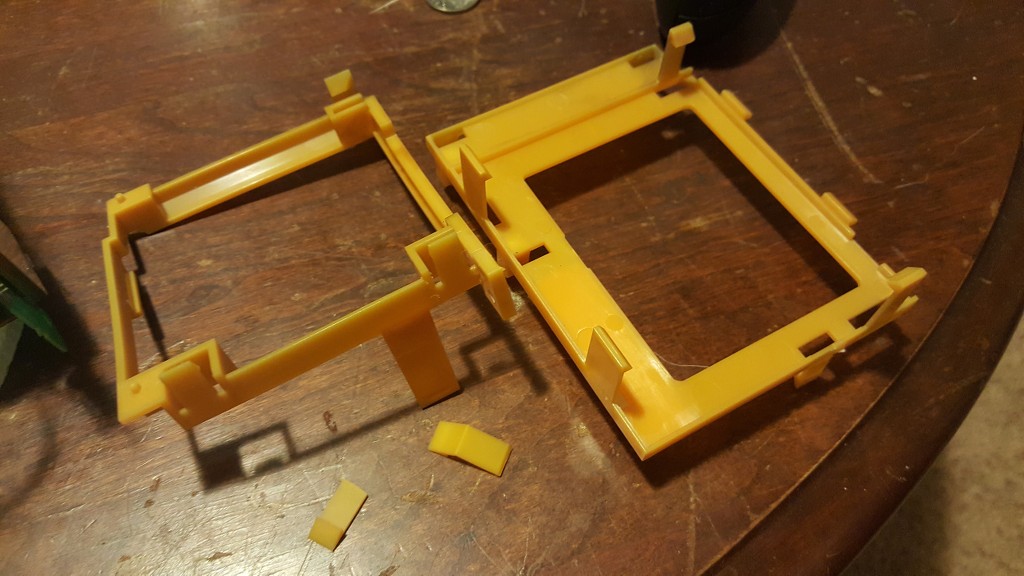
So heres some pictures for the curious. What do you guys think? As you can see at the end there the bromine has taken over the internal support pieces and they have become extremely brittle. Nearly every little clip broke during disassembly and i have been slowly reassembling it with cyanoacrylate (super glue) but the good stuff with the activator. The two pieces you see left there on the table i have yet to find the home for.
|
|
#13
03-27-2017, 11:36 PM
|
|||
|
|||
|
Quote:
.
|
|
#14
07-31-2017, 11:30 AM
|
|||
|
|||
|
So I have finally gotten around to trying to fix this thing. A beautiful thrift store Sansui 661 got in the way among other things. So I went over every board and documented each and every through hole capacitor and sent the order out through Digikey. I have gotten the vast majority of the caps replaced except for some of the super tiny ones under the shields. I will get to these soon. The larger board that is directly connected to the tube seemed to have the most damage. Several leaky caps with electrolytic goo all over the board. the corrosive damage from this was seemingly minimal be there were certainly a few components that had suffered a bit of damage to their solder joints. I was able to get these joints cleaned up and fixed but i can say it certainly wasn't easy. I had never had the opportunity to work on a damaged bard such as this before so it was certainly a learning experience. I checked continuity between each solder joint and the next component down the line and everything looked good.
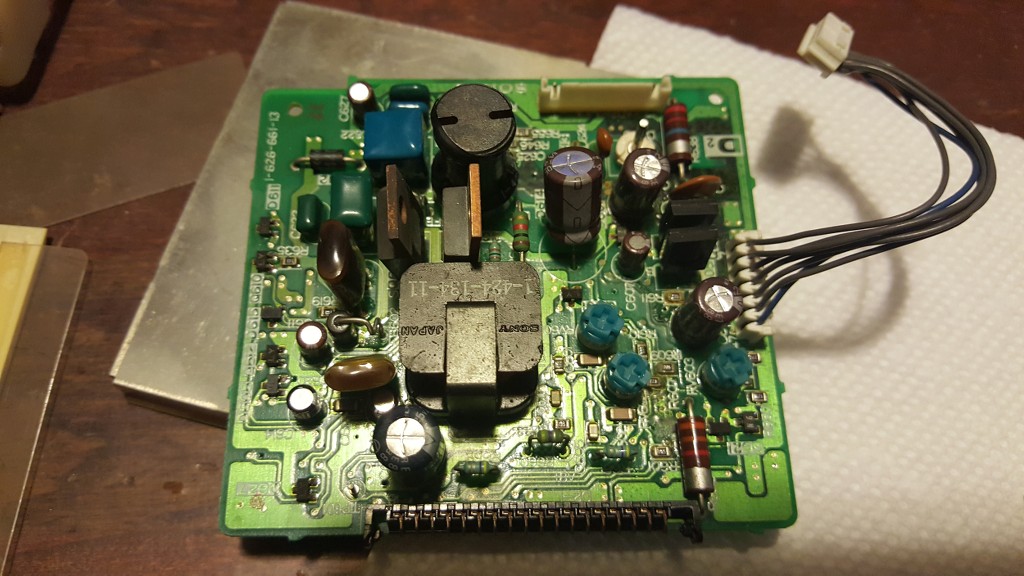
After getting the majority of the new caps in and fixing some ugly joints (it appears that someone has been in here before) I went to reassemble her on the bench to see if I would get anything out of her. In a temporary laps of brain power I stacked the main board connected to the tube (D1?) on top of the shield of the power board forgetting to place the cardboard spacer in between to prevent shorts. well I plugged her in and of course got nothing. Until about 10 seconds later the smoke came. I quickly unplugged the power supply and tried to see where it was coming from. After plugging it in a couple more times I was able to see that the smoke was coming from the B734 transistor on D1. I pulled everything back apart and had a closer look. All three legs were burnt and she had a hole blown right through her. I have to admit it was kind of cool . I went ahead and desoldered the transistor and sure enough there is a short between the collector and emitter pins. I had a look at everything else on the board and it doesn't seem as if anything else had suffered any damage. Heres hoping. I have a couple new transistors on the way from ebay so hopefully I'll be able to have another go here soon. I did try powering everything up again with the cardboard spacer in place and as expected did not get any smoke so I am certain that I am to blame for this and not a component on the board.Anyway in the mean time I would like to look into running the boards through the ultrasonic (something I should have done first). Does anybody have any advice for disconnecting the D1 board from the tube? Also other than the flyback is it ok to leaving everything else on? Cables, Plugs, pots, chips and soldered in daughter boards?
|
 |
|
|


 Linear Mode

