
|
|
|
|
|
#1
 08-18-2017, 01:19 PM
|
|||
|
|||
|
Quote:
Any luck finding a schematic for the wiring? Looks like you're almost ready to start putting the vending machine back together. 
|
|
#2
08-21-2017, 07:19 PM
|
||||
|
||||
|
I have been unsuccessful at locating schematics. Nobody seems to have them.
 I am almost done painting. There are still two parts that need to be sandblasted and painted. I only have six cans left with nowhere to buy tint matched alternatives so I can't do much more until those are done. I'll be picking those up this week and hopefully dropping them off at another sandblaster next week sometime.
|
|
#3
09-16-2017, 09:16 PM
|
||||
|
||||
|
The last pieces have been cleaned, rust treated and repainted. We are ready to proceed with reassembly.
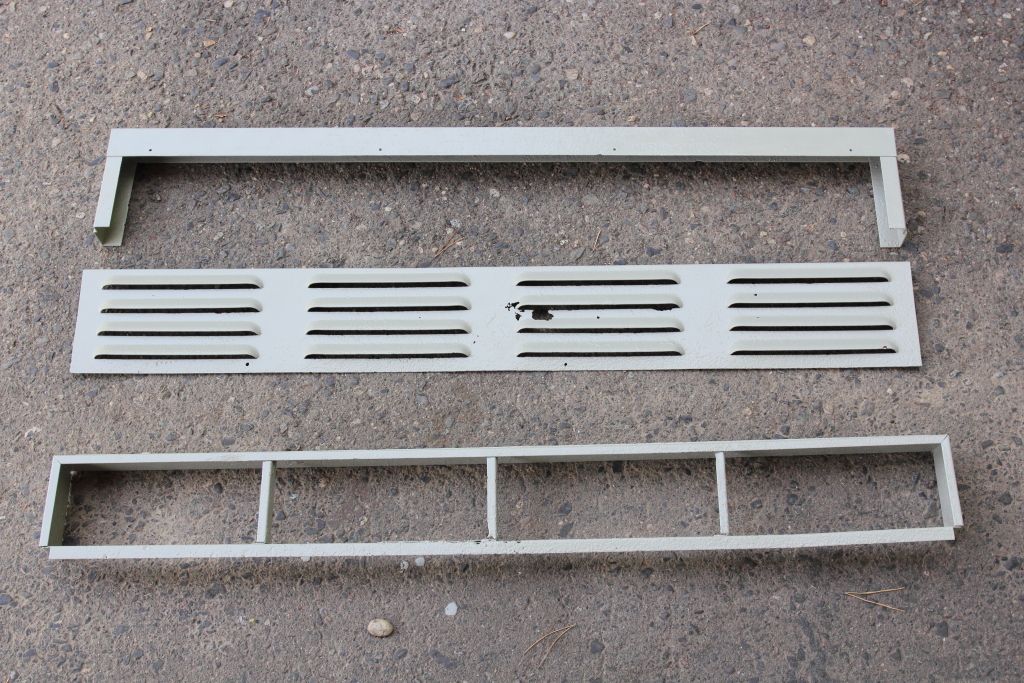 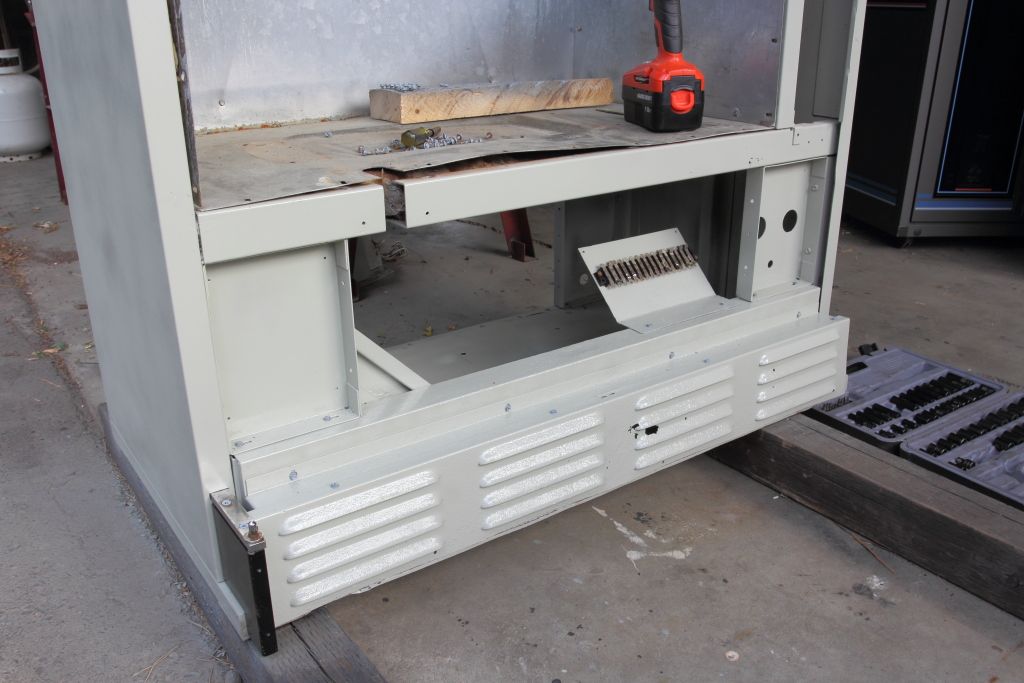 http://i11.photobucket.com/albums/a1...t/CGS_7703.jpg http://i11.photobucket.com/albums/a1...t/CGS_7705.jpg It was a good thing I waited until this was painted. One of my cans failed half empty so after four coats here and another coat on the sides I have one can left for emergencies. Also, here is the compressor now that it has been rebuilt. All it is missing is the replacement condenser and the fan then it can be purged and vacuum checked. 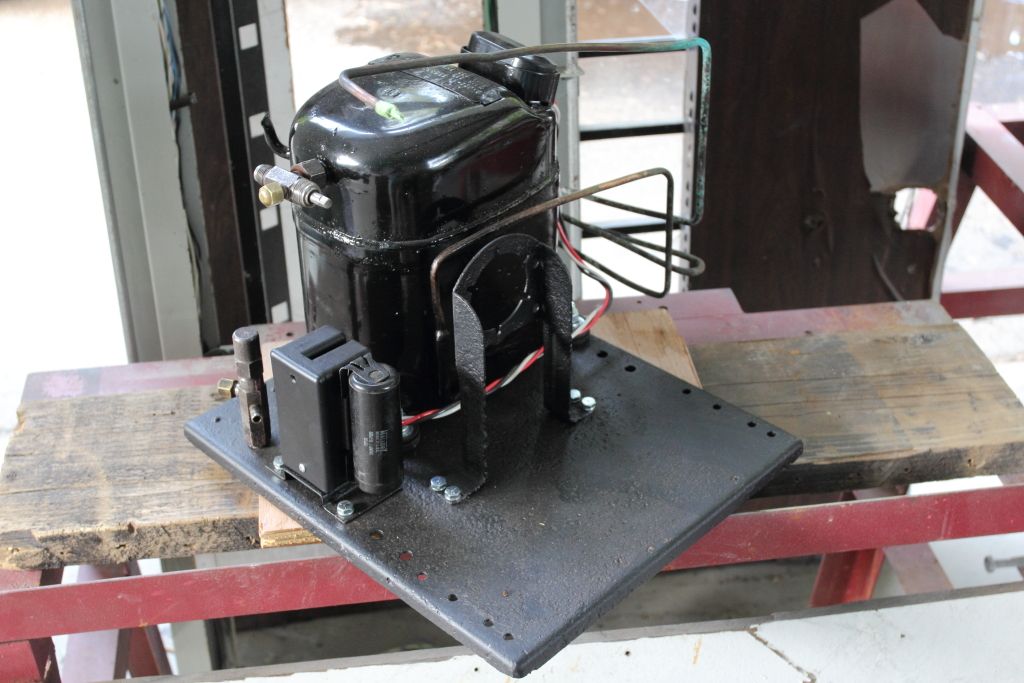 http://i11.photobucket.com/albums/a1...t/CGS_7706.jpg
|
|
#4
09-17-2017, 11:17 PM
|
||||
|
||||
|
FYI I'm putting direct links to my images below the img tagged ones because after two months I am still not getting complaints from anyone about if they are just seeing the "bandwidth exceeded" notice from Photobucket.
Cleaned and reinstalled the central column today. The chains and bearings were oiled and work much better now. The motors for the fans are good and likewise the motor and gearbox for the chains sounds excellent. I also started addressing the torque coupling for the motor shaft. At one point there was a tri-wing rubber insert that was part of the three-piece linkage but at some point it had presumably failed so the coupling was taped together. Likewise the cotter pins had gone missing and were replaced with nails. One came out with a hammer but the other had to be drilled out before I could install new cotter pins. The bottom half of the coupling is also apparently press fitted into a steel sleeve as it looks like it had started to split. This coupling really needs to be replaced if I could find a replacement.  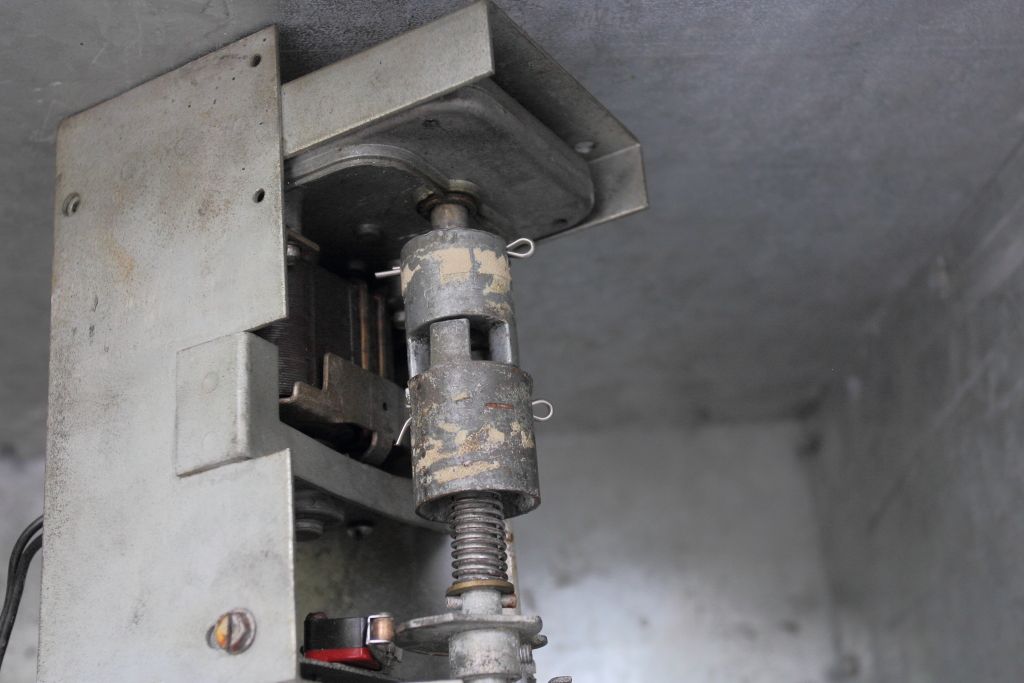 http://i11.photobucket.com/albums/a1...t/IMG_8701.jpg There was also this switch at the bottom next to the thermostat. It is some sort of Health and Safety interlock component that when you turn to the 9 o-clock position winds a 30 minute timer and presses in a switch. When the counter returns to zero the switch releases but a thermostat holds the switch closed until the temperature rises above a set limit, at which point the switch releases and something somewhere in the vending machine shuts down. When I got the machine it had been disconnected and bypassed. I found that the timer was not running until I flooded it with sewing machine oil and blew the excess out, then I could get that portion to work. The switch part also seemed good and the thermostat also seemed to function when I hung the assembly out of a freezer so indeed if the vending machine gets too warm it does...something. 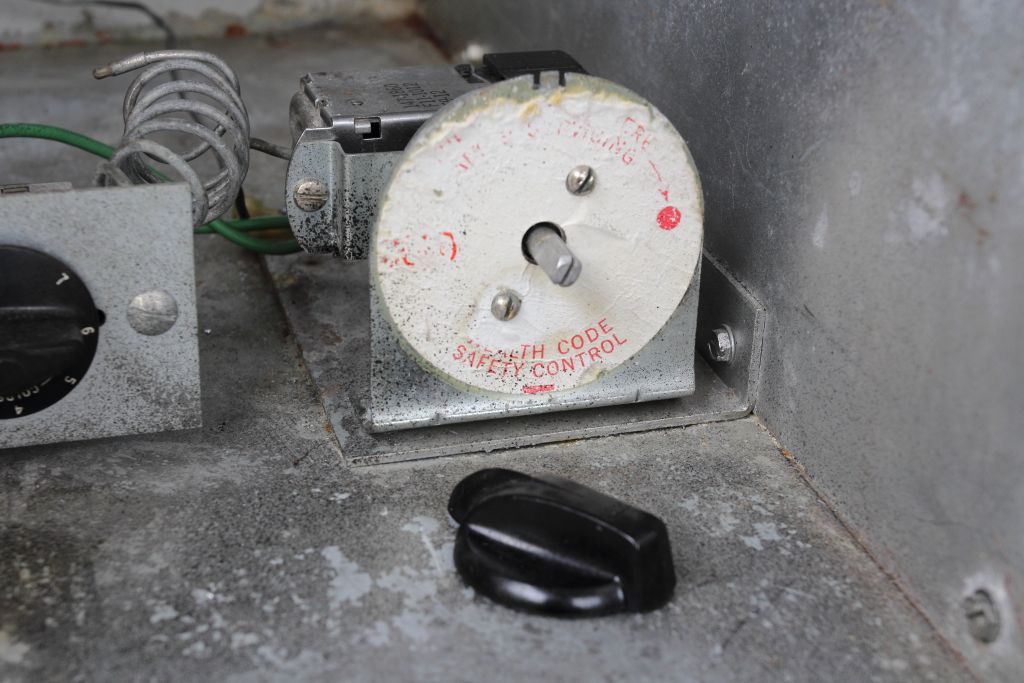 http://i11.photobucket.com/albums/a1...t/CGS_7707.jpg I also found that I had forgotten to paint one of the components and good thing I did not. It had a partial schematic on it! 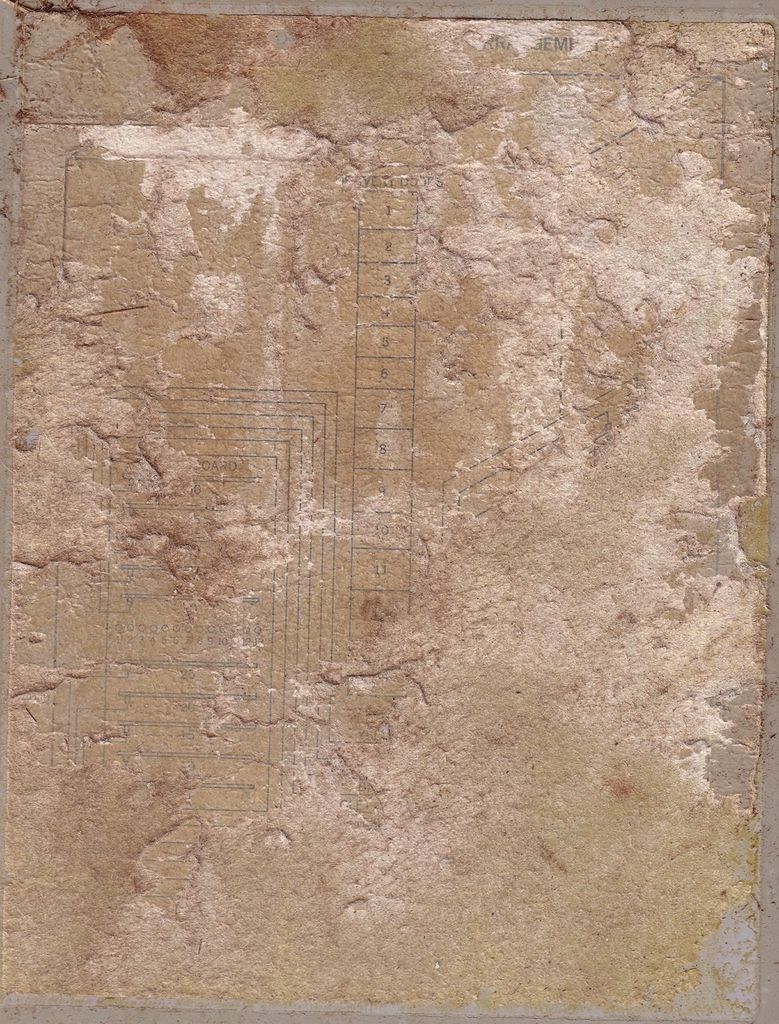 http://i11.photobucket.com/albums/a1...cket/Photo.jpg It's extremely hard to make out anything but I can clearly see the 13 doors and the plugboard for setting the prices, so this was probably the in-machine reference so you could rewire the doors for different values. That in mind I sure hope you turned the machine off first. I've all but confirmed that the ENTIRE VENDING MACHINE OPERATES AT 120V AC. Lots of places in here to get zapped. Finally because it's getting late in the year I rehung the door for now and checked some of the clearances. There is now very much signs that I am halfway done. The door is the last bit to finish and if I'm lucky I can get a good handle on that before the snow falls, then unfortunately the machine needs to be tarped up and moved so the car park can be used for the winter.  http://i11.photobucket.com/albums/a1...t/CGS_7708.jpg Last edited by MIPS; 09-17-2017 at 11:23 PM.
|
|
#5
09-24-2017, 01:15 PM
|
||||
|
||||
|
Spent last evening stripping down the door. A lot of the components again, are all screwed in so after a few dozen screws and about a dozen rivets on the exterior cladding you end up with this:
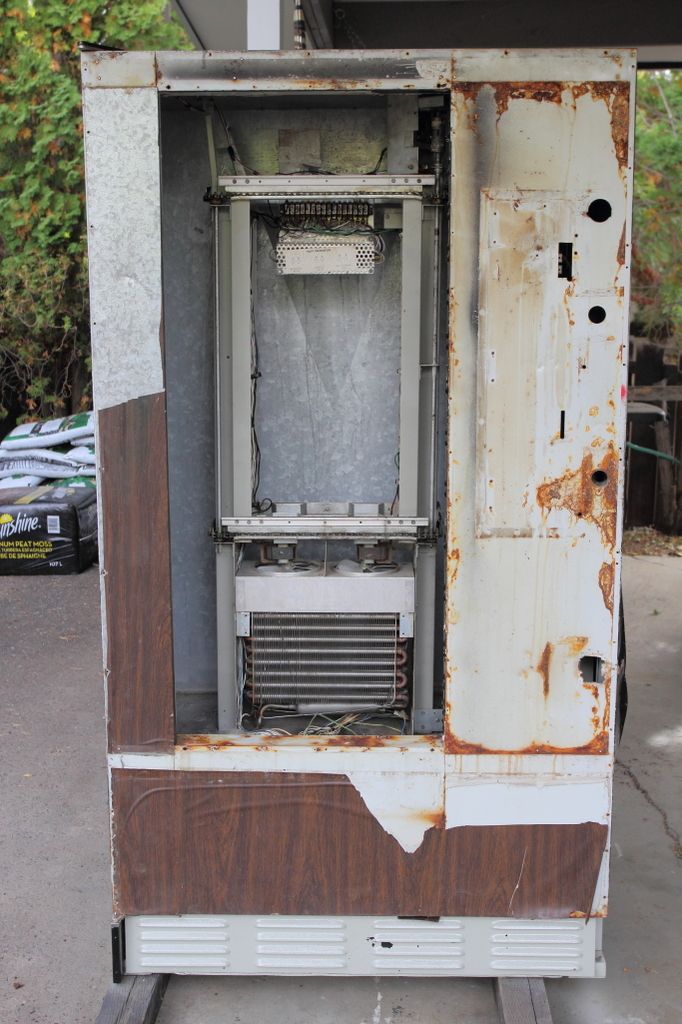 http://i11.photobucket.com/albums/a1...t/CGS_7714.jpg  http://i11.photobucket.com/albums/a1...t/CGS_7715.jpg  http://i11.photobucket.com/albums/a1...t/IMG_8730.jpg  http://i11.photobucket.com/albums/a1...t/CGS_7716.jpg 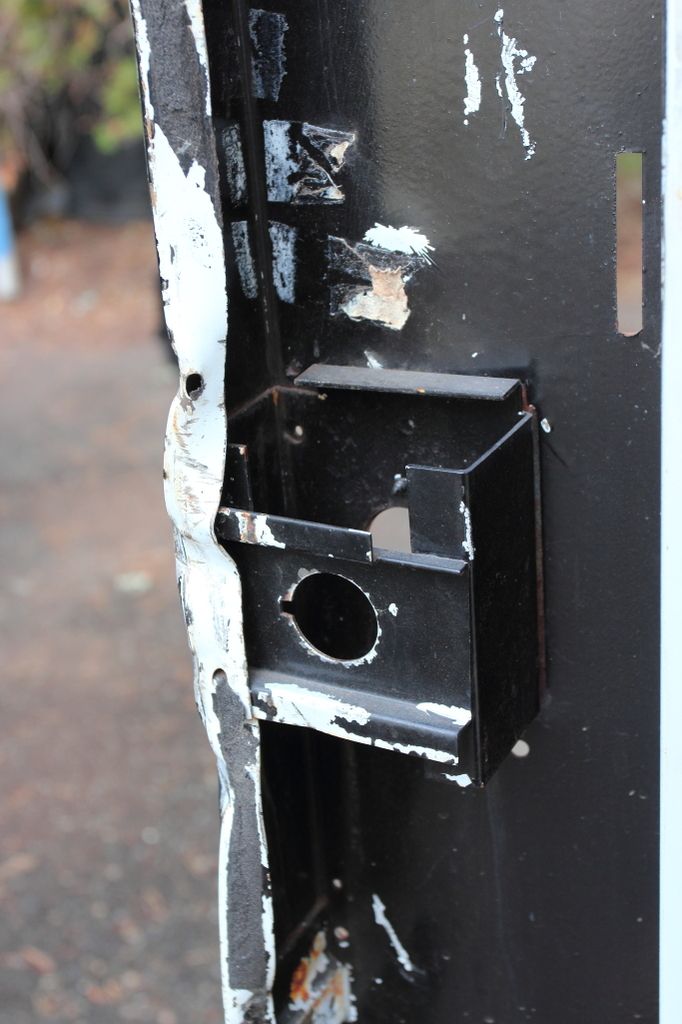 http://i11.photobucket.com/albums/a1...t/CGS_7717.jpg 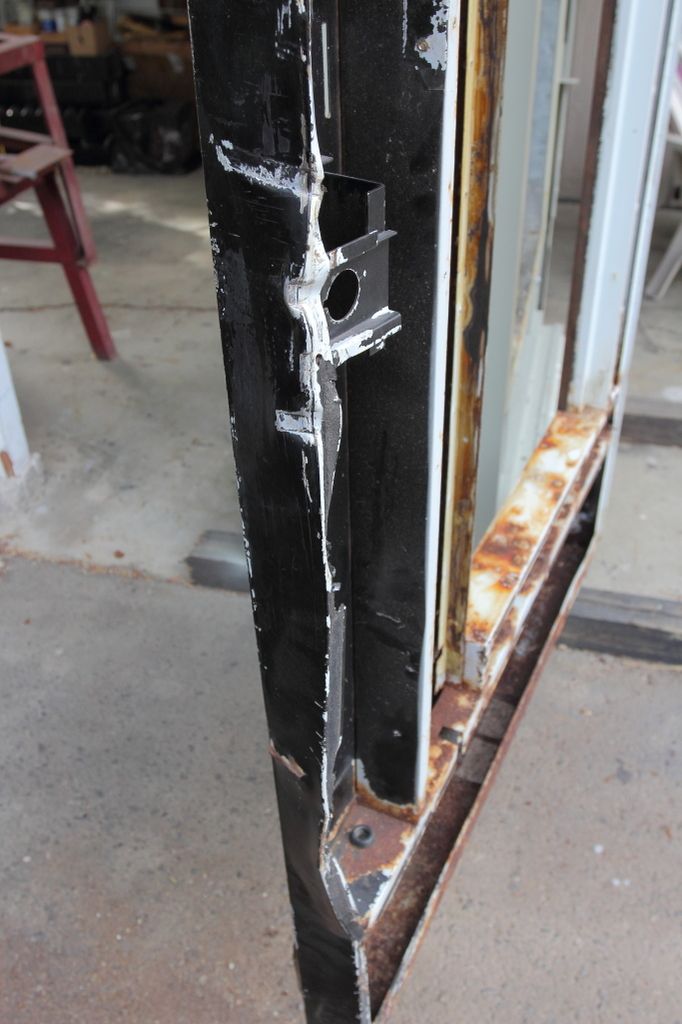 http://i11.photobucket.com/albums/a1...t/CGS_7718.jpg Okay, so here is the plan again. The damage is limited mainly to that end of the door. Because all the bracketing components for the latch are spot welded to the FRONT of the door I can surgically cut the side off. While it is removed I can bang out the curling caused by a prybar being used to open the machine. Once that is squared up I can then weld in a new piece of steel and start with the rust treatment. The damaged coin slot opening will be repaired with another piece of sheet metal so I can bolt the coin cup back in. A new piece of sheet metal will go over the front to mask the rest of the scars, which itself will be clad in new fake wood grain vinyl. The one thing I do not have is a source for the trim pieces. Half of them are too badly damaged to be reused but are required to mask some of the edges, gaps and rivets. Unfortunately, I'm out of time for the year. The frost has arrived. The machine will have to be tarped up and moved so the work area can hold a car and shovelling tools for the winter. I'll have to continue on the door in the spring. Over the Winter however, I get the lucky task of starting to look over what remains of the wiring harness and figuring out how it all goes back together because guess who STILL cannot find the goddamn schematics? Ugh....
|
| Audiokarma |
 |
|
|


 Hybrid Mode
