
|
|
|
#1
 12-19-2016, 10:07 PM
|
||||
|
||||
|
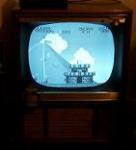
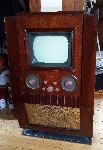
1956 Admiral T103 10" 14YP3B-chassis
Hey guys. As usual, its been awhile
") Anyways, Im back to working on this project after a good years hiatus. Had some more important stuff get put on the bench and that stuck around for awhile and after that was done, I worked on a few other things. I kind of forgot about this set. Was looking for some tubes in the basement and uncovered it. Had it covered by a towel, and had some junk piled on it... Anyways, Im back to working on this project after a good years hiatus. Had some more important stuff get put on the bench and that stuck around for awhile and after that was done, I worked on a few other things. I kind of forgot about this set. Was looking for some tubes in the basement and uncovered it. Had it covered by a towel, and had some junk piled on it...I dont remember exactly when I got this set, but I believe it was in the summer of 15. After seeing a couple series of restoration videos on the T103 (I think they were by Bandersen here on VK) I was inspired to re-cap mine. When I got it, the seller claimed it worked. Of course he had to plug it in and show me, and it did-kind of work. It had a raster and that was it. So I had that to go from. I did the standard re-cap job. There still are a few original plastic caps in it, but those are higher voltage caps that I still dont have any replacements of. I also put all new e-caps in too. One of them was already replaced, but some of you guys here would probably shit yourselves if ya saw how it was done. I may have a picture somewhere, maybe not. Anyways the old can was removed and the new can was electrical taped to another can and another component in the tv, and extended wires were soldered in place to be able to connect it in circuit. Wasnt pretty at all. And of course when I took it apart the tape had been degrading due to the heat and whatnot, so a little messy too! Anyways, after recap, the set still didnt work any better than before. I could not get signal through. Found a couple tubes in the IF sections had shorts. I picked up good ones and now all tubes are good, but the set just acted marginally better. I was finally getting something through, but not much. No sound other than some scratch from the dirty control and a very weak picture. Everything was synced good and had a recognizable picture, but weak. So, if I remember right, I pulled the tuner out and cleaned the contacts inside. Put a new capacitor on it (that was normally unreachable when together) and re-attached it in the set. Set still has problem with the tuner In order to get signal, it has to be carefully placed slightly counter clockwise of the click detent to go through. If thats done, and it actually stays, I now get a pretty good looking picture. Any way to fix that tuner issue??? Still needs some more work in regards to the picture, but a great improvement. Still, and to this day my main issue. NO SOUND  That was where I was at, until just recently. All Ive been doing lately is messing with it. Found some wires that needed re-soldering on the pcb, and 1 joint that needed reflowing. Still had no sound. I also have a weird little resistor with one lead on the power switch and the other going to nothing?! I have no clue what the deal with that is. Cant find anything in the schematic on it and there is no spot nearby that looks like where it used to be connected. I dont know if it was supposed to be on 1 of the lugs of the volume or what Well, after more looking and messing around, I finally got some sound from the signal being put in. Not much, volume needs to be near or at max, but Sound!! At last!!!  I noticed that it looked as if someone bottomed out one of the adjustable sound coils, so I figured, what the hell, what have I got to lose from this and started screwin the Sound IF and Quadrature Coil back and forth. Best I got was stated above. What else can I do to get better sound? I noticed that it looked as if someone bottomed out one of the adjustable sound coils, so I figured, what the hell, what have I got to lose from this and started screwin the Sound IF and Quadrature Coil back and forth. Best I got was stated above. What else can I do to get better sound? Well if you read my whole essay, I applaud ya!!! Well if you read my whole essay, I applaud ya!!! Please give me some thoughts, opinions, advice or whatever on what I should try next to get my little 10 Admiral going better. I'd like to make this one a watcher sometime down the road...though i'd like to mod it too, but getting it working correctly is my main priority first! Please give me some thoughts, opinions, advice or whatever on what I should try next to get my little 10 Admiral going better. I'd like to make this one a watcher sometime down the road...though i'd like to mod it too, but getting it working correctly is my main priority first!Schematic: http://www.earlytelevision.org/pdf/A...Sams_350-1.pdf 
|
|
#2
12-19-2016, 11:12 PM
|
||||
|
||||
|
Voltage checks in the sound related stages against those listed in the sam's may point you to the culprit.
If you've got a B&K 1075/76/77 analyst you could try signal injection troubleshooting, or if you have a scope you could do signal tracing. I just realized I have one of those sets too.
__________________
Tom C. Zenith: The quality stays in EVEN after the name falls off! What I want. --> http://www.videokarma.org/showpost.p...62&postcount=4
|
|
#3
12-20-2016, 09:39 AM
|
|||
|
|||
|
Quote:
You have to remove the cover check for play. IIRC, the rear one. The proceedure for repair is to properly center the disc and carefully drill a hole through the hub and the shaft and use a cotter pin.
|
|
#4
12-20-2016, 11:01 PM
|
||||
|
||||
|
Quote:
I guess these sets are quite common  I've seen some other collectors with them too. I've seen some other collectors with them too. Quote:
Well, I got measurements from the 3 tubes that have the most to do with the sound. I've got some that are way off... Title tube# Type Sound IF V6 5U8 p1] 212 p2] 0 p3] 40.9 p4] 0 p5] 0 p6] -0.9 p7] 0.3 p8] 36.7 p9] 33.3 Audio Det. V7 3DT6 p1] 0 p2] 1.2 p3] 0 p4] 0 p5] 98.7 p6] 78 p7] 0 Audio Out. V8 12CU5 p1] 74.6 p2] 74.4 p3] .08 p4] 0 p5] 73.3 p6] 256.5 p7] 250 These were all taken after a 20 minute warmup with a digital multi-meter.
|
|
#5
12-21-2016, 04:08 PM
|
||||
|
||||
|
Ok, after some more work, I found that R41 and R42 (on the Audio Output tube) were way off, so I changed them and sound got a little better. All others directly connected to the AO were within range.
Started checking around the 5U8 sound IF. I found that it seems my sound IF coil is bad. I get no reading. It's not shorted, but I'm not sure if its completely open either. All I know is that its too high for my meter to read, and its only supposed to be at 4ohm's. It is though, still affecting sound. When I stick my allen wrench in to adjust, it picks up on it, and will make more static sounds. and If I mess with it, and move it from its current setting, it will kill the sound that I do get now out of the set. I also noticed I need to figure out how to adjust the fine tuning. I get the best sound when the picture starts getting wavy and distorted. I get scratchy, static-e sound when I move it to get the best stable picture.
|
| Audiokarma |
|
#6
12-21-2016, 04:38 PM
|
||||
|
||||
|
You have two issues. First you need the address that open coil. Check if it is open or broken inside at the terminals or anywhere not covered by windings. If you can reach the break you should be able to fix it...Otherwise it is part huntin' time.
If the coil don't fix your fine tuning issue then you will need to align the audio IF stages AND ONLY THE AUDIO IF. The tuner can NOT fix audio and pix not fine tuning at the same point. When the two don't line up one has drifted. Unless picture is really bad (at best), you should tune the sound to match up on the fine tuning. The easiest procedure to line up the sound on the fine tuning is to fine tune for best pix, then best sound, then move back towards best picture till audio gets fainter (but still remains) then peak the audio IF system. You may need to repeat this a few times to 'walk' the IF into fine tune match with the pix.
__________________
Tom C. Zenith: The quality stays in EVEN after the name falls off! What I want. --> http://www.videokarma.org/showpost.p...62&postcount=4
|
|
#7
12-24-2016, 12:31 PM
|
||||
|
||||
|
Well, I got the coil fixed! Turns out it had a loose connection on the one side and just came off when I poked it with a probe. Re-soldered that, and its nice and loud now! Gave it a few adjustments and it sounds great.
Ive come to the conclusion that the sound, seems to be in a good position for where it is on the fine tuning. It’s the video that’s not correct. It has to be cranked all the way to 1 side(don’t remember if its to the left or right) to look good, while good sound is in the middle. Unfortunately though, I killed the little TV. I started messing with some of the slugs on the IF board to see what they’d do in relation to the image, and the one shorted out and burned a resistor on the board. I changed that resistor, then powered it up again and it immediately fried that one, so I f****d it up… I was at the A2 slug when it shorted and It wants to keep burning the R23 resistor- in accordance with the schematic I’m using. It appears to be the sets B+ … Well, whats next. Am I to figure that the coil itself is now shorted out and bad and have to search for one, or something else in my circuit. When it initially happened all I noticed that smoke and burned was that 330ohm resistor. Haven’t found anything else.
|
|
#8
12-24-2016, 01:39 PM
|
||||
|
||||
|
Perhaps I was not clear enough...If audio and video don't line up on the fine tuning ONLY adjust the audio.....Video IF should NEVER be touched without a CALIBRATED SWEEP/Marker, a scope and knowledge of video alignment or a junk set to experiment with first.
It is challenging to get Vid IF right even when you have the correct test equip/experience doing, and a 'visual' alignment correctly is something of a miracle...If achieved. ....Hence why I said don't touch the video IF unless the picture is really bad at best...You don't want to mess with the video IF unless it is bad enough that you have nothing to loose. Most sets have OSC adjustments in the tuner to re-center fine tuning. What I'd do if handed that set is try to EXACTLY undo all vid IF adjustments you've done*, get it working, walk the audio to the video, then use the tuner adjustments to center the fine tuning. *It is possible that if you reverse what you did to the slug of the shorted coil that it will unshort....If that don't work get the can off of it and see if you can find/clear the short. If that fails you'll need a new coil.
__________________
Tom C. Zenith: The quality stays in EVEN after the name falls off! What I want. --> http://www.videokarma.org/showpost.p...62&postcount=4
|
|
#9
12-25-2016, 12:12 AM
|
||||
|
||||
|
Sorry to hear your set is messed up. I noticed you mentioned using an allen wrench to adjust the coils? Only a plastic hew shaped tool should be used. A hard metal tool is likely to break the powered iron slug. Also using a metal tool throws off the adjustment as it effects the properties of the coil being adjusted.
|
|
#10
12-29-2016, 04:52 PM
|
||||
|
||||
|
Well, it seems I got that fixed. That coil is a little funky, but it's stable now, and the new resistor isn't blowing up anymore. My B+ is now at a solid 260v. Is that ok? It's 10 higher than what the schematic shows it should be.
Any chances I could have damaged anything other than the resistor? It doesn't seem like anything is operating any different... other than, maybe the vertical being more sensitive, but that just might be me being more...paranoid about it. Tom, you were clear enough. That's just how I am. Video was off, so I figured i'd just mess with the video controls and see what happens. I always return back to original position if there is no improvements, and I didn't get any improvements with the ones I messed with before, so yes they were returned to their exact original settings. So, for re-centering the best image in the fine tuning control, would be to adjust an oscillator control on the tuner itself? Well, if so that's more simple than having to mess with all those others. Hey B., yea I figured that when messing with the sound coil. It was a little difficult doing the job, because it would start shushing at some points, then clear up when the tool was removed. Well, is it even possible to get a plastic allen wrench type of tool for these. I've never seen one, and my little allen that I'm using fits the slugs perfect. If I had something plastic that would fit, id use it, but I don't, and it looks like I cant buy the tool at a local store.
|
| Audiokarma |
|
#11
12-29-2016, 05:39 PM
|
||||
|
||||
|
Yes, they are available but probably only online. Here are some for example: http://www.ebay.com/itm/Alignment-To...-/381012365113
|
|
#12
12-29-2016, 05:51 PM
|
||||
|
||||
|
Quote:
If you must buy local look for a ham radio place, radio shack (if your lucky), old TV repair shop, or Chester Electronics in Kenosha. The only app for those plastic tools is older electronics so you ain't going to find them on the shelves of your local hardware store, and most places devoted to consumer electronics won't carry them either. I have a few, but I try not to let 'em go since I keep loosing and rediscovering them.
__________________
Tom C. Zenith: The quality stays in EVEN after the name falls off! What I want. --> http://www.videokarma.org/showpost.p...62&postcount=4
|
|
#13
12-29-2016, 09:47 PM
|
||||
|
||||
|
Thanks for the link Bandersen. There actually rather cheap too! I don't see the one I need at the moment though for this set, unless its just obscured by the image they have of the group.
I do have a radioshack in town, and they do sometimes surprise me with what they have. The new 330ohm resistor that's now in the set is from there. As you say though, they probably won't have them, or the like.
|
|
#14
12-29-2016, 11:54 PM
|
||||
|
||||
|
Amazon has a number of sets of alignment tools:
https://www.amazon.com/s/ref=nb_sb_n...lignment+tools not affiliated, jr
|
|
#15
12-31-2016, 03:28 AM
|
||||
|
||||
|
Well guys, thank you very much for helping me out some.
This actually turned out to be kind of simple. This evening I finished what I wanted to do with it for now. That is, just a stock "rebuild". Nothing's been modded yet, and I don't plan to for now. Later down the road I'll see about the switch mod and the diode+thermistor (powersaver) mod.(to take the place of the 20w 57ohm dropping resistor) So I now have it back in the case. The outer case, I have found is not hot.(I read that it's not hard for the hot chassy to ground out on the metal case) My chassis is unfortunately bent at the front though... CRT sits at an odd angle and that made getting things aligned in the front of the case, hard to do. Overall I am happy with the set. Seems like it runs good, pretty stable. I've got to put it work though, watch a show or play a game and get it nice and hot to see if it drifts any. Later (this weekend,hopefully) i'll get some pics up of it for y'all. 
|
| Audiokarma |
 |
| Thread Tools | |
| Display Modes | |
|
|


 Linear Mode

