
|
|
|
#1
 10-24-2004, 02:43 PM
|
||||
|
||||
|
Emerson 747 mini-tuber
Hi guys!
Over on the Transistor Radio forum, Anthony was nice enough to post a link to an MSNBC story heralding the 50th anniversary of the Regency TR-1, the worlds first transistor pocket radio. Fortunately, they didnt make the common error of attributing the honor to Sony, but they did make one statement that sounds a bit extreme: Quote:
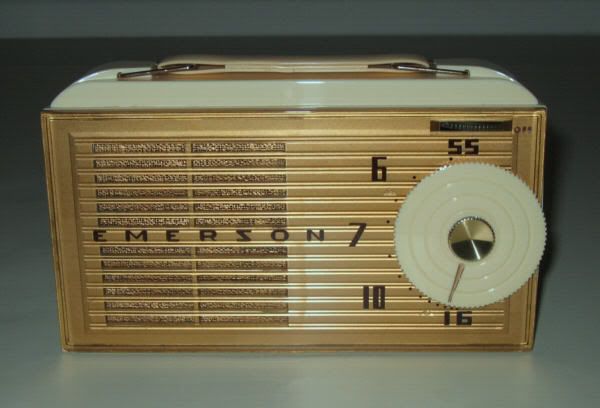 For a tube radio, its positively tiny, measuring just over 6 long, 3-1/2 high, and 1-3/8 deep. While not really a pocket-size radio, I do own a number of garments with pockets large enough to accommodate it. At a price of around $40.00, Emerson sold quite a few of these, and production was continued into 1954. Shortly thereafter, they followed up this design with the 838, which replaced the sub-mini output tube with two of them new-fangled transistors. This particular radio, though it didnt work, was in pretty good shape when I bought it. It was dirty and scratched up, but had no large cracks or breaks in the case. The plastics they used in the fifties were not nearly as tough or shock-resistant as they are today. Below is a back 3/4 view of the radio, showing some of the various openings: 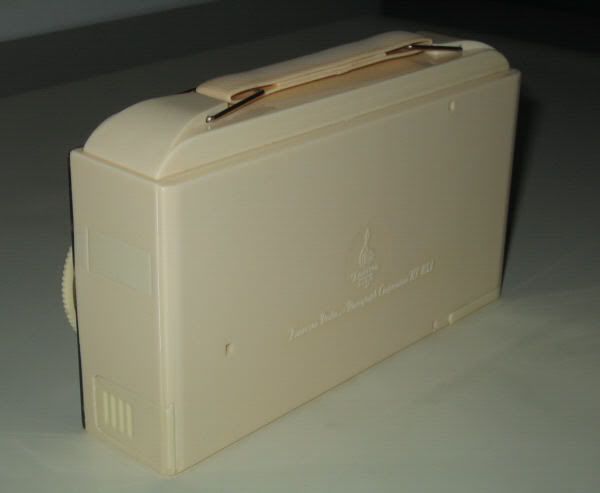 At the lower left of the picture is a small sliding cover for the B battery compartment. It takes one of those 45-volt jobs that looks like a super long version of the common 9-volt battery. Above that is an access cover for adjusting the alignment. Over on the lower right side of the picture, you can just see the back of a sliding cover on the bottom of the radio, which is for replacing the filament battery, a 1-1/2 volt C-cell. To get to the chassis, you only need remove the tuning knob by unscrewing its brass thumbscrew, and then snapping off the entire face. Heres a faceless view: 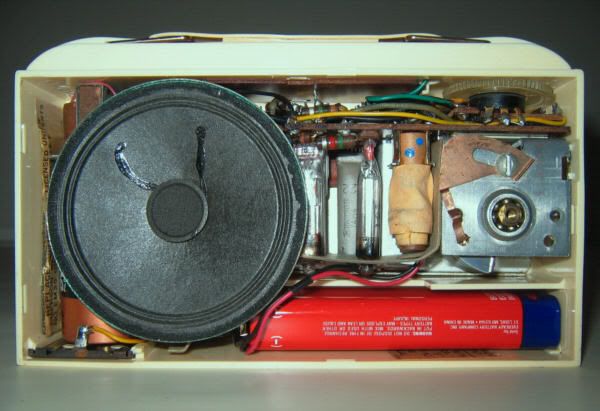 The 747 uses four sub-miniature vacuum tubes developed by Raytheon, at Emersons request. They are 1V6, 1AH4, 1AJ5, and 1AG4, each consuming about .05 watt. The IF amplifier tube (1AH4) has a metal shell. Unlike the 1-volt filament tubes in some of the larger battery-operated tube portables, the filaments in these subminiature tubes glow quite visibly. The wiring on this radio is very tight, and difficult to service. Though the tube sockets are mounted to a thin mica board, there are no printed circuits, and all wiring is by hand, point-to-point. Interestingly, the 747 does use one printed-circuit board, but not for wiring. Presumably as a means of shielding the antenna winding from the rest of the radio, they installed a thin board directly below the antenna compartment with a printed-circuit grid pattern on it, connected to chassis ground. 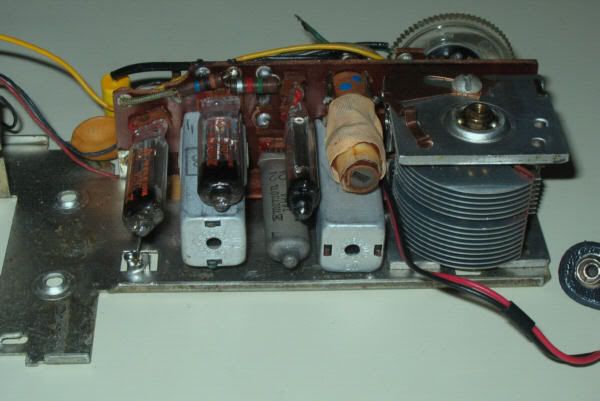 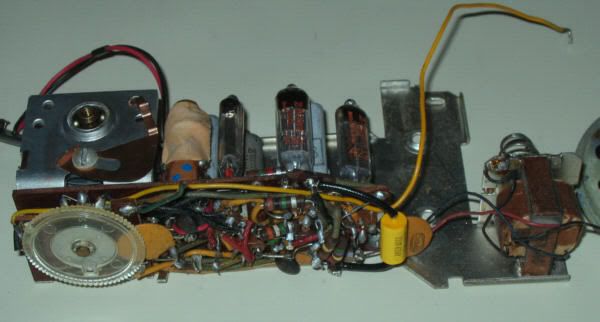 Speaking of the antenna, on this radio Emerson entombed a flat-bar loopstick antenna in a sealed compartment at the top of the radio. It was my luck that one of the two wires had apparently broken off at the antenna, at one time or another in the past. The only way to access the connection was to carefully cut away the fused plastic tabs that held the antenna compartment in place. The picture below shows the radio after soldering a new wire to the antenna, and siliconing it back in place. 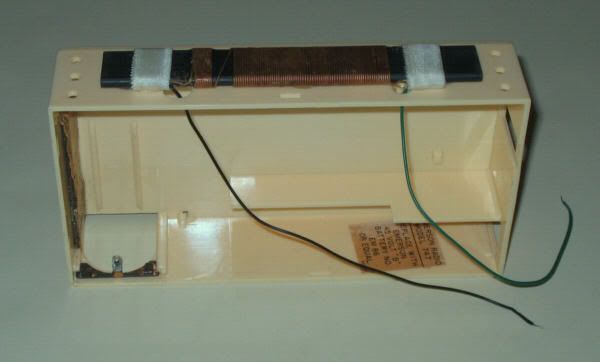 Getting this radio working proved problematic. The first time I disassembled it, I pretty much figured out where the antenna had to be, but there was only one wire disappearing into the hole in the upper compartment. Huh?? There was no loose wire coming from the chassis, that might have broken loose -- just one antenna lead, and a chassis ground wire going to the PC shield. At this point, I realized I needed a schematic, and actually found an original Sams Photofact on eBay for only $3.00. It turns out that someone had at one time opened the radio to repair it, found the disconnected green antenna wire, and, not knowing where it was supposed to go, soldered it to a random point in the circuit! I have to admit, it did look as though the wire was supposed to go where they soldered it, but they made a completely wrong guess. Fortunately, with the schematic I was able to get it straightened out. While I was at it, I also replaced two capacitors -- a paper and an electrolytic -- for good measure. After reinstalling the antenna, with its new wire, I cemented the plastic cover back in place. With the chassis still out of the radio, and batteries connected, I turned it on and it took off working like nobodys business! It has surprising performance for what it is. Even out in the boonies (where I live), it picked up at least a half-dozen stations, at more than adequate volume. And this was during the daytime. I was happy!  I spent several hours on the exterior of the radio. First, I wet sanded all the plastic surfaces with ultra-fine paper, followed by Novus polish. I had to re-touch the little gold pointer on the tuning knob, and I polished the knurled thumbscrew as well. The face of the radio is reverse-painted, so I was able to get a mirror finish on it. I did have to touch up a few areas of the reverse-paint job. The little plastic handle responded well to scrubbing with 409, and I polished the brass handle brackets with steel wool. The finished product came out looking great! Hope you enjoyed my story of the 747 -- all in all, a fun and challenging project, and a remarkable little radio! Paula 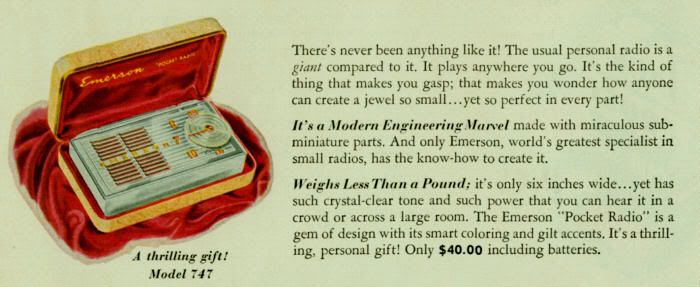
Last edited by Paula; 05-11-2006 at 04:35 PM. 
|
 |
| Thread Tools | |
| Display Modes | |
|
|


 As always, excellent work Paula!


 Linear Mode

