
|
|
|
#16
 12-27-2009, 06:55 AM
|
||||
|
||||
|
I had after experimenting as I had posted before obtained the Sams folder for this model, but a page or two "grew legs" and walked off on me. If you have access to a scanning bed, and could send me the schematic that would be great.

|
|
#17
12-31-2009, 08:27 PM
|
||||
|
||||
|
Quote:
http://www.bobandersen.com/images/schematics/ge/
|
|
#18
10-01-2010, 09:56 PM
|
||||
|
||||
|
While I wait for my Philco 49-1040 cabinet to cure, I'm diving into this one. I expect it to go a lot faster.
One side is fine, but the other needs a little help. I hope that blemish fades after stripping. I'll use scraps from the top as patches. 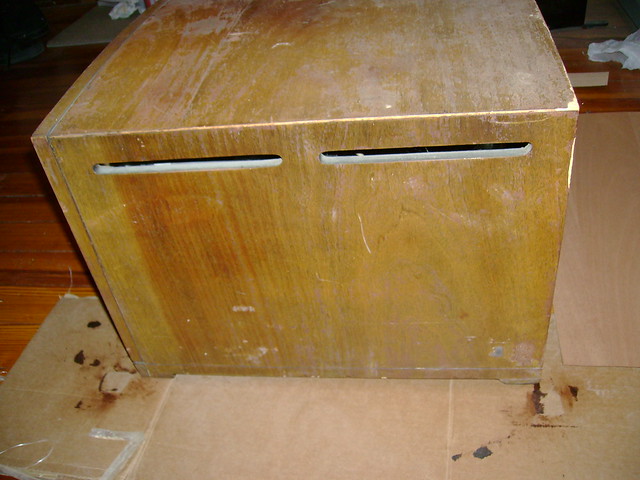  Here's the nice new sheet of face cut Mahogany veneer. I'll be using Mohawk Brown Mahogany toner lacquer. 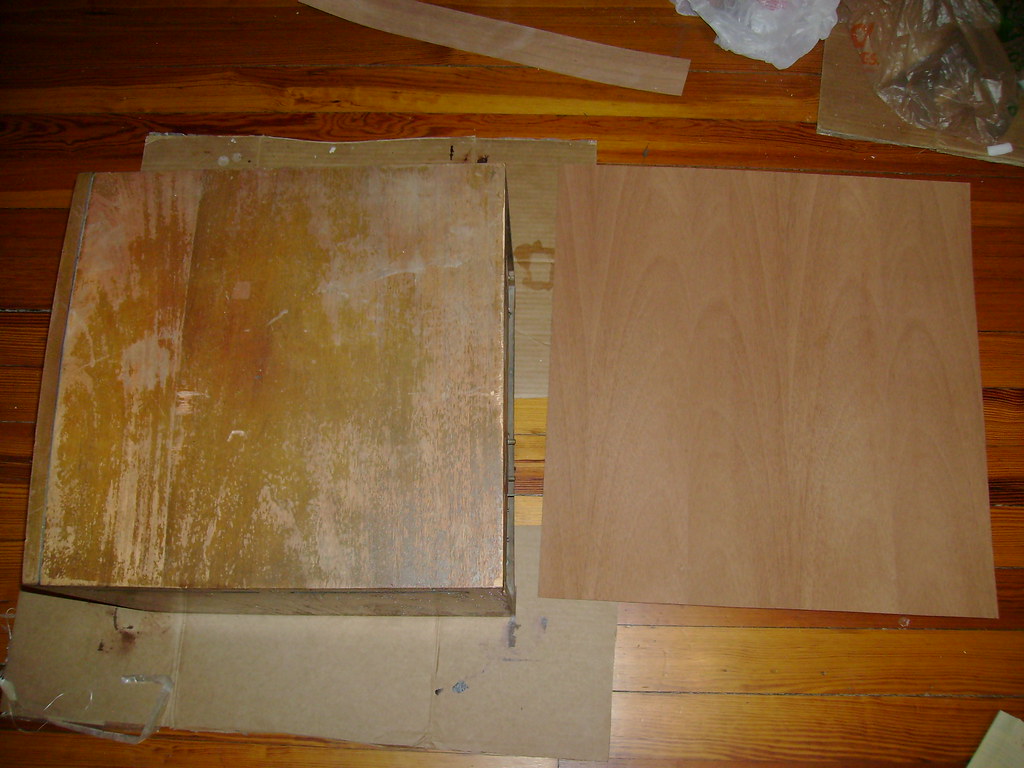 The old veneer is peeling off very easily  I only needed to use the heat gun in a few stubborn spots. I hope the new stuff stays on a lot better! 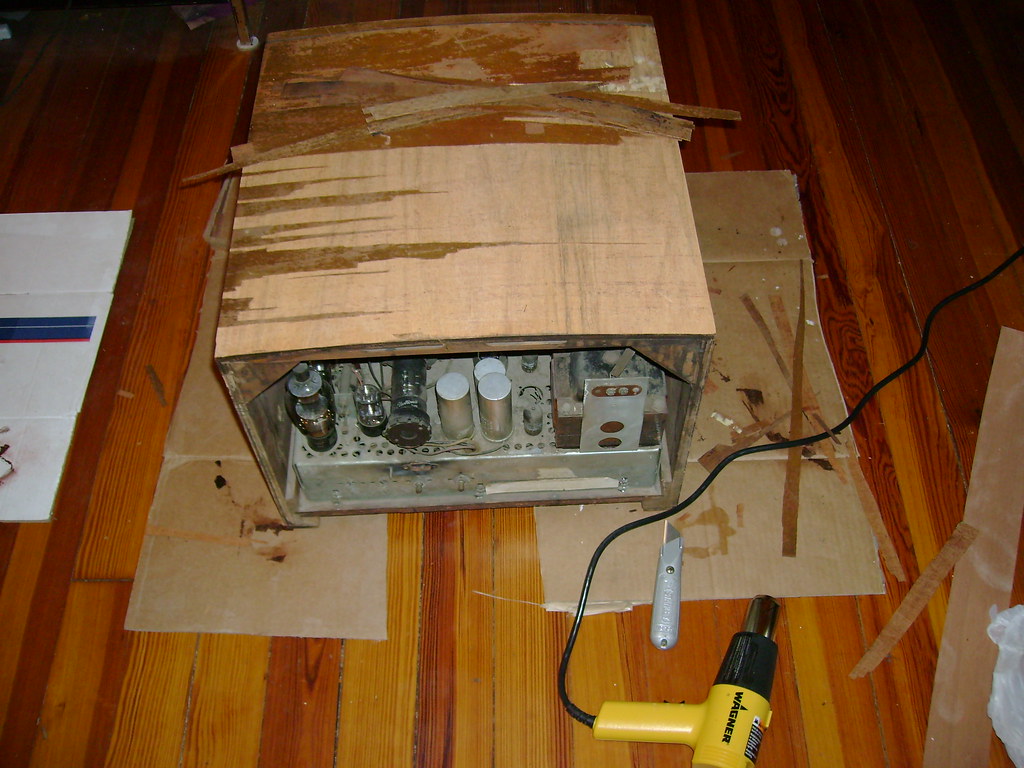 Weird how the front few inches of the substrate are different. Seems to be slightly lower than the rest with a filler making up the difference. I'll need to use some new filler and sand it smooth. 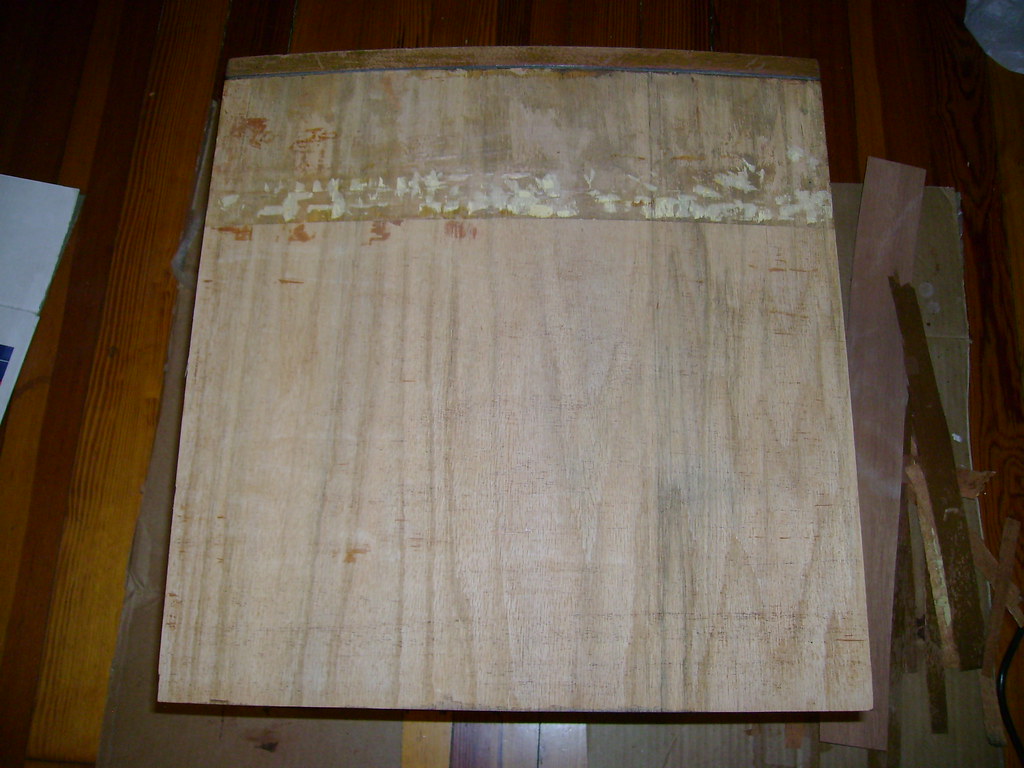
|
|
#19
10-01-2010, 10:04 PM
|
||||
|
||||
|
I'm curious-are you still using shellac for grain filler? The reason I ask is that I have been as well, although I switched from using many sprayings from a can to using the brush-on kind. It is much cheaper and far faster using that to fill in the grain, and you can be pretty messy at it as you'll just be sanding it all back anyway.
I'm in the rush to do a few cabinets this weekend as well-I have a Philco 60, filled the grain today and will begin lacquering tomorrow. After that, I have a teeny Emerson mantle radio that needs done. We've been getting lots of rain on the East Coast, so that has slowed me down considerably! Hopefully you won't get frozen out of finishing these cabinets. Keep up the good work!
|
|
#20
10-01-2010, 10:20 PM
|
||||
|
||||
|
I have use brush-on shellac for the last couple projects. Definitely better (and cheaper) than spray for grain filling. I do have some Behlen water based grain filler and I plan on using it this time on the top. Messy, but faster on really open grain like this new veneer. I'll still use shellac on the sides I think.
I suppose to go down into the 40s this weekend but back up to the 70s later next week. Good luck!
|
| Audiokarma |
|
#21
10-03-2010, 03:24 AM
|
||||
|
||||
|
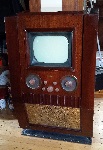
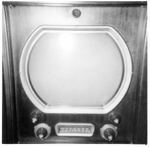
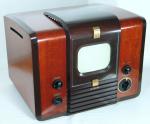
The inside of the cabinet is in good shape.
 I was pleasantly surprised that it comes apart quite easily. Just a bunch of phillips wood screws and 1/4" nuts.  The grille cloth peeled right off too. The old adhesive had really dried up. Does anyone know if there's an good cloth match available ? If not, I'll just clean this old cloth up and glue it back on. I'll try to find a good match for the light green paint around the screen. 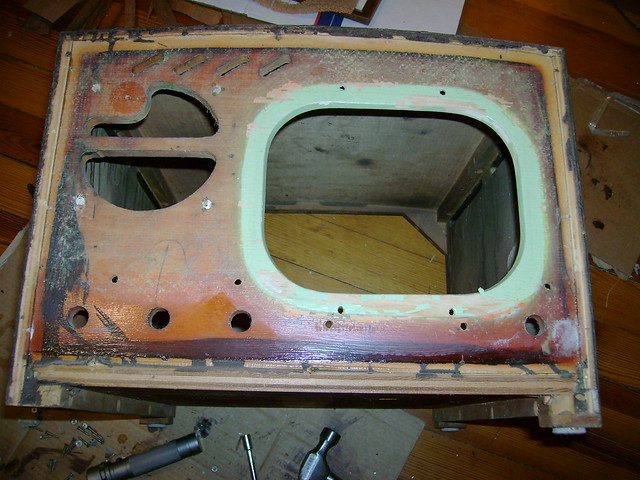 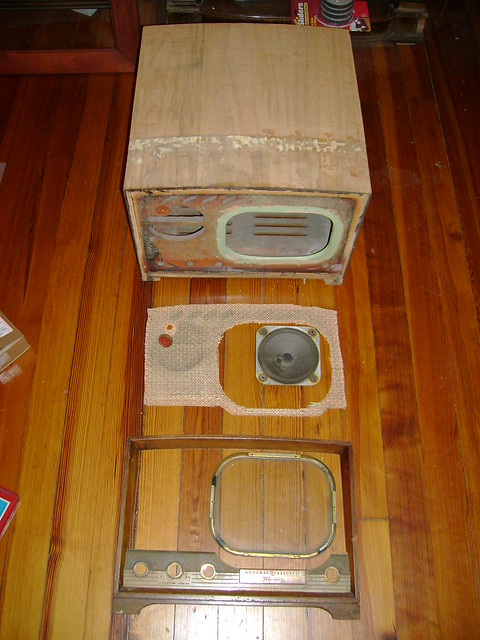 The only problem I've found so far is bubbles in the safety glass  Perhaps I can get a new piece cut somewhere - or maybe use lexan or plexiglass Perhaps I can get a new piece cut somewhere - or maybe use lexan or plexiglass  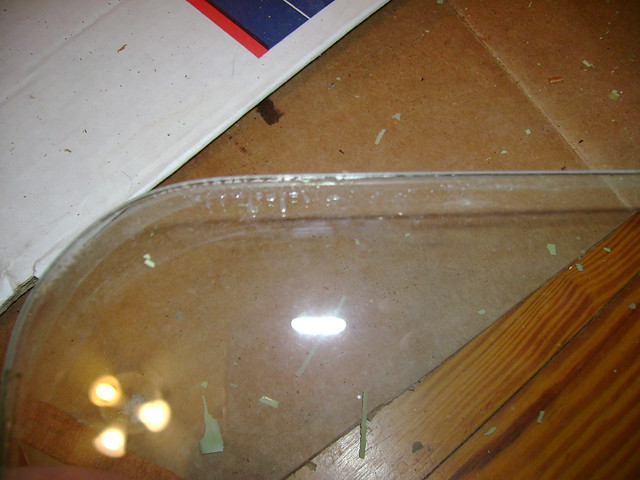
|
|
#22
10-03-2010, 03:43 AM
|
||||
|
||||
|
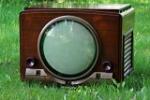
I've got one of these sitting out in the garage, it's in so-so shape and the CRT is weak though I should have something to replace it with.
I dread working on GE sets for some reason, they just seem weird and hard to get working right, my 803 has been sitting half finished because the tuner and i.f. section was so weird I didn't want to deal with it. I've wondered about that strange hole where the CRT socket is, they all seem to have it and I've never seen one with a cover, did they originally have something to plug the hole?
|
|
#24
10-03-2010, 03:24 PM
|
|||
|
|||
|
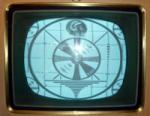
That is a nice looking set. I only wish that the previous owners of sets had stored them in better conditions. Not having to do a cabinet is certainly a plus but it is all part of the equation. Since you have sound, and picture of sorts, you know the main components are good: Power Transformer, Yoke, Flyback and CRT. It is all good from here. Waiting to watch this restore...
|
|
#25
10-03-2010, 03:46 PM
|
||||
|
||||
|
Quote:
I think the 803 is pretty cool looking. I had a shot at one recently with a cracked dial face, but the bidding went over my limit. Something like $300 I believe. Quote:
 I stripped off a portion of the old finish and was surprised at the color difference. I wonder why they used Mahogany only to cover it with a heavy walnut finish ? I coated a test strip with Brown Mahogany toner, Golden Mahogany stain and Medium Brown Walnut toner. None are close at all   I reviewed the Mohawk color chart and I think Van Dyke Walnut or Universal Walnut is a good match. Here's a Philco 37-630 radio which I think is van dyke walnut for comparison.  I don't have any on hand, but luckily it's on sale at Pond Cove Paint. I hope it gets here soon. Last edited by bandersen; 10-03-2010 at 04:03 PM.
|
| Audiokarma |
|
#26
10-03-2010, 10:13 PM
|
||||
|
||||
|
Quote:
The 810 is a much more conventional design. I have one here that is electrically restored, and performs very nicely. Can't think of anything off hand that I found strange in its circuitry. The cabinet on mine is in a bit tougher shape than the one being discussed here. Sometime in the next month or two I will get into the cabinet restoration on that one. Interesting you mentioned the strange hole in the back cover where the CRT socket is. For some reason, I had not really noticed it before! I imagine there must have been some kind of flimsy plastic cover made of something that completely disintegrates in less than 60 years! Tom
|
|
#27
10-03-2010, 11:16 PM
|
||||
|
||||
|
Quote:
|
|
#28
10-03-2010, 11:33 PM
|
||||
|
||||
|
If you want the job done right do it yourself.
I purchased a GE 810 restored and working, only to find the soldering and terminal work sloppy, messey and quite ugly.What caught my eye was the modifications, a whole mit full of extra parts around the horizontal output socket, the poor soul must have really fought with the bias circuit, albeit the set
worked but how?. My instinct was to check and verify that the tubes are the correct ones, well the horiz out is a spanking N.O.S. GE 6GB6, but wait a minuit this tube has all the pins connected on the base, the schematic and my RCA receiving tube manual shows a 6GB6 with two pins not connected and on the tube base. When you have a manufacture that saves money and space by using unused terminals on a tube socket for a convenient hookup post and a revised tube is installed you can see where this can go. So i reduced the part count to what the diagram called for and put in an earlier 6GB6, suprise suprise the average plate is current RCA tube manual text book perfect. a quote from Ronald Regan "Trust with verification" my quote "Get your hands on a RCA receiving tube manual!".
|
|
#29
10-04-2010, 08:12 AM
|
||||
|
||||
|
Yeah, these early GE tubes sets seem to be troublesome- Eric, I don't blame you for not working on that 803's tuner. I believe it has the same as the 802 that I worked on. After going through so much grief to just get that set running, I wasn't too happy to power up the tv/fm audio section only to have it fizzle out less than a minute later. Then I found out that whole section of the tv is basically a sealed unit-yey!
I also recently recapped a GE locomotive, and while all the voltages are in line, it has terrible signal problems, and EVERYTHING about that chassis is HOT! Probably one of the most dangerous hot chassis sets I've worked on as it is all so crammed in. I'll be curious to see how this 810 looks/performs. I already know how the cabinet will turn out, though......
|
|
#30
10-04-2010, 10:38 PM
|
||||
|
||||
|
Here's the one capacitor that has me a little puzzled. It's shaped like a big mica cap, but I think it's molded paper.
I downloaded the Rider's from the ETF and there's no capacitor listed as 0.05 @ 400v. However, under the "specialized replacement parts", there is a 0.047 @ 600v molded paper cap listed. I need to trace out the wiring to confirm if this is the cap I'm looking at. I wish Riders's had the handy component location pictures like Sams does. 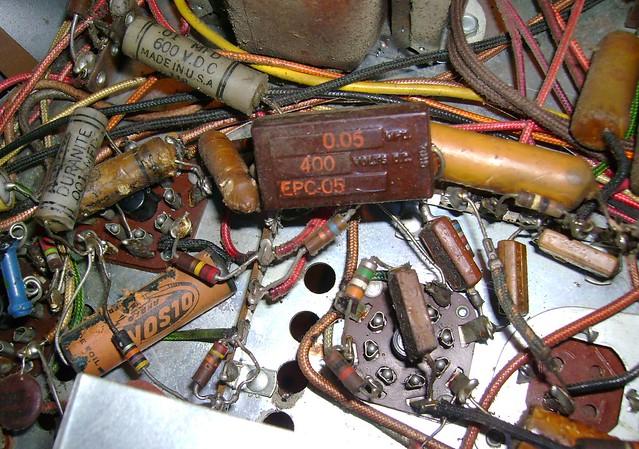
|
| Audiokarma |
 |
|
|


 Linear Mode

