
|
|
|
|
|
#1
 08-06-2011, 03:09 PM
|
||||
|
||||
|
Photo finish: my solution!
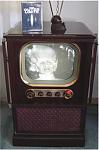
So it's finally time to deal with the shabby cabinet on the CTC-7 I acquired from Seattle a while ago, which has the typical cracked/crazed faux wood photo finish. There was pretty much no hope of touching it up with pencils or anything like that, so it's time for something a little more intensive...
I hit it with a heat gun first to basically burn off the old plastic, then scraped it off with an ordinary paint scraper.
__________________
Evolution... 
Last edited by miniman82; 05-15-2017 at 03:30 PM. 
|
|
#2
08-06-2011, 03:13 PM
|
||||
|
||||
|
Next, I went over it with 220 grit on the random orbital sander to remove what was left. Result? Bare wood, but it will never be totally clear of the old residue. Hence a trip to Menards, for 3 rolls of very nice cherry veneer. Once all the old stuff has been stripped off I will apply the veneer, stain, then clear poly till it looks like glass. All the brass will be hand polished and reinstalled, the end result I hope will be a stunning cabinet that will dazzle anyone who sees it.
__________________
Evolution...
Last edited by miniman82; 05-15-2017 at 03:30 PM.
|
|
#3
08-06-2011, 03:18 PM
|
||||
|
||||
|
The top alone took me just over an hour to do, I suppose it will take me maybe another 4-6 hours to be completely done with the whole thing. This really needs to be done outside, since the smoke from burning the plastic off is pretty acrid and doesn't smell too good. Who knows what it's really made of after all, I wouldn't be the least bit surprized if it were toxic.

__________________
Evolution...
|
|
#5
08-06-2011, 04:38 PM
|
||||
|
||||
|
WoW! Nick, Once again you have shown that you are not affraid to tread where others have been hesitant.
I don't know if you have ever done veneer before. There are 2 methods that I know of for adhering the veneer. Method one uses several coats of PVA glue on both surfaces and allowed to fully dry. Then you place the two surfaces together and iron the veneer with a household iron to melt the PVA glue and stick the veneer to the cabinet. I tried this method and it works pretty well. I suggest experimenting before you try it full on with your subject cabinet. The nice thing about this method is that you can position your piece of veneer precisely prior to hitting it with the iron and get a perfect fit with no mistakes. Method two is the contact cement method we are all familiar with. Coat both surfaces with contact cement, wait till dry to the touch and then sitck the veneer down. This method does not allow for repositioning so where the pieces come together is what you are stuck with. IN most cases, you will be trimming off the excess anyhow so it won't matter. I think either bonding method will work for what you are going to do. This fall I will be visiting John Folsom and we will be doing Oak veneer on his Admiral Ambasador blonde set that is in worse shape than your CTC7 was. Glad to see there is a nice method of pealing off the crappy photo finish. Do you hve any opinions on how you think the photo finishes were applied and what they were made from? I have always been curious about the process of photo finish, but have never been able to find any information on how this process was accomplished. I often wonder if it was an early form, or an offshoot of the Formica laminate process which is actually printed on paper and then compressed into a melamine sandwich.
__________________
Vacuum tubes are used in Wisconsin to help heat your house. New Web Site under developement ME http://AntiqueTvGuy.com
|
| Audiokarma |
|
#6
08-06-2011, 05:12 PM
|
||||
|
||||
|
Quote:
Method 2 is the one I will use, since this paper-backed veneer has instructions to that effect. I have a pint can of cement, hopefully it will be enough. Raw veneer can use either method, and there is also a third type with adhesive already on it- you simply pull off the backing paper and stick it down. Doesn't sound very permanent though, more like something you would do if you were covering a desk on the cheap. Quote:
__________________
Evolution...
|
|
#7
08-06-2011, 05:14 PM
|
||||
|
||||
|
A second thought: perhaps the reddish stuff was photo sensitive, and they simply exposed it to a negative which had the wood pattern on it after it was applied to the cabinet? It smells nasty enough to be nearly anything...
__________________
Evolution...
|
|
#9
08-07-2011, 03:06 PM
|
||||
|
||||
|
Quote:
Most fake grain during the 30's to 80's were printed. If you look very closely at it, you will see the half-tone grid used in the printing process. An alternate process was simply applying a lighter base coat and sliding a rotating roughlty groved roller coated with a darker color to fake the grain. This method looks too crude for most TV's, but for large wall panels, it works. Jas.
|
|
#10
08-06-2011, 05:53 PM
|
||||
|
||||
|
Quote:
Later types like what's on my 1958 Miss America look much more plasticky to my eye. Could be anything, as miniman82 says. There are many kinds of plastic! Phil Nelson
|
| Audiokarma |
|
#11
08-07-2011, 02:34 AM
|
||||
|
||||
|
Interesting post, I have the same set (The Anderson aka Mr Anderson) in the same ratty condition and was planning to do basically the same thing, however I was planning on veneering right over the existing whatever it is, I like your method of stripping it down to bare wood better though.
I thought the plastic veneer was Formica or a relative of it, Melamine perhaps? I don't know if Melamine and Formica are related but they seem similar in some ways. Would it be easier to just sand it off with some 80 grit or would that take even longer? I certainly wouldn't breath the dust if I tried it. 
|
|
#12
08-07-2011, 01:28 PM
|
||||
|
||||
|
Quote:
The top and front of the set has a much thicker coating than the sides do, so the heat gun method works a lot better there. Burn it, then scrape it off. The sides are a little different because the coating is so thin, it doesn't bubble up as much. Also much easier to burn the wood underneath if you hold the heat in one spot for too long. It's better on the sides to use a wide razor- chase the gun with the razor to warm the stuff up, then the blade will scrape it off easily. It's actually a lot like paint removal on the sides, where the top is like burning off a layer of something. If you wanted, the sides would probably sand off pretty easily but the top and front are too thick. It would take forever to get through it all. I also noticed that the top is 'real wood' underneath, where the sides look like this sort of fiber board. Easy to go overboard with sanding there, so watch what you do. I should be completely done removing all the photo finish later today, then I'll post pics of what it all looks like.
__________________
Evolution...
Last edited by miniman82; 08-07-2011 at 01:34 PM.
|
|
#13
08-07-2011, 02:38 PM
|
||||
|
||||
|
Quote:
Phil Nelson
|
|
#14
08-08-2011, 10:51 PM
|
||||
|
||||
|
I have a 59 Zenith blond set that has what seems to be printed paper covered in toner lacker. The lacker has degraded in a couple of spotts and when it does it becomes sticky and adheres the paper to whatever is in contact with such that anyting touching a badspot will take the entire photo finish off!
Once I get to learning cabbinet work this will be some where on my list. Tom C.
|
|
#15
08-20-2011, 11:33 PM
|
||||
|
||||
|
Update, as promised.
Got the new brace installed so the cab won't be all weak, and applied the first of many pieces of veneer. Top looks pretty good now, but holy smokes does that contact cement STINK!  Tomorrow, I'll be finishing up the rest of the sanding. Then if I have any time left, I may apply some veneer to the side of the cabinet. Looks good so far, no?
__________________
Evolution...
Last edited by miniman82; 05-15-2017 at 03:30 PM.
|
| Audiokarma |
 |
|
|




 Hybrid Mode
