
|
|
|
|
|
#1
 05-02-2012, 10:09 PM
|
||||
|
||||
|
That CRT is not supported, and could break like that. Remove it before you do
any more work. 
|
|
#2
05-03-2012, 06:07 AM
|
||||
|
||||
|
Quote:
Carl
__________________
CW 1950 Zenith Porthole - "Lincoln"
|
|
#3
05-04-2012, 06:45 PM
|
||||
|
||||
|
I honestly do not know how to remove it safely and my friend Bob who will help with the resto won't be over for weeks. Is there something I can put under the tube to support it temporarily? I'm not equipped to remove this monster tube by myself and risk ruining it. help.
|
|
#4
05-04-2012, 06:55 PM
|
||||
|
||||
|
Quote:
Disconnect the rear connector. The ION Trap is a clamp like device that you loosen and slide off the back of the CRT. Then, you should be able to pull the CRT out from the front. I had ready an paper index card that I had to insert between the neck and the Yoke as the rear connector wanted to snag on something. I carefully supported the CRT so as not to let the long neck break, noted that the neck snagged, then inserted the index card so it would slide out easy. Carl
__________________
CW 1950 Zenith Porthole - "Lincoln"
|
|
#5
05-04-2012, 07:19 PM
|
||||
|
||||
|
Okay, will follow your instructions this weekend and get it out. Temporarily I inserted a 1/8 in. thick piece of flexible rubber under the front edge of the tube. Once the tube is out just lay it on its front supported with some foam in a box? Seems like I read that somewhere recently. Thanks.
|
| Audiokarma |
|
#6
05-04-2012, 07:28 PM
|
||||
|
||||
|
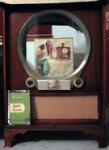
CW - Just to make sure we're on the same page, here are some photos just taken of the tube from the rear. Steve
|
|
#7
05-05-2012, 04:38 AM
|
||||
|
||||
|
Yes. With one hand hold the black plastic base and with your other hand carefully pull the part with the wires on it. You want to hold the black plastic base as sometimes these come loose and you don't want to pull off the black plastic base. If you find the black plastic base is loose, you can use Super Glue to make it tight - but wait and do this later when your friend tests the CRT.
Once the back connector is removed, looking forward is the ION TRAP. With a pencil write an arrow pointing to the front on it so you know how it goes back on. Then, loosen the long screw and slid it off the back. Have an index card ready just in case - you may or may not need it. From the front of the CRT, carefully pull the CRT out and away from the chassis Yoke. If you feel it snag, you can push is back into the Yoke. If it snags, its because the black plastic base on the CRT. From the back, insert the index card under the CRT neck where it enters the YOKE hole. The idea is that the index card allows for a smooth surface for the black plastic base to ride on. Don't put pressure such that it bends the CRT neck - you don't want to break it. If the CRT stil will not come out, just push it back in the Yoke assembly all the way and support the CRT front slightly with the piece of rubber such that you are taking pressure off the neck. But, you really want to remove the CRT so you can get to cleaning the chassis before your friend comes over. Also, when you fully remove the CRT, turn the chassis upside down and take some pictures and post back here. Once you extract the CRT, store it in a safe place face down. What I did was to store it in the corner of the room face down on carpet. But, I did not have pets or kids that would mess with it. Let us know how this worked for you. Carl
__________________
CW 1950 Zenith Porthole - "Lincoln" Last edited by cwmoser; 05-05-2012 at 04:48 AM.
|
|
#8
05-05-2012, 09:27 AM
|
||||
|
||||
|
Okay, thanks for the play-by-play. I'm a little bit more comfortable now. Will try to do this later today or tonight. Steve
|
|
#9
05-05-2012, 03:23 PM
|
||||
|
||||
|
The picture tube is out, no damage inflicted. Resting comfortably in custom cut box with lotsa foam at the bottom. Here are some pics just taken. Relying on you guys to tell me what you see is obviously wrong. I cut the resolution in half on these so if you want me to email any they will be abt 1mb each in original format. The only thing obvious I see is the covering on the winding inside the HV cage has flaked off, a piece lying at the bottom. Steve
|
 |
| Thread Tools | |
| Display Modes | |
|
|




 Hybrid Mode
