
|
|
|
#1
 05-28-2014, 07:34 PM
|
||||
|
||||
|
RCA Victor RCA-6T71 (Where to start?"
Hello everyone. I'm back after a long interlude about 4 years.
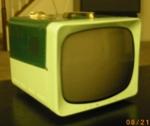
But I've got a new TV and this will be the first TV I've actually repaired that is this old, And I was wondering where to start? I've replaced the vertical output tube because it was missing and cleaned the dust out and checked for shorts but I don't know where to go from here? after starting it on the light bulb cord no shorts I plugged it into mains and god buzz and some soft audio under the HUM and a raster. So any ideas on where to start with gitting this thing ready for everyday use again?  Heres a picture of what I got so far,  

|
|
#2
05-28-2014, 07:54 PM
|
||||
|
||||
|
Hi Coshi, welcome back!
All the basics on this set. At very least, replace all of the electrolytic capacitors. Replace all of the bypass capacitors second. I recommend replacing all capacitors if indeed you want to use this set as a 'daily driver!' These RCAs will also need some peaking coils replaced. The two types they used in these prone to fail look like a blob of white wax with leads coming out either end, or a blob of reddish or brown ceramic, also with leads coming out either end. Some are just coils, and some are coils wrapped around resistors. Easy to replicate with the help of a schematic. There are about 5 or 6. Mica caps coupling the IF stages together should also be replaced, but not absolutely necessary unless they prove to have problems... so check those last. Raster on the screen is a great start!
|
|
#3
05-28-2014, 07:56 PM
|
||||
|
||||
|
From the shrunken raster it's clear your B+ voltage is way low. First step is to replace all the Electrolytic Capacitors, that might improve things a lot but ultimately all the paper capacitors will have to be replaced for it to work correctly.
It's a good start that you at least have some raster, that indicates that all the essential parts are working at this point, CRT, Flyback, Yoke, deflection circuits. If you change all the capacitors it will likely start working fairly well though there are often other minor issues like drifted resistors and dirty controls and such.
|
|
#4
05-28-2014, 09:13 PM
|
||||
|
||||
|
That is what I was thinking. everything seams to be about 70% all the major parts are working. What I was wondering is where do I get the electrolytic condensers? I found the modern replacement for the paper condensers. But the electrolytics are strange values. Plus how do you replace those big metal cans?
|
|
#5
05-28-2014, 11:35 PM
|
||||
|
||||
|
This article has a lot of information about replacing capacitors, including various methods of replacing those in cans:
http://antiqueradio.org/recap.htm This article may also be helpful: http://antiqueradio.org/FirstStepsInRestoration.htm Regards, Phil Nelson Phil's Old Radios http://antiqueradio.org/index.html
|
| Audiokarma |
|
#6
05-29-2014, 08:40 AM
|
||||
|
||||
|
Hello again,
Thanks everyone so far I've ordered the paper caps but not the electrolytic filter caps. (There too expensive right now.) I was wondering if I could feed the set 110v DC untell I can replace the filter caps. Or would this damage something?
|
|
#7
05-29-2014, 08:50 AM
|
|||
|
|||
|
Quote:
It's strictly an AC, transformer powered chassis. No choice, but to replace the electrolytic caps. 
|
|
#8
05-29-2014, 09:16 AM
|
||||
|
||||
|
Quote:
|
|
#9
05-29-2014, 09:35 AM
|
|||
|
|||
|
Quote:
Google AC power. There's a good explanation there.
|
|
#10
05-30-2014, 05:45 AM
|
||||
|
||||
|
OK, Update time, I've got the picture tube cleaned safely put back into the Cabinet I put foam rubber insulating strips around the safety glass and to cushion the bottom of the picture tube.
But I found that the HV lead that connects to the edge of the picture tube isnt getting good connection to the edge of the screen. I have it taped to it with a peace of rubber tape, How SHOULD it be connected? I'll get a picture of it soon as I can.  
Last edited by Coshi; 05-30-2014 at 06:07 AM. Reason: Missing picture
|
| Audiokarma |
|
#11
05-30-2014, 06:51 AM
|
||||
|
||||
|
Wonderful News! After cleaning the controls or I believe there called Potentiometer's, The picture is now filling almost the hole screen, Is this right? Should there be any change I have it hooked to a VCR and some sound is coming through but no video just a blank screen?

|
|
#12
05-30-2014, 07:14 AM
|
||||
|
||||
|
Speaking from the experience of being elbow deep in a couple of these KCS47 chassis, I actually shuddered when I saw the model number stamped into the back of your chassis
 But, since your set is this far along, it obviously didn't have any of the horrible repair work that was done to some of these at different points in the 1950s. Now, my advice is this. As tempting as it may be, don't run this set any more until it's gone through. These KCS47's were one of RCA's most unreliable black and white chassis of the era. The fact that it's producing a raster is evidence that it was either well cared for, or used very little. At the very very least, the tubes have to be checked, and all capacitors need replacement. Though you're getting a raster, these sets were designed to operate with a pretty wide tolerance and still get a picture. You could have shorted or open components or tubes in the chassis, and if you run this set hoping it'll straighten out on its own, it won't, and something *will* smoke or burn out. If you're not keen on tackling the job yourself, tell us where you're located....I'm sure one of us would be glad to give you a hand
__________________
"Restoring a tube TV is like going to war. A color one is like a land war in Asia."
|
|
#13
05-30-2014, 09:37 AM
|
||||
|
||||
|
Well I have never done work like this before. I would like to learn how to do the work. BUT in the end all I really want is to get this set back to everyday use.
Thanks mr/ms.Kamakiri I live in Southern Maryland is there a group around here?
|
|
#14
05-30-2014, 09:46 AM
|
||||
|
||||
|
It's Mr.
 . My name is Tim. . My name is Tim.I did a couple sets for people in the DC metro. I don't know what others charge for such a job, but I'd hook up with someone local to you. While this set can be brought back to life and used, using it as a daily driver it is eventually going to need additional service no matter how it is restored. Tubes, filter chokes, transformers, etc failed when the sets were a lot newer than they are now. And plan to invest in a tube tester, failures among tubes are commonplace. Putting a dozen or so hours a month on a KCS47 that's been restored isn't out of the question, but for long-term reliability you'd be better off with a different set if you plan to use it as TVs are used today. Just my .02....
__________________
"Restoring a tube TV is like going to war. A color one is like a land war in Asia."
|
|
#15
05-30-2014, 09:54 AM
|
||||
|
||||
|
Quote:
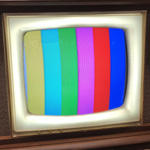
I have a few round screen TV's - but not one exactly like yours. Mine, the HV Anode lead typically clips to the metal CRT bell housing. I assume that your CRT housing - the black colored part is metal. DO NOT TOUCH that metal housing -- there is approximately 12K volts on it. AND, when you remove power, you need TO DISCHARGE that voltage. One way to discharge it is to take an insulated screw driver and a clip lead with alligator clips on both ends of the clip lead. Connect one end to the metal chassis and the other to the metal part of the screwdriver. When you unplug your TV, then hold the insulated part of the screw driver with the clip lead attached and touch the HV Anode wire. In essence you are grounding out to the chassis the voltage on the capacitance in the circuit. Do this a couple more times as the voltage sometimes builds back up. I hate getting shocked :-) Here are photos showing how the HV Anode wire connects in my Zenith and Raytheon televisions:
__________________
CW 1950 Zenith Porthole - "Lincoln" Last edited by cwmoser; 05-30-2014 at 09:58 AM.
|
| Audiokarma |
 |
|
|







 Linear Mode

