
|
|
|
#16
 10-25-2018, 09:40 PM
|
|||
|
|||
|
I installed the E-caps and wired them in today. While I was working in the corner I also took care of some of the audio section on the terminal strip and volume & contrast pots.
  Then I did the other E-Cap on the opposite corner of the chassis. This E-Cap was a 3 section cap and was previously replaced with a 2 section cap and a separate 100uf cap just "tacked" in using a terminal strip. It was pretty evident what was done and it was fairly simple to restore that section back to OEM.   Here's a fun picture for ya. Here is the pile of components that I'll be using during this restoration. Missing are 7 E-Caps. 

|
|
#17
10-28-2018, 12:42 AM
|
|||
|
|||
|
Today I ohmed out the transformers and coils. They all checked good!
I then decided to redo the chassis from the HV section back. Basically got all the components from V14 (Damper tube), Fly Back, V12 (H Output Amp), and the safety cap.    
|
|
#18
10-28-2018, 09:27 PM
|
|||
|
|||
|
Moving from the H output toward the H. Osc. section. This terminal strip was a toughie. Lots of wires and components. Between church, football, and family, this was pretty much all I got done. BTW, the mica capacitors were changed and the ones I pulled out were C-72 was 17%, C-75 was 17%, and C-76 was 14% out of tolerance. This just reinforces that they do go bad especially in the sweep circuits.
If you haven't noticed, when I remove a wire from a terminal, the end gets cleaned up and then a small 3/16 or so length of clear heat shrink is put over the insulation to prevent any future fraying. It sure neatens up the job.   
|
|
#19
10-29-2018, 11:50 PM
|
|||
|
|||
|
Took are of V11 and the H. Osc. section today.
On to V10 and the Vertical section.  
|
|
#20
11-05-2018, 11:25 PM
|
|||
|
|||
|
Moving upstream I've completed V9, V4, and V5. Next up V6, V7, and V8.
 
|
| Audiokarma |
|
#21
11-11-2018, 11:47 PM
|
|||
|
|||
|
Getting close.

|
|
#22
11-15-2018, 03:55 PM
|
|||
|
|||
|
Oh no! On power up I wasn't getting any audio. So I wiggled the tubes in their sockets. Still no joy. Then I pulled each tube to clean the pins again and to inspect each socket.
Look what happened! Yeah, pin #1 on the 6J6 tube stayed with the tube. Now I have to pull the tuner again and see if I can fix it. Any helpful hints will be appreciated.  Also on another note. No high voltage either. I'm thinking that the H. Oscillator isn't running. But I'll check into that later.
|
|
#23
11-15-2018, 04:55 PM
|
||||
|
||||
|
Just pull the bottom solder tab down a bit slide a new contact from a similar socket in from the top and solder the tabs together under chassis. That is the least intrusive method.
__________________
Tom C. Zenith: The quality stays in EVEN after the name falls off! What I want. --> http://www.videokarma.org/showpost.p...62&postcount=4
|
|
#24
11-15-2018, 07:00 PM
|
|||
|
|||
|
Quote:
|
|
#25
11-15-2018, 10:05 PM
|
|||
|
|||
|
I found the time tonight. I had an old Motorola chassis that had a similar tube socket. After robbing the socket, I cleaned off the solder on one of the pins, then I used some short needle nosed pliers to "flatten" the small indentation in the contact. I then used some small narrow duck bill pliers to push it up and out of the socket.
I then cleaned up the contact. Ready for the tuner. I pulled the tuner and removed the turret. Lucky me. the #1 pin on the 6J6 was the easiest one to get too! I removed the solder and the resistor and jumper wire from the old contact. I inserted the "new" contact and used a small flat 1/8 dia. pin punch and a small hammer to drive it home. It felt secure. Then I rewired the contact with the jumper wire and resistor. I then tried the tube in and out several times. Good to go! Thanks to ElectronicM for the suggestion.  
|
| Audiokarma |
|
#26
11-15-2018, 11:39 PM
|
|||
|
|||
|
I reinstalled the tuner and now I have sound.
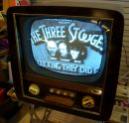
I then found a 12SN7GT bad. I had it listed as bad but installed it anyway! I replaced the tube and now I have HV! I put in the 10BP4 CRT that I cleaned up and restored the DAG with Slip-plate. A few tweaks on the back panel controls and here is what I have. The CRT works very well! Of course I'll have to take some time to align it and set it up. I do have an annoying 60 cycle hum/buzz in the sound. After I align it if it is still there, then I'll look into it. 
|
|
#27
11-16-2018, 09:22 AM
|
||||
|
||||
|
That chassis probably looks better than it did when it rolled off the line. Great work!
|
|
#30
11-17-2018, 05:51 PM
|
|||
|
|||
|
Quote:
|
| Audiokarma |
 |
|
|



 Linear Mode

