|
My original problem started while bench testing the unit after recapping. I had it on for about an hour and went up to check on it, I noticed the dreaded burnt smell and had no raster, I also noticed a sizzling noise, when I looked in the the HV cage I noticed a blue arc. The anode wire was arcing at the 1B3/flyback terminal. It had also been arcing at the 1B3 tube socket, so the socket and the anode was toast.
I did consider splittling the wafer and even did so on a bad socket, I think this would work if you could come up with a good way to put it back together, perhaps the epoxy might be worth a try.
I ended up removing a socket from a spare parts chassis I had laying around, this had 8 terminals on the bottom, after some head scratching I ended up just bending the unwanted terminals back and forth until they broke, and they broke inside the socket so nothing was sticking out. So that was an easy soloution. I desoldered everything, replaced the socket installed a new anode wire and fired it up.......No smoke, good picture and everything at the moment is working great.
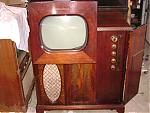
Check out the pic's.
Last edited by cdmarion; 02-27-2010 at 11:53 AM.
|

 02-27-2010, 01:17 AM







 Hybrid Mode
